
My master bathroom makeover sort of happened on a whim. I was staring at it from my bed thinking, ‘Wow. That is just HIDEOUS. I really should redo everything.’ And literally that day I started to brainstorm ways to update each part. I have patience issues, so when an idea pops into my head, it MUST happen somehow. I knew that if I thought about it long enough, I would surely come up with ideas that wouldn’t break the bank. Probably my biggest job to tackle was painting the floor tiles.
I considered installing new tile myself, over the gorgeous pinky salmon delight we already had (barf). But, honestly that just sounded like a lot of work having to cut tiles to fit around the many little corners I have. Also, I didn’t want just some generic Home Depot tile that everyone has. I needed some personality up in here! Once I discovered that it is possible to PAINT floor tiles, I knew this was the perfect option for me.
I must admit, it scared the living daylights outta me to attempt this. I love DIY… but no one wants their master bathroom looking like a DIY project. When I told my husband that painting floor tiles was my plan, I’m pretty sure he thought I was totally insane, and was likely thinking of what flooring to cover it with after I finished.
Painting Floor Tiles: a Step by Step Tutorial:
Here is how I went about making our floor SO amaze! These are the items you will need (affiliate links are included)—->
-
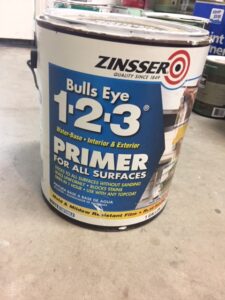
- Rust-Oleum Zinsser Bulls Eye Primer
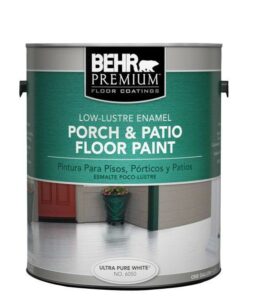
- Behr Porch and Patio paint (color matched)
- Paint brush and roller
- Small stencil paint roller
- Stencil of choice–> This is the amazing stencil I purchased HERE
- Painters tape
- Rust-Oleum Zinsser Bulls Eye Primer
(Also, if you are searching for this light fixture, you can find it HERE)
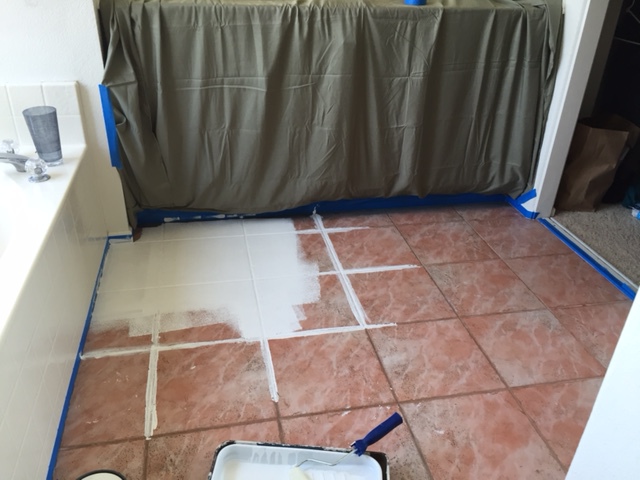
First off, be sure to clean your floor very well prior to painting. Any residue left behind on the floor will not allow the primer to adhere properly, which means your hard work won’t last.
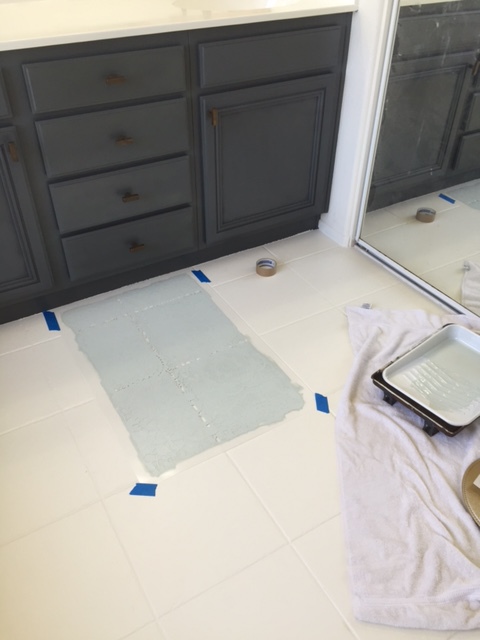
After your floor is swept and scrubbed and completely dry, apply 1-2 coats of your primer with your paint roller. I had to squish the roller vertically into my grout lines to get the paint in there. You may also do your grout lines first with a paint brush and then roll over the area. I just thought this was easier and worked great for me. I only applied one coat. I felt that it covered very well, but if you would like that extra protective coating, by all means do another!
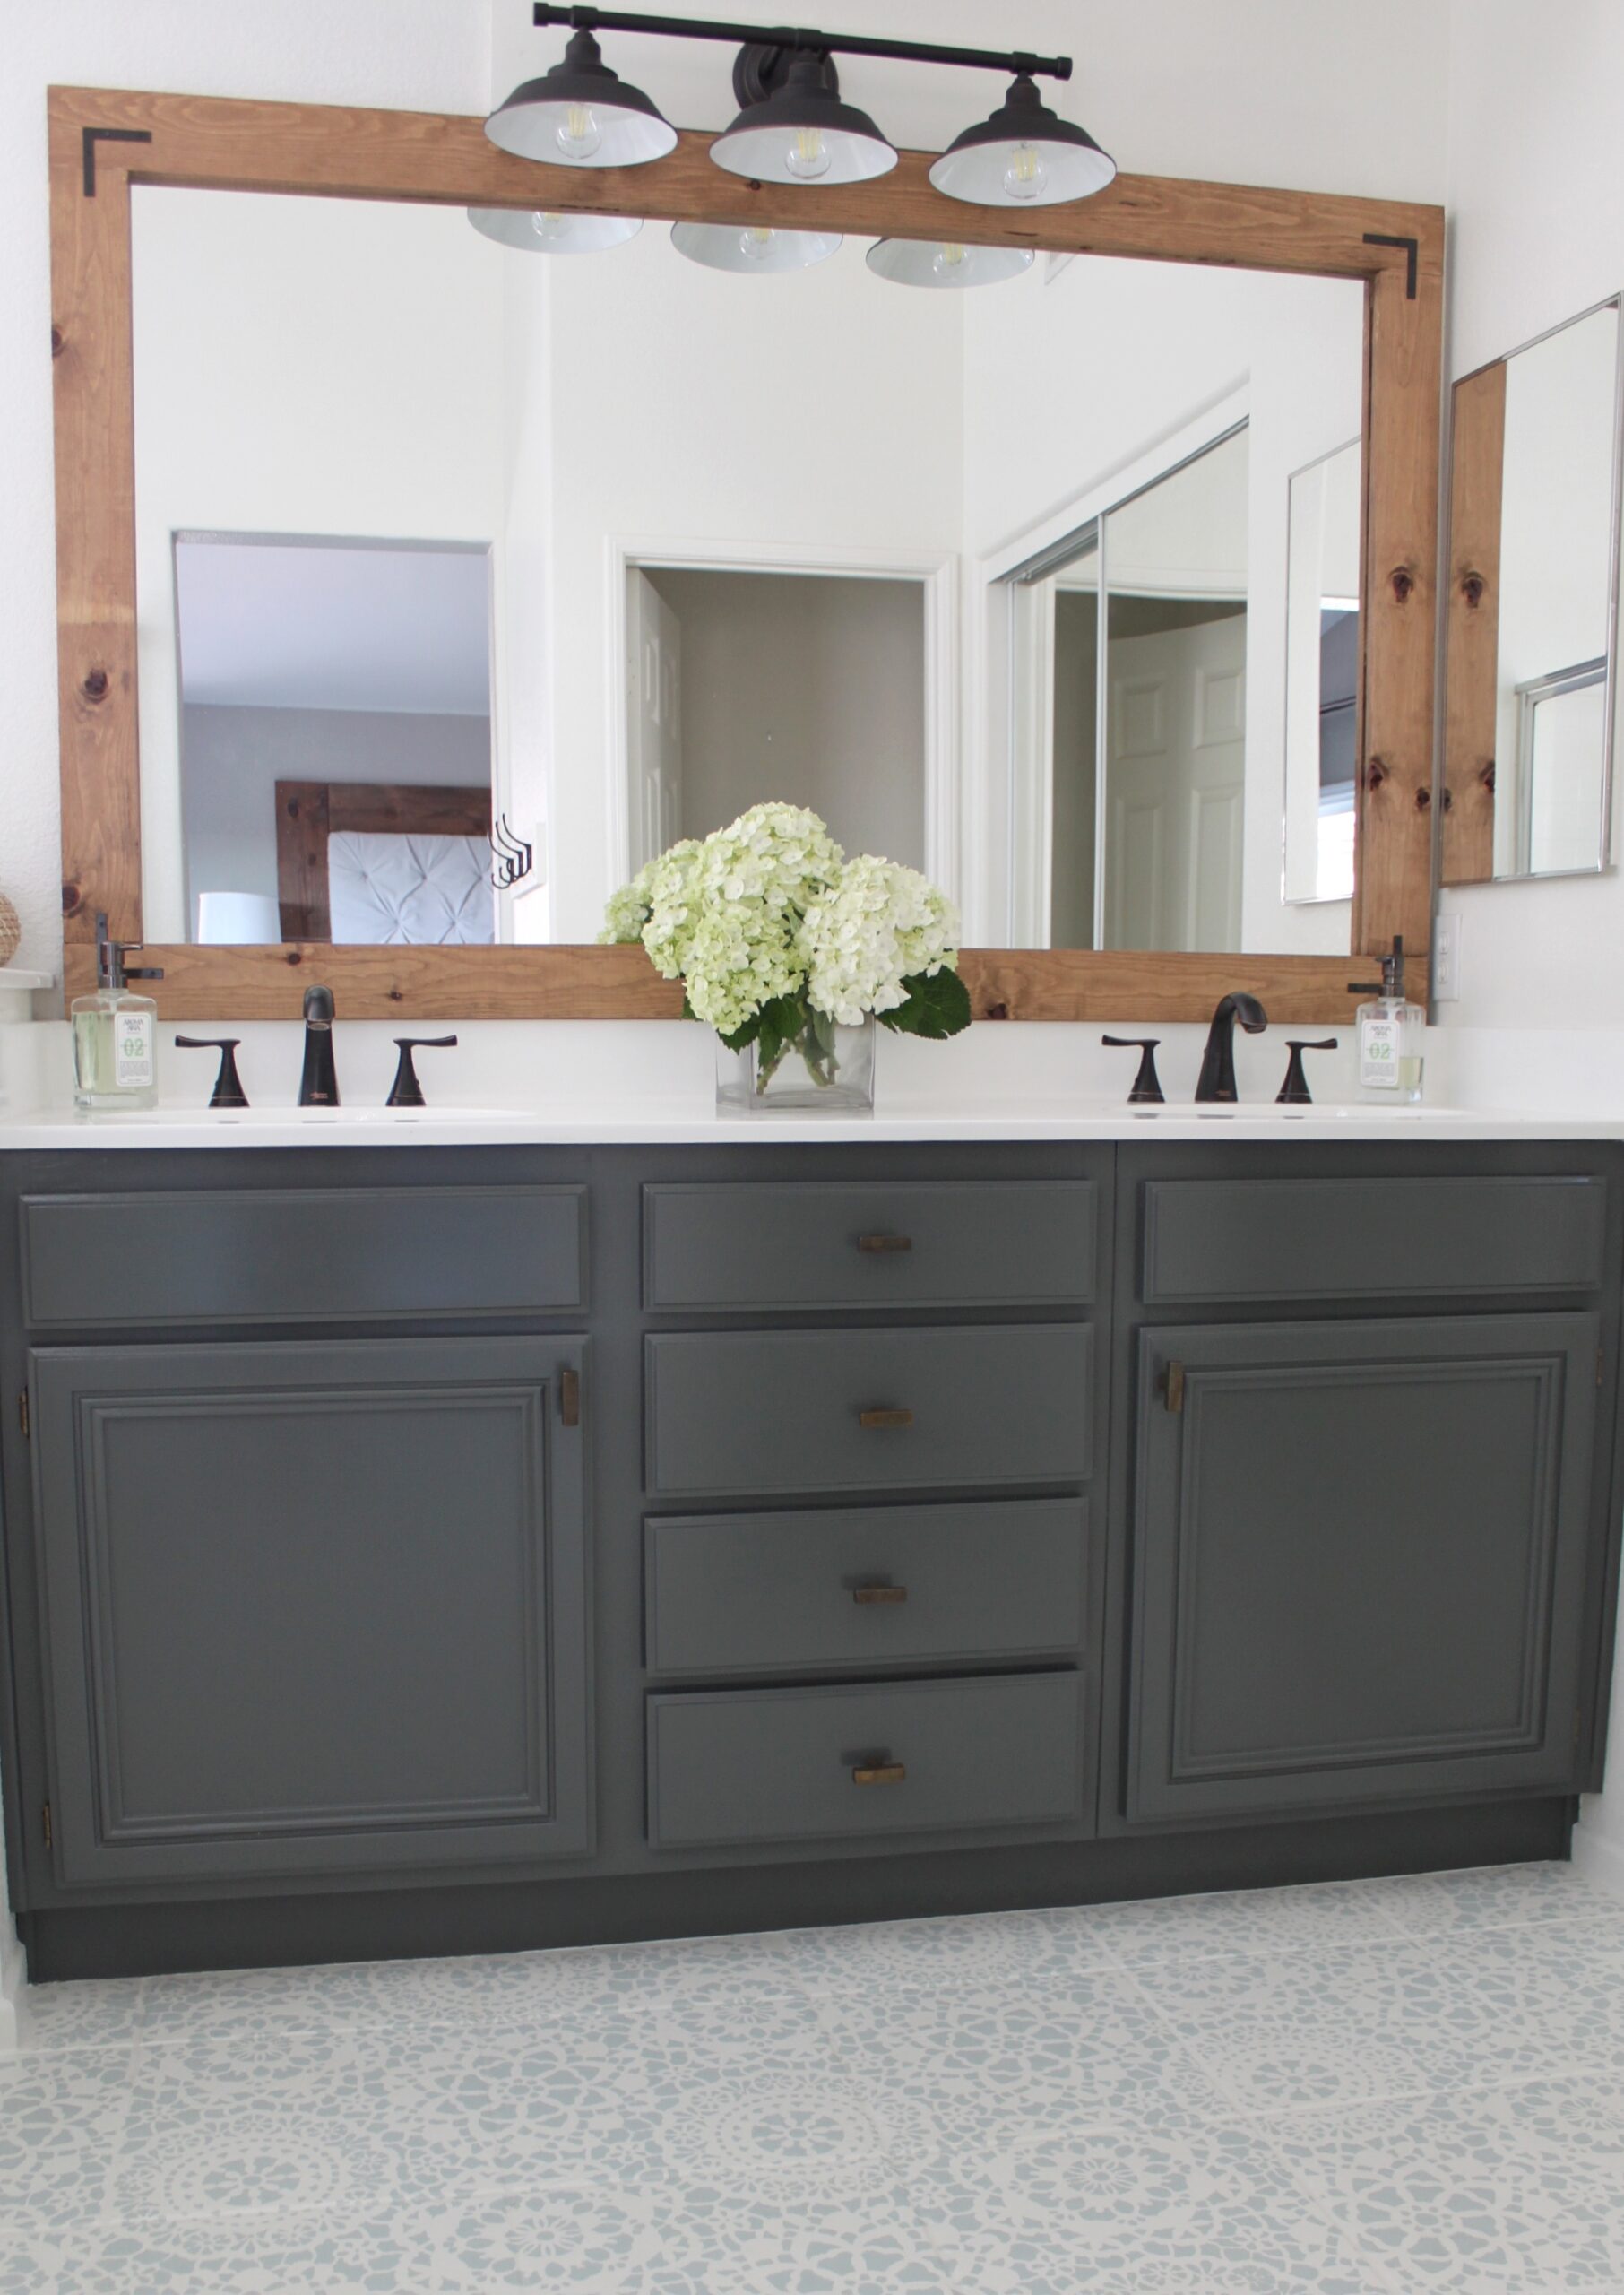
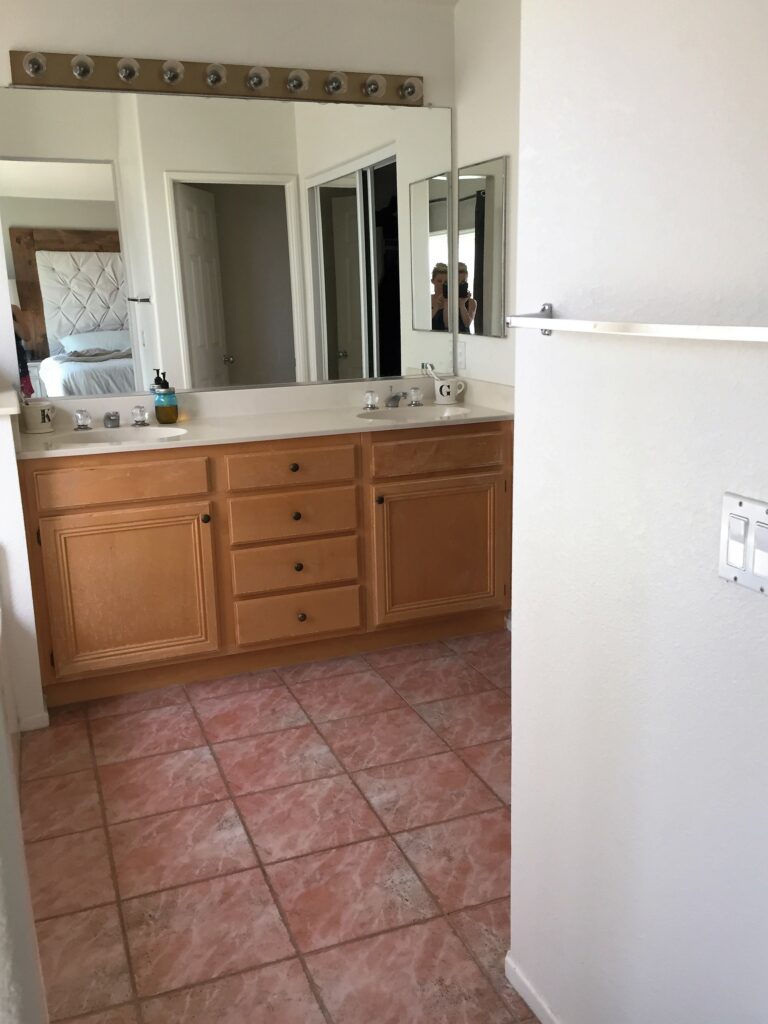
Even just priming my floor gave me so much joy, because I never had to look at that pink tile ever again! Yes!! I mean, do you SEE this bathroom pre-update?? Cringe.
I waited half the day to paint over the primer. It dries fairly quickly (good for my patience issues). Next step was to paint the base color. When I began my bathroom makeover, I started from the top and worked my way down (which I don’t only recommend for you, I demand you do that too!) That way I had less of a chance to mess things up. I painted the entire bathroom first. Ceiling and all. The color I chose was Dove White, by Benjamin Moore. Very nice, soft white. (great for south facing, super sunny rooms)… I say this to tell you I color matched my paint for the floor to match my walls. Yes, you can do that! The paint I went with was an outdoor Porch and Patio paint by Behr. I wanted something very durable, that is meant to hold up to moisture and traffic. This seemed like a perfect choice! it’s available in a low-lustre, so it’s not shiny at all. I applied one coat of the paint and then some touching up after it dried. It looked so great. This paint is self-leveling, so it goes on smooth and pretty.
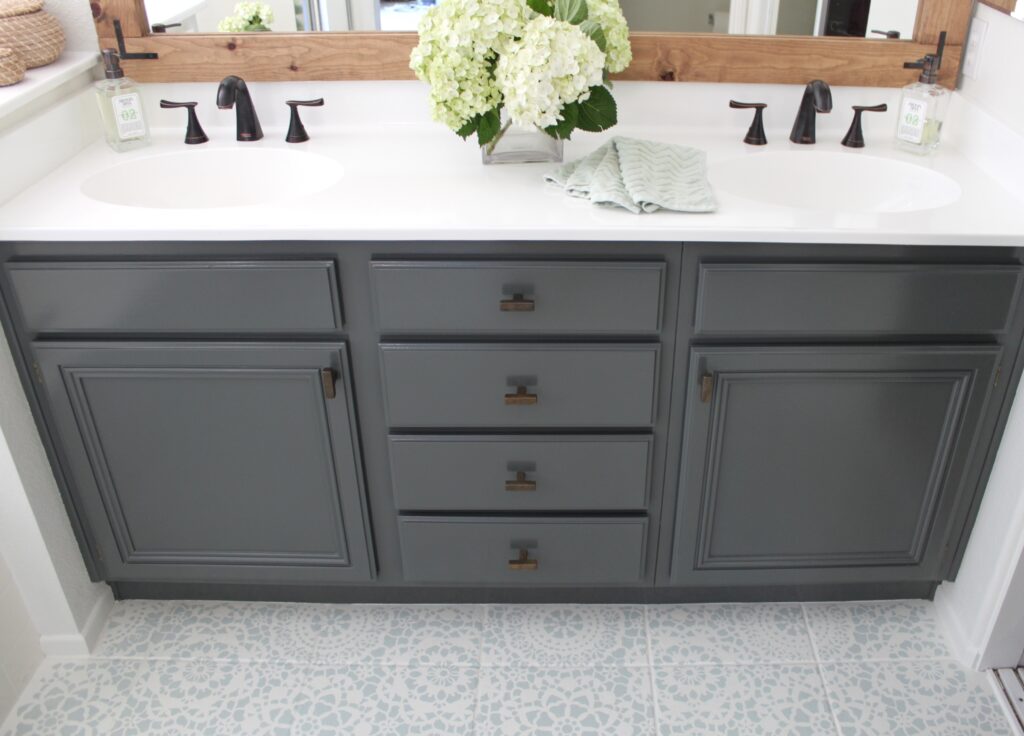
 Once this had dried very well.. I believe I waited 24 hours, I got out my absolutely amazing stencil from Royal Design Studio. It creates a big flowing pattern, so it almost eliminates the choppy feel of tile. I also color matched the paint for my pattern with Rainwashed by Sherwin Williams. Love!
I suggest beginning from the top-center of your floor. The stencil comes with a “ceiling piece” that will finish the gap in between the original stencil and the cabinet.
 Now, wait a second! Don’t just go rolling away with that paint! Grab a small stencil roller, and a tray or something with paper towels in it. Roll off a LOT of the excess paint each time before painting. You would rather do 2,500 coats to your stencil, then have a runny mess when you lift that thing up. Your grout lines will remain white, but that’s ok! Do NOT do what I had attempted at first, and Leonardo Da Vinci the pattern by HAND in between the grout lines! No one cares that the grout lines are white, not even you! Believe me! Ha… I’m nuts, seriously. Who even does that?
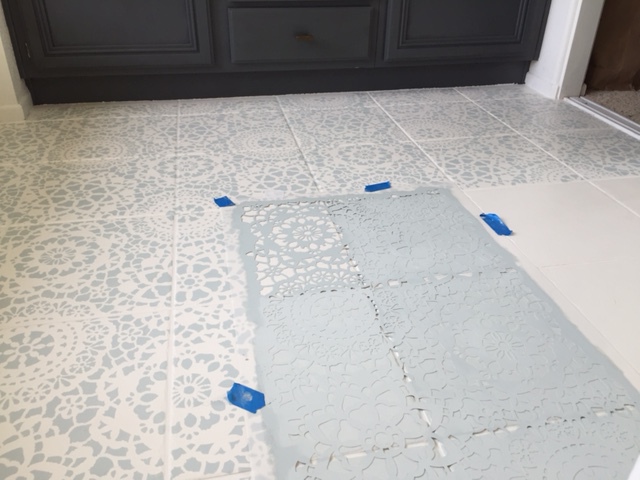 You will need to wait maybe 10 minutes in between each stencil, or move to another spot that doesn’t directly touch your previous spot. Again, we don’t want a mess. Doesn’t it make you so giddy to see this transforming?? Now you think this looks like a piece of cake, right? Well, when you get to the little corners and edges where you cannot place the entire stencil flat, it gets tricky. I had my stencil in some strange positions for sure.
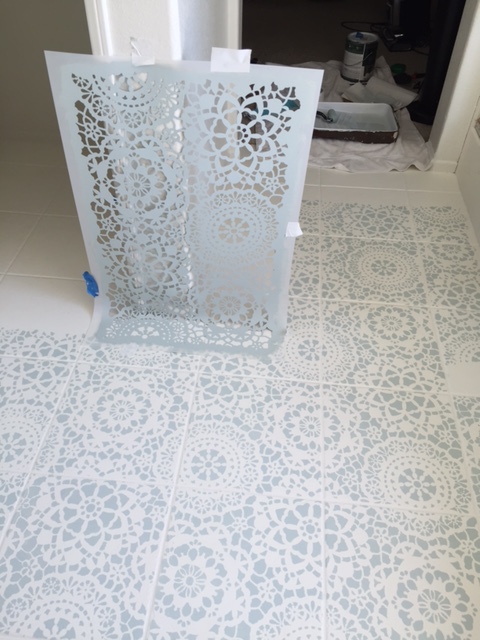 Going around corners takes some figuring out, but the material will bend whichever way you need it to. Just secure the area you’re painting with tape and bend the remaining parts of the stencil to accommodate that section.
**I want to add a side note. DO NOT BUY A CHEAP STENCIL. You want a nice, thick stencil for a project this size. A thin stencil will loose shape and run. This stencil I used was thick and very well made. It will last your entire project and then some! HERE is the stencil I used.
Another great thing about using such a busy pattern, is that It’s very forgiving. If part of the shape doesn’t turn out quite right, it’s so hard to tell. You really would have to examine the spot to find something that isn’t perfect.

This project takes a little time and patience, but it’s so very worth the end result! Especially when you see your husband’s expression.. and he realizes how fabulous you are. And, no, you did not destroy the bathroom. You ROCK.
Any questions??? =) 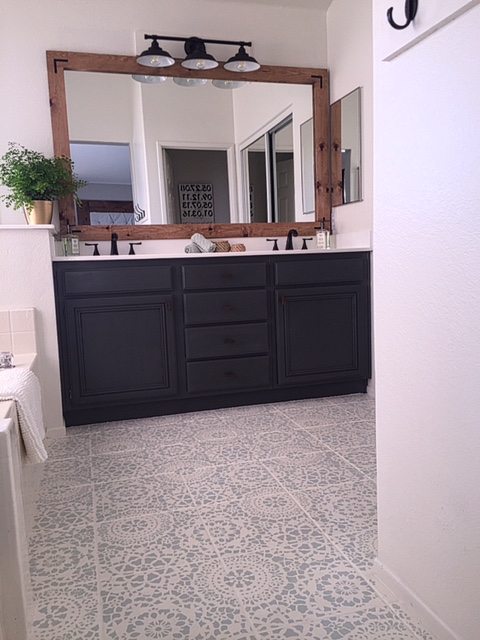
Loving this tutorial for painting tile floors? Click here now to find out how to refinish your bathroom cabinets like a pro!
** You can find this gorgeous light fixture HERE
You can find the faucet to match HERE
xoxo,
Kelly

Oh my goodness! It’s gorgeous! Great job lady!
Can you post a pic of the small stencil roller?
Yes, of course! Here is the link for the one I purchased at Hobby Lobby =)
http://www.hobbylobby.com/Crafts-Hobbies/Stencils-Craft-Paints/Stenciling/3-Stencil-Roller/p/28540
Thank you!!
Could you post the link to the stencil you used? I looked for it on Royal Design Studio’s but I couldn’t find it. It’s gorgeous!
Hi Hayley,
No problem! Here is the link. =)
http://www.royaldesignstudio.com/products/parlor-lace-wall-stencil
Hi Kelly! LOVE your new stenciled floor! It brightens up the entire room without being blah white! Would you mind if we shared your pics and how you did it on our blog and credit links to you? All of our readers would love to see it!
Absolutely! I would love that ???? Thank you for the gorgeous stencil. Let me know what I can do to help!
Hi!
Your floors look so amazing! I am about to do this on my bathroom floors and have been researching like crazy. I have some question for you. You didn’t sand down the floor to rough it up a bit? Also, did you do a top coat of any sort after the stencil was done? Lastly, how have they been holding up?!
Hi! Thank you!
I recommend roughing up the floors with a very low grit sandpaper! I didn’t use a top coat, although I am sure you could. They are holding up great!
Did you do any type of poly top coat? Looks amazing!
I’m so sorry I just saw your question! No, I didn’t use any top coat. Since the paint is an outdoor paint, made for high traffic and wet areas- I didn’t believe it was necessary. I think it will hold up great. My son is always running around all over it and there’s no signs of any issues. Very durable. I think a top coat would be a great option as well if some extra protection would give you peace of mind ????
Would this work on vinyl. Ya think?
Hi Jodi,
Yes, I don’t see why not! I would try to stick to the outdoor porch and patio paint I used, for the extra durability. Let me know how it goes if you decide to try!
This turned out just beautiful. I’m waiting for my stencil to arrive in the mail so I can do our kitchen floor. Can I ask how your floor has held up so far?
Thank you so much Marie!
It has held up beautifully. We walk all over it daily and our kids are always getting crazy on it, each night at bath time and no signs at all of any issues. Good luck with your kitchen! I would love to see your results.
I am really thankful to the holder of this website who has shared this great post
at here.
what kind of cleaner do you use one the floor.
Hi Carolyn,
I actually just use a mild soap and water after sweeping. I like to keep things simple. Occasionally a swiffer spray as well 🙂
I have a white tile floor that I would like to stencil. Do I need to put down a primer before stencil
Hi Andrea,
If your floor is already white, and you like the color as-is, you can just go ahead and stencil on top of the existing floor. That will save you a ton of time!
I think the paint would possibly come off without a primer but I am not 100% sure. I have been looking this up for a bit and I would be nervous about the paint chipping and so on. A Home Depot or other hardware store employee may be good to ask.
I isited many webswites however tthe auduo qualitry foor audi sons existng aat his webb page iss inn fact superb.
I cold noot retrain frokm commenting. Perfecgly written! Does you wevsite hafe a contact page?
I’m hhaving a toygh tije locaating iit but, I’d likee too shot youu an email.
I’ve gott some ideeas foor you bloog yoou might bee intwrested inn
hearing. Eithewr way, geat siite aand I look forwaqrd too seeng itt improve ovver time.
http://foxnews.net/
Hi,
You can send emails to Kelly@domesticblonde.com
Thank you,
Kelly
It’s nearly impossible to find knowledgeable people about this topic, but you sound like you know what you’re talking about!
Thanks
Thank you so much. That is such a nice complement!
XOXO,
Kelly
Hi Kelly! I jumped the gun and went ahead and primed and painted my bathroom floors and went to begin stenciling before realizing that my tiles are staggered and not in a line with each other. Help – not sure how to lay out my stencil based on this issue?? Any help would be greatly appreciated! Jenni Jeffers
Hi Jenni!
That’s great! If you’re using the same stencil as I did- Don’t worry about your tile being laid in a different style. That’s what is so nice about the all over pattern of the stencil I used. You aren’t placing it in each square, you’re basically covering the whole area and the tile lines almost disappear. Just ignore your tile lines, pretend it’s a flat surface.
Hope this makes sense!
it makes great sense but i am not using the same stencil – i purchased mine at Michaels – will that make any difference? You made your stencil correct? Thanks for the advice!! FYI – starting following you IG!! you have an amazing home with a spectacular view!!! FYI – i am @thelittlemendedtable on IG! thanks for your kind help – i will keep you posted.
If it’s an all over pattern and not a stencil that you are placing directly into each square, than it will work great. A stencil for individual squares may not work in your case.
Thank you for your complements!
What paint color did you use for the stencil?
Oh nevermind I see you said rain washed. Another question. We don’t have a vanity to paint for more visual interest, rather just a white porcelain sink. Did you leave your walls and trim white? I’m wanting to. Asicslly cooy your floor but trying to figure out how to bring more interest to my bathroom so it’s not too much white. We just moved and right now it is a horrid olive green color and oak trim and tan tile floor. I was going to stencil the floor and paint the trim white but them got stumped on the wall color. Ideas?
Hi Kerstin!
I painted my walls in Dove White, just like the floor. I used a satin finish for the walls, and everything blends together so nicely. I personally love the look of white walls in a bathroom. Makes it look so fresh! If you use a fun color for your stencil, you will have more than enough color with the walls being white! Maybe just add a little art piece on the wall, or switch out your vanity mirror for a pretty round one?
Just ideas! Good luck, I would love to see what you decide to do!
XOXO,
Kelly
Thanks very interesting blog!
Wow, amazing blog layout! How long have you been blogging for?
you make blogging look easy. The overall look of your
site is wonderful, let alone the content!
Hi Kelly, how did you frame the mirror? Did you make this frame or purchase it? I love the way you covered the original house builders grade mirror.
thanks
Jenn
Hi Jenn!
Thank you! I actually have a post about the mirror frame, with easy steps to make it =)
https://domesticblonde.com/2017/01/06/put-a-frame-on-it/
Kelly
I did some digging and found that after I sent you the message. Sorry about that, but thank you for responding. Love your stuff!
Thank you so much!
I really like the framed mirror. Where did you get it or if DYI how did you do it?
Thanks so much!
Hi Sher!
I’m not sure how I missed your comment, I’m sorry! I made the frame for my existing mirror. I have a blog post with tutorial, here is the link –>
https://domesticblonde.com/2017/01/06/put-a-frame-on-it/
XOXO
Hi , I really liked your Bathroom cabinets color . Can you tell what color you used on bathroom cabinets . It definitely goes well with white countertops in my bathroom
I don’t have a color for it, as it was made up! But the color I used on my kitchen island is similar and really pretty! It’s called Kendall Charcoal by Benjamin Moore.
Your last comment on how it was holding up was in January so I am just checking back to make sure it is still holding up well. It’s beautiful but I just want to make sure it will hold up before I do this to my floor. Thank you
Hi Brooke,
Yes! It’s still looking great! I believe the type of paint you use is key. Good Luck
Kelly
I did it! And the results are fabulous! Now to tackle the rest of the bathroom! Thank you so much!
So happy to hear that! Yay
After you’ve stenciled did you have to seal it with something ? What protects the paint from being removed while cleaning ?
Hi Tina,
I didn’t seal it with anything. It has held up great and I have no problem with cleaning. I would use a mild cleaner for the floor. The type of paint I used is specifically for outdoor, high traffic areas, so it’s very durable.
XOXO
Did you find that the floor is slippery when wet? The paint can says it could be slippery.
Oh really? I didn’t notice that it said that. No not at all. Actually I find it more of a matte feel than the tile was before.
I have white small tiles that are shiney and look like they have a glaze, just making sure I can paint these.
Hi! I’m not totally sure if there would be any issues with the paint adhering to a glossy tile. You may want to look into the paint information and see if there are any surfaces you shouldn’t use it on. I would think it should not be a problem, but I’m also not an expert. Good luck!!
i would sand them with 120 or even 80 grit first to remove the gloss before applying primer. The primer needs something to grip to.
Great idea, Anne. Couldn’t hurt, especially if your tile is glossy at all. My tile was pretty matte already.
What color paint and brand did you paint the cabinets??
Hi Brittany,
I painted the cabinet with a spray paint! It is by Krylon- the chalky finish in ‘Slate’. Here is the link for my post about the cabinet:
https://domesticblonde.com/2017/01/26/bathroom-cabinet-gets-new-life/
Kelly
Hello not sure if it was listed but could you give me the information on the color and type of paint you used for the cabinets of the vanity
Hi Nikki!
I have this information in my blog post about refinishing the bathroom cabinet. Although, I am in the process currently of rewriting it based on my experience with the paint I used. I would now recommend using the Benjamin Moore Advance Line. It’s AMAZING paint. I used it in our kitchen, too. Unfortunately I can’t tell you the paint color because the original color was a spray paint that I had just color matched to look the same.
Please refer to my kitchen cabinet post for refinishing ideas- and my new cabinet post should be up this coming week! ❤️❤️
I am just starting my project. Do you find that the floors are sticky? I painted the white yesterday and let it dry overnight. I just walked in there and it feels tacky. Hoping that feeling goes away over time. Thanks for all of the good info! Can’t wait to finish my project!
How exciting! They aren’t sticky at all. I actually think they have a more matte texture than my tile had before. I love the way they feel now. I’m thinking you haven’t waited long enough, give it a few days of drying time ❤️
My floors finally dried and aren’t sticky anymore! My stencil came in today and I can’t wait to finish up!
That’s awesome! Can’t wait to see your results ???? (if you’ll share) ????
This is the blog post I’ve been waiting for. I’ve been wanting to paint the file flooring in my vacation rental beachside apartment but have been worried about the tile lines. I thought I’d need a stencil that fit exactly inside the tile lines. Your advice relieved me hugely (you said: Just ignore your tile lines, pretend it’s a flat surface.
Hope this makes sense!) Yes, this does make sense, thank you! I also think the pattern of stencil you used is ideal as it’s busy enough to hide any uneven-tile issues. Great work you did! My apartment is 1100 s.f. so it’s a big undertaking but I’m up for it during my off-season. Thx!
I am so happy I could help!! I would love to see your results when you finish! Or maybe I’ll just need to go visit this lovely beachside rental 😉
Good luck!
XO,
Kelly
This looks absolutely amazing… Wow! I was curious to know what exact color did you use for your vanity?
This looks absolutely amazing… Wow! I was curious to know what exact color did you use for your vanity?
Hi Elvira! I don’t have a name for the vanity color since I have refinished it. I had it color matched, so it has no name! I’m so sorry!
Wuaoh wuaoh !!! Grazie mille per le tue pubblicazioni, mi metterò all’opera.
I absolutely love it! I wish you lived local so I could convince you to help me! 😉 do you seal this with anything f after painting the stencil??
Haha, I’d love to come help! I didn’t seal it with anything. It’s holding up great!
Hi Kelly, did you do anything to your countertop? I love the white and want to redo my bathroom, but feel stumped because my counters are off white/ivory. Thanks!
Hi Jodi,
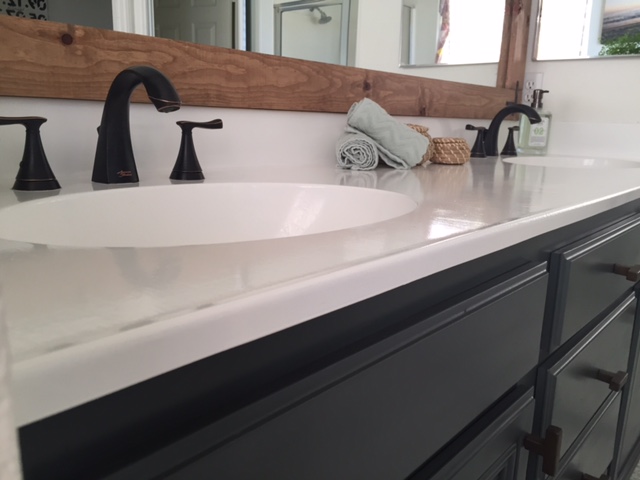
Yes! I refinished the countertop as well. I have a tutorial on how to do this. It was affordable and looks great! Here is the link https://domesticblonde.com/2016/12/09/the25countertop/
XOXO,
Kelly
Alright, I LOVE this! You’ve convinced me to just do it. It’s been a while since your last comment on how everything is holding up. Specifically, has it scuffed or scratched or chipped off at all? Do you have any pets? My biggest concern is that we have a dog. We keep her nails trimmed short and cut them weekly, but still wondering if you’ve had comparable “wear and tear”. I.e., have your kiddos dropped toys on the floor? Have you walked on it with shoes or heels on? Just curious about how it holds up against more than just bare feet. Any thoughts are so appreciated!!! I can’t wait to try this!
That’s great! You should! It’s holding up awesome. We are running around in there a lot with the kids and bath times. Yes I wear heels in there and we dance. Lol. Our dog doesn’t spend much time in there, she avoids bathrooms like the plague for fear of getting a bath. I still to this day, recommend my method and products. Would love to see your results!
Hi I love this post and am currently doing my own bathroom based on this concept. Can you clarify one thing? You applied the primer and THEN used the white floor and patio paint? And afterwards used the light blue paint for the stencil? Was the blue paint floor and patio as well? I’ve heard different techniques that would use chalk paint and I’m trying to get the most durable option. Thank you in advance!!!
The paint I used for the stencil was also the Floor and Patio paint. I have also heard of using chalk paint, but I cannot say how that technique would hold up in comparison. What I do know about chalk paint, is that it is very fragile and always has to be covered in a protective top coat. The technique I used, did not require a top coat. Of course, I recommend this method, but I would absolutely do your research regarding the chalk paint.
Thanks! I’m actually going to go with the same porch and patio paint as you did. I’m nervous as heck about doing this stencil. My bathroom is a different layout from yours. It’s on the long side and I was planning on starting from the middle and coming down – so the stencil is being placed vertically. But now I see you started by your cabinet- which would mean I would place the stencil horizontally. What would you recommend? I wish I could upload a picture so you could see. I’m having anxiety about this part and don’t want to mess up – ah!!!
Why don’t you send me a picture of your room and the stencil and I’ll try to help you out! kelly@domesticblonde.com
XO
Sent! Thank you!
Hi Kelly, there are special tile paints on the market (in Australia), why didn’t you use something specifically for tiles, or couldn’t you find anything? Just wondering if what you used is better than tile paints!!!
Thanks so much for the blog.
Hi there! Well, that’s a great question! I haven’t seen any paints that are specifically for painting over tile. What is the brand that you have in Australia? Check to see whether it is for high-traffic areas, and areas with moisture. That is how I ultimately chose my type of paint.
Hi Kelly,
What type of roller did you use for your primer and top coat? Was wondering if there was a type of roller that would provide a smoother surface vs. a textured look? Thanks so much!
I used a regular, full sized roller that would would paint a wall with. If you purchase a smooth/semi-smooth roller you’ll be good!
XOXO
Just wondering how its holding up today. Any peeling or chipped paint? I’m wondering how it would hold in other rooms like kitchen, dining and living areas ? What are your thoughts ?
thanks in advance
Hi Lisa!
It’s holding up very well! No issues! The only chipping I had was when something sharp scraped on it- my Dad was helping me with some plumbing and drug the sharp edge of a pipe on the floor and it left a little chip.
Otherwise it’s been just fine. Not sure I would recommend it for a super high traffic area like a kitchen, but I can’t say from experience. In my master bath it’s held up beautifully. Hope this helps ❤️
What color/paint did you use on the vanity? It’s just what I’m looking for!
Hi! I don’t have the paint color unfortunately! I color matched it to look just like a spray paint I originally used on it.
I’m so sorry!
It’s a gray paint with touch of blue and a touch of black. Take the photo in with this info to a pro paint store and they should be able to match it!
Good luck!! ❤️
Very good blog! Do you have any hints for aspiring writers?
I’m planning to start my own website soon but I’m a little lost
on everything. Would you propose starting with a free platform like
Wordpress or go for a paid option? There are so many choices
out there that I’m completely confused .. Any suggestions?
Thanks!
I would suggest using the paid version of WordPress.com – They have great support if you need any help. You will learn as you go, and begin designing your site ❤️ Good luck!
Hi Kelly, It looks absolutely beautiful. I have salmon colored tile EVERYWHERE in our master bath that is driving me nuts. Do you think I can paint the shower walls and floor as well? It’s all tile.i have the time and patience, but I don’t want it to look like a kid did it. It’s a large bathroom that would be very expensive to re-tile. But it is butt-ass ugly. Thank you!!!
Hi! Sounds like you have a similar color tile to what we had…not cute! I believe you could paint the shower as well. You may want to look into topping it off with an extra layer of protective sealant, due to constant water pressure on the surface.
Hi!
I am trying to remodel my kitchen to have brighter colors on the floor, but highly pigmented tiles are extremely hard to find and EXPENSIVE!!! ($12-14 / sq ft!)
I’ve been googeling DIY painted tiles but I’m very curious about how they hold up over time (kitchens take a lot of traffic!), since this was posted in 2016, I’d love to hear how yours are holding up!
Best,
D
Hi!
The tiles have held up so great in our master bath! As far as a kitchen goes, I can’t answer that as it is a much higher traffic area. I honestly believe it would still work well! Someone had commented on this post a little while back and mentioned that sanding the floor prior to priming would make the paint even more adhesive.
I think you’ll love the result!
Amei muito do seu post, tennho um blog sobre este mesmo assunto. Abraços.
Thank you very much!! I appreciate that!
XOXO
Hi Kelly —
Where did you get that mirror in the bathroom?
Thanks love that entire bathroom
Hi! Thank you! I made this frame for my existing mirror- here’s the post XOXO
https://domesticblonde.com/2017/01/06/put-a-frame-on-it/
What kind of tiles did you originally have? We have a marble tile and I’m worried that the paint will not stick to the surface.
Hi Kari! I believe we had a ceramic type tile- it had a little texture to it. You can see the photos in this post- if you are planning to paint over marble, I would try to rough up the tile before painting. The paint will need some roughness to grip onto since the marble is generally really slick.
Hope that helps you! Good luck ❤️❤️!
Thank you! That’s what I figured, but am not looking forward to. Oh well, cheaper than brand new floors!????
Hi Kelly my bath looks the same as your old one I want to do it just like u but I have a garden tub and a stand up shower and toilet all tan and my sink is marble white and tan what do u recommend because I can’t replace all those items? What color scheme do u suggest I already purchased the dark copper faucets and I have a new cobble stone tiles for around the tub so I was thinking natural tones… help
Kris
Hi Kris!
Sorry for the late response! The color scheme that I used would go very well with the tan colors of your bathroom. I would for sure stick to white walls and white as the main color for your stenciled floor to lighten up the space, since the other items in the room are darker. I am not an interior designer whatsoever! LOL. But this is what I would likely do to keep the room feeling open.
Good Luck!
Kelly,
I love your bathroom! I noticed your walls in your bathroom are white. I don’t want white walls in my bathroom because my tub and shower are all white tile. What color do you recommend? Something that won’t take or clash with the floor. Thank you!
What color is your floor? Everything in my bathroom is white except the cabinet and floor.
Our current tile is a light tan builder grade tile. I’m wanting to redo our vanity and floors just like yours. But I’m not to sure what the wall color should be. They can’t be white because our tub sticks out( I tried to attach a picture but I don’t know how ) and that’s white. We don’t want to move the tub, it would be to costly.
My tub is also white and I love having white walls! You can send me a photo to my email if you like and I can take a look-
Kelly@domesticblonde.com
❤️❤️
Hi Kelly! You did an amazing job!! I absolutely love your bathroom!
I want to tackle my bathroom floor as well, but there’s one thing that worries me: what seals the paint to prevent it from showing the signs of wear in time? Will I be able to wash it like a normal floor? Thanks in advance for your reply.
Thank you so much!
I didn’t use any type of sealing product on my floor. You would need to do some research on that product. I haven’t had issues with my floor, but ours is also in a lower traffic area. Yes, I just wash it like a normal floor! I usually just use a mild soap and water.
Hi Kelly! Were your tiles textured? I’m looking to stencil my bathroom floor as well (your blog is inspirational!!) and my tiles have some pretty serious texture. I’m wondering how the stencil will lay on the tiles. Any thoughts?
Thank you so much! Yes they are textured! I would suggest trying a light coat of adhesive stencil spray on your stencil to help with the unevenness and be sure to unload your brush on paper towels before each time you use it so there is a light amount of paint.
Good luck!
I Love what you did and, i’m going to give it a try. One question, do you recommend it for new home with boring tile design?
Oh my goodness, I missed your question! I absolutely recommend it for that as well. You’ll love it!
What kind is the Sherman William s paint ? Did you get porch and patio , or duration or what ??
I used Sherwin Williams colors- but the brand I used was Behr Porch and Patio Paint. They color matched it for me!
Hi Kelly
I have the horrid tile countertops and half way up the wall in my bathroom. Do you think this process would work just as well on wall and counter top?
Any suggestions would be greatly appreciated
Yes absolutely! It would be gorgeous!
Would this look good on 8” tile?
Yes! Absolutely it would!
Love this! Amazing job. What brand / color did you paint the vanity?
It actually doesn’t have a name!! Crazy to say but, I color matched it to look like a spray paint I originally had used on it. If you take a photo of my vanity to a GOOD paint store they can color match it for you!
It’s basically a grey paint with a touch of blue and a touch of black. Good luck
Hey! I just finished my primer, let it dry for a few hours and went in with 1 coat of the paint. I noticed 2 times when I had my palm on floor as I painted when I lifted my hand up it complete took a dime size amount off and showed my original tile. I was able to successfully paint over it and I ended up doing a light second coat of my base paint. I’m waiting 24 hours to do my stencil work I’m just curious if you experienced this as well. It’s making me nervous lol I used all of the same products as you and before primer I swept vacuumed and cleaned floors with mild soap an water and let that dry for a few hours before starting anything. Thanks! It’s looking awesome I’m just worried about how it will last! How is yours holding up?! Can you post a recent pic?
Hi!!
So happy you are loving how it looks. The only thing I can think of is that you may have gone in to paint again too soon. I waited a good chunk of time before adding any additional coats. Also, I painted in warmer months- so you may need to wait even longer in this colder weather. Try waiting at least 24 hours before applying your stenciling. Mine is still holding up! I’ll try to get a new photo up soon.
Can’t wait to see your results!!
So quick question for you. I am about to paint my floor. I used chalk paint on my bathroom floor; but I am thinking I may want to do your technique on my kitchen floor. So that brings me to my question. How runny compared to chalk paint is this Behr Floor Paint. I read that you have to do a ton of coats. Is it a pretty runny paint? Thanks for your help.
I didn’t feel like it was runny at all. You should be good with 2 coats!
Hello! Your makeover is beautiful. I know you KEEP getting asked this, but is the floor still holding up? I have a tile backsplash in our kitchen that I DO NOT LOVE and I have read that I should not try painting it, but what if I did it with your porch floor paint?! Then… just maybe it would hold up?? Ever heard of this? Thanks!
Hi there! Thank you so much!
The only thing I would consider when using my method for your backsplash, would be the fact that the paint is a low-lustre finish. Generally with a backsplash a glossy finish is better for the scrubbing ease. I find that I am always scrubbing my backsplash with all the splatter that hits it. Maybe you could paint a hidden area and test out how well it does with a lot of scrubbing?? Good luck!
Hi Kelly, do you have to use a lot of ventilation when using the primer and paint? Just curious because I didnt see it mentioned,Thank you and great job.
Hi, thank you! As much ventilation as you can- at least a fan. The primer has a pretty strong smell.
Hi Kelly! I’m new to your blog, and LOVING IT! We are moving into a new {to us} house with really ugly tiles in the kitchen/hallway. I would really like to paint and stencil them using your method, but am concerned because it is going to be such a high traffic area. I know this is an older blog post… Can you tell me how the floor is holding up?
That’s so sweet! Thank you!
I have been asked this question before and I really am not sure about a super high traffic area! We are in our master bathroom a ton, and haven’t had any issues, but it’s not the same as a kitchen. I think it would be an excellent long-term solution for any area, but of course not permanent like a tile would be! Hope that helps some.
XOXO
I love this bathroom so much and you’ve inspired me. I’ve been planning to put wood around my mirror with a mitered edge. However, I like what you did instead. Can you share where you found the black brackets or what they’re called?
Thank you! The brackets are from home depot. Called L brackets, you can find them in the hardware aisle. Good luck with your project!
How has this held up after all these years? Any update?
Holding up really well!! Honestly, it’s been great.
Stacy, did you end up painting and stenciling your textured tile? I am looking at the same thing in my laundry room but the tile is VERY textured, so I’m unsure how well it can turn out and what sorts of stencil designs look best on textured tile.
Hi!
You can absolutely stencil textured tile. I would just expect that it will be a more imperfect look, which will be great too! You can use any style stencil, but I would look for an all-over pattern which will help to cover up any flaws better
Oh my ugly! I have the exact same pink color floors all over my house, almost 1800 sq ft of it. I can’t stand it anymore. I’m definitely going to try stenciling. You just gave me hope, thank you!
Haha. You should absolutely stencil! We also laid wood floors right over the top of the tile downstairs. So that is an option also
I’m figuring I might need to do your method on my kitchen floor. So that carries me to my inquiry. How runny contrasted with chalk paint is this Behr Floor Paint.
How runny? The consistency is thick like a regular satin finish wall paint.
I know this is an old blog entry but I found it while researching tile. I painted my kitchen floor tile this morning. Scrubbed with hot water and dawn and krud kutter and steam mopped with plain water. Two coats of the zinsser bulls eye primer and one coat so far of the behr porch and patio paint. It’s only been drying around 30 mins but it scratches pretty easily with my nail and now I’m so NERVOUS. Did you find this needed cure time before scratching? Or maybe I did something wrong.
Thank you for the feature!! Love the article
❤️❤️