
Well, if you have never seen it before, you are seeing it now. A DIY blogger who is telling you NOT to do your project the way I originally did it!! So many times we look for projects to do, totally trusting that the info we find through a blogger or Pinterest is THE way to do it. I’m here today to tell you, that is not always the case!
Here is a photo of my bathroom before I updated it. Brace yourself.–>
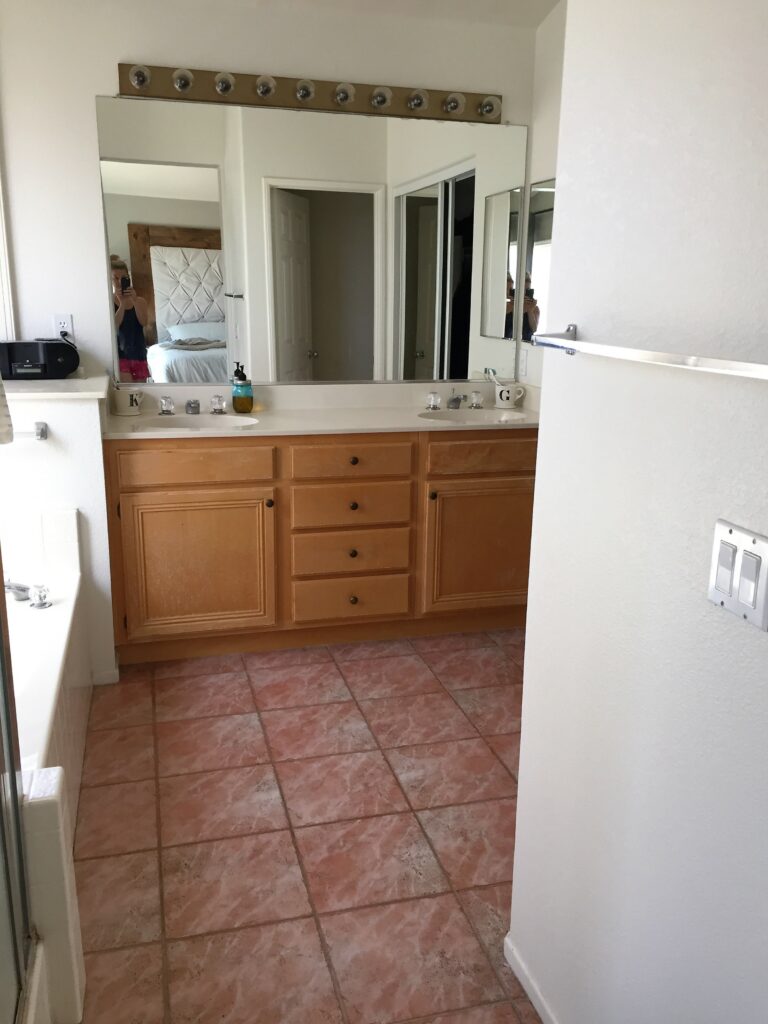
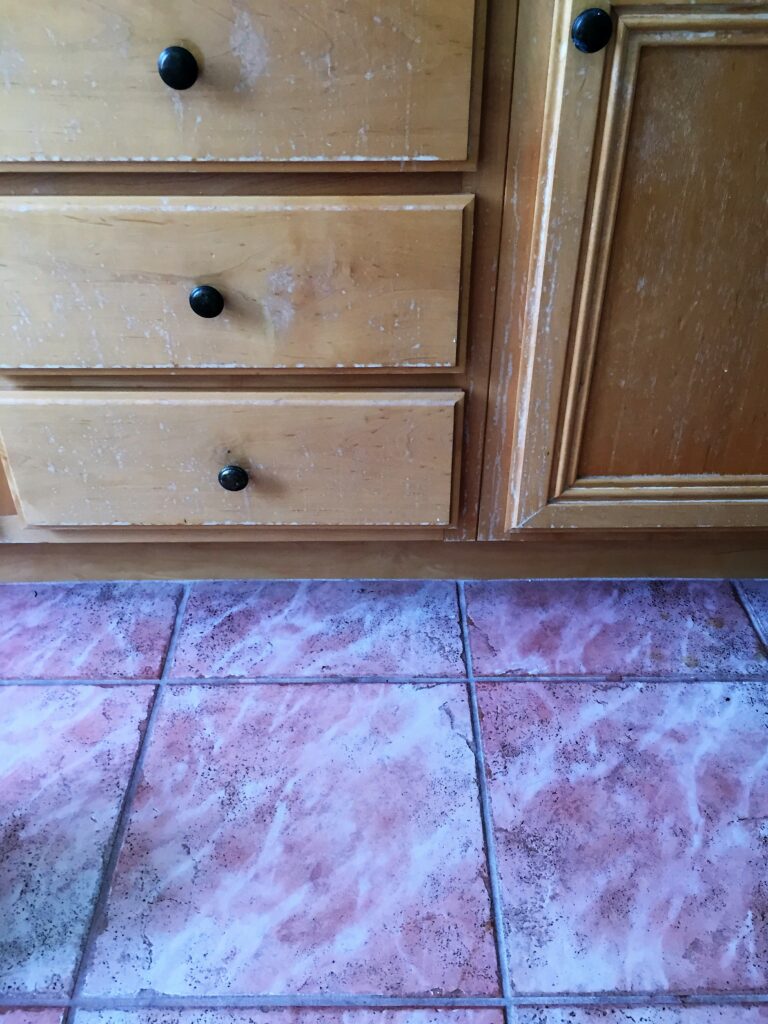
I refinished my bathroom cabinet about a year ago now. You may have seen the stenciled floors, the countertop and the framed mirror…etc. I refinished/updated all of the items myself. It was the first time attempting many of these specific projects. (all other parts of the room are holding up wonderfully, and I recommend them all) When I decided to refinish the cabinet, I used a spray paint to do it. Don’t get me wrong, most of the cabinet held up great. The issue was the doors; the spray paint wasn’t holding up well in the center area of the doors. I assume that is a spot that gets the most abuse from knees, babies, and other things bumping into it.
Better Homes and Gardens was scheduled to come to our home to take pictures of the bathroom and kitchen. I just kept looking at the door on the cabinet, thinking I wasn’t happy and wanted to touch it up before they arrived to photograph the space. So, I tried. Guess what people? YOU CAN’T TOUCH UP A SPRAY PAINTED SURFACE. I am telling you, I tried multiple times to touch up the door, and it just wasn’t happening. Spray paint, unlike regular paint, will not look the same when trying to touch up an area at a later time. It dries differently and the color match is not guaranteed once the paint has been sitting on a furniture piece for a while. Look at the blotchy-ness that was going on by trying to touch it up! (also I had sanded it lightly)–>
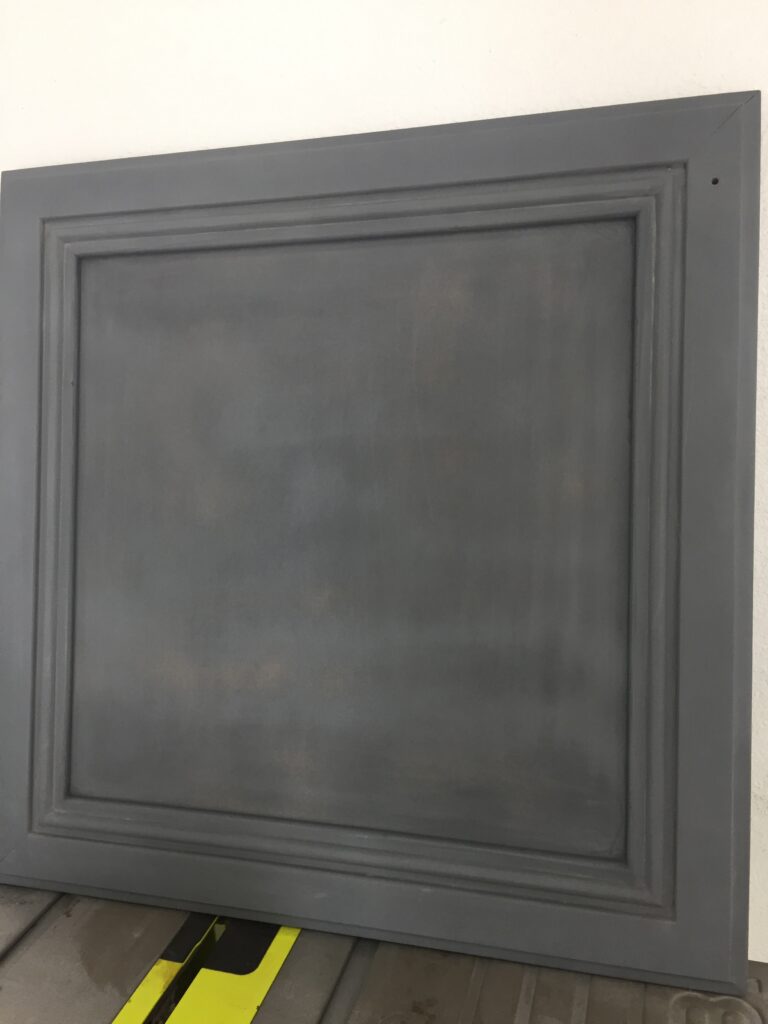
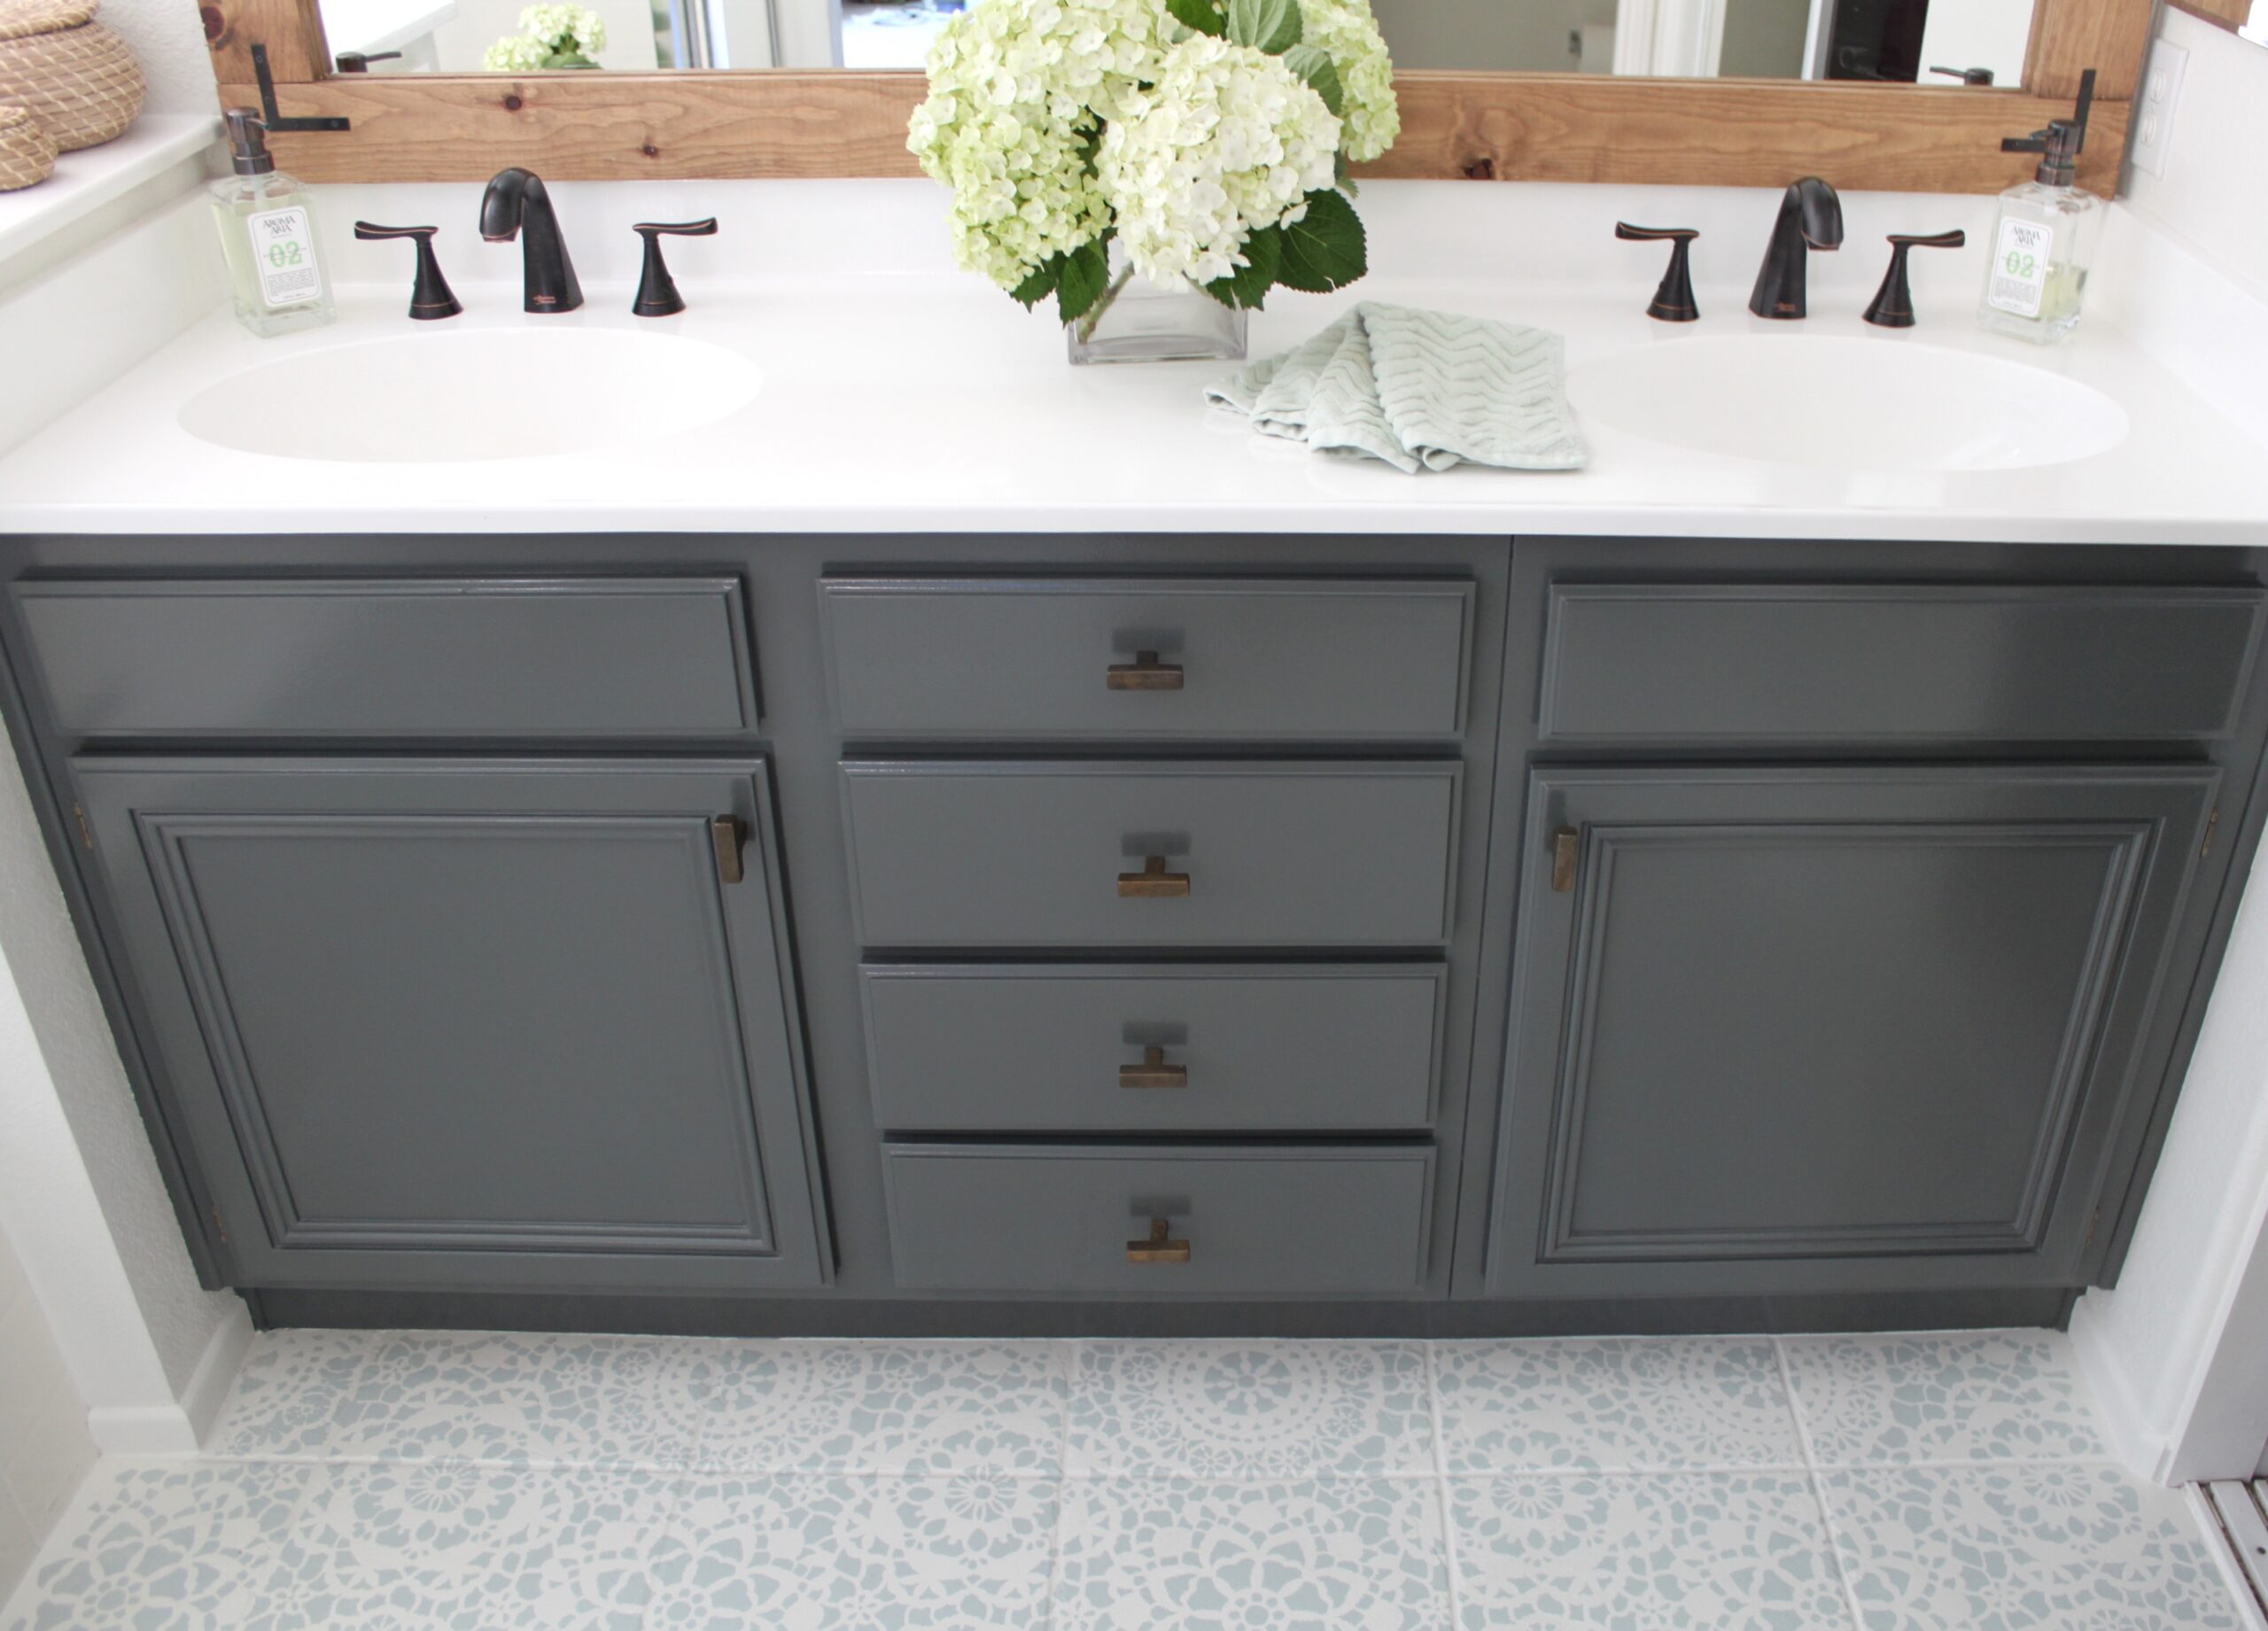
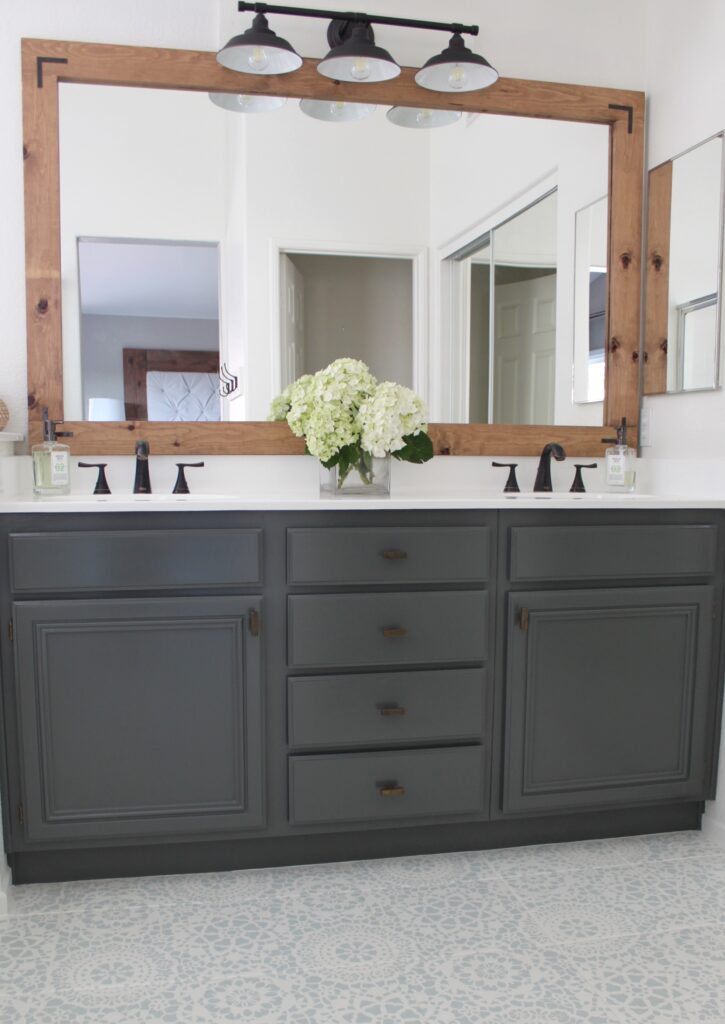
YIKES!!!!! Well, needless to say, I was pretty terrified that I was going to have to call Better Homes and Gardens and tell them our photo shoot was a no-go. After much thought and time spent trying to match what was never going to match again- I realized something. WHY am I driving myself crazy trying to fix this? If this is so complicated for me, won’t my readers want to know that? I don’t want to put them through this! It was so obvious what needed to be done. I refinished the entire double vanity. Using the paint that I used on our kitchen cabinets.
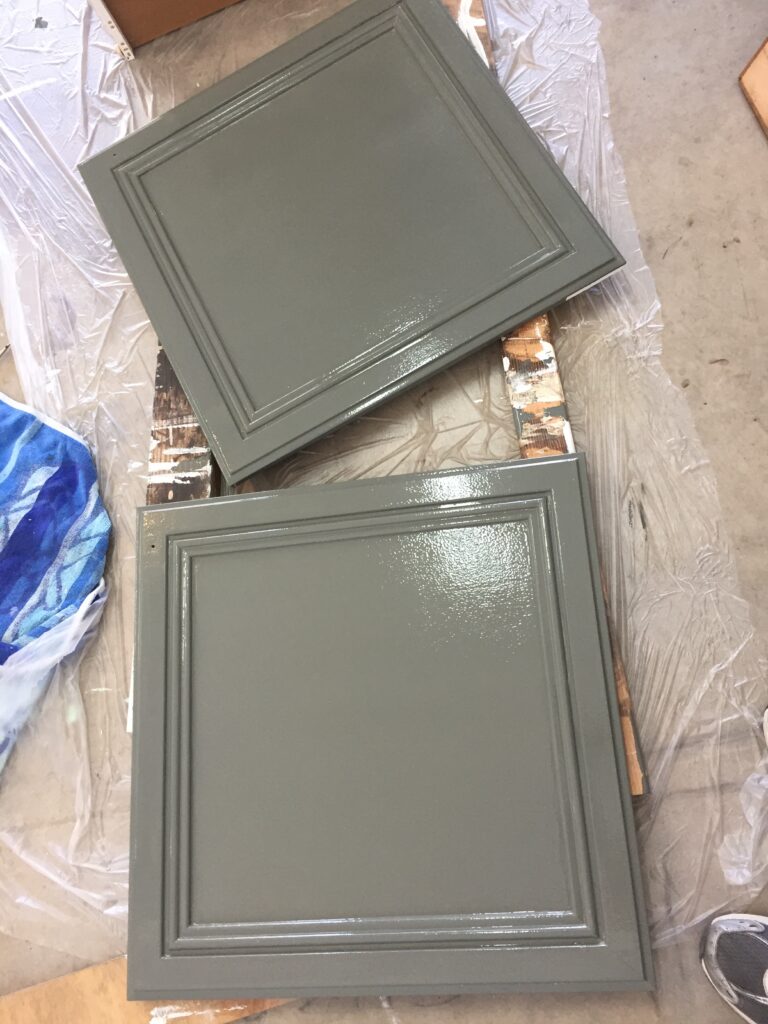
THIS is the way to refinish a cabinet. My kitchen looks amazing and now my bathroom cabinet looks even better than before. If you want professional results, you can trust this tutorial. (affiliate links are included)
Spray paint. I loathe thee.
Here are the Items you will Need to Refinish Bathroom Cabinets:
Liquid Sander Deglosser or handheld electric sander
Rust-Oleum Zinsser Bulls Eye 1-2-3 Primer
Benjamin Moore Advance Line Paint (in color of choice)- Don’t buy cheap paint!
1/4 inch Nap Roller (NOT a foam roller)
Angeled Trim Paint Brush, 1 or 1-1/2 inch
Once you have your items, this is not a complicated project. Just takes a little time. Totally worth it!
Refinishing Bathroom Cabinets:
a Step by Step Tutorial
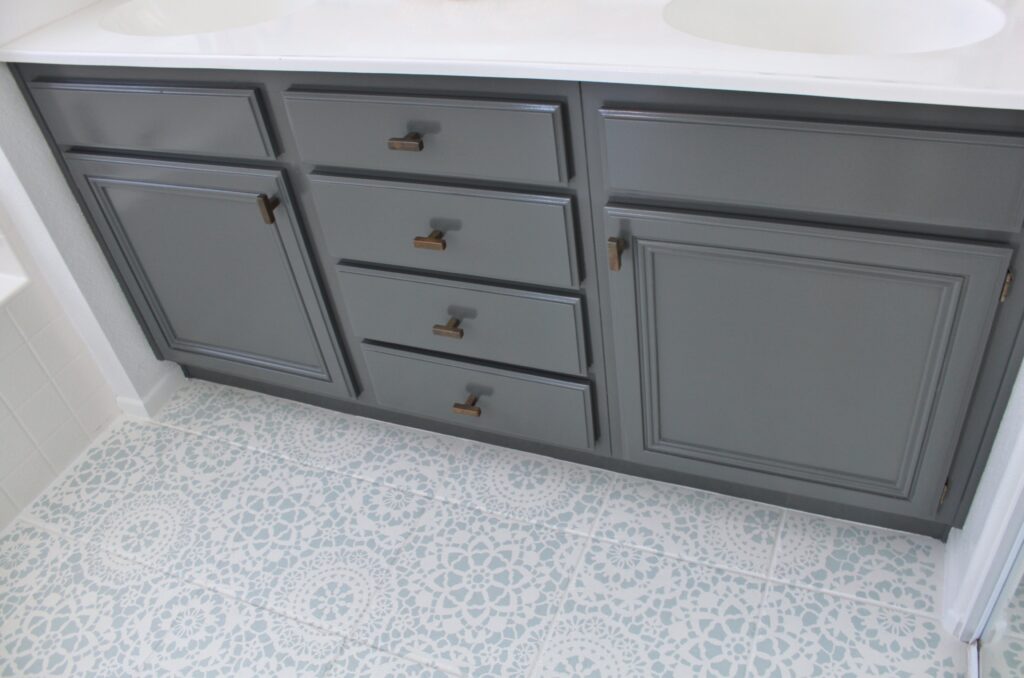
Begin by removing all doors and drawers from the cabinet. Remove all hardware and hinges as well. Bring them outside or into the garage and either use the deglosser or your handheld sander to remove glossy topcoat. Do this on cabinet as well. (You do not have to sand all the paint off, only sand until shine is dulled).
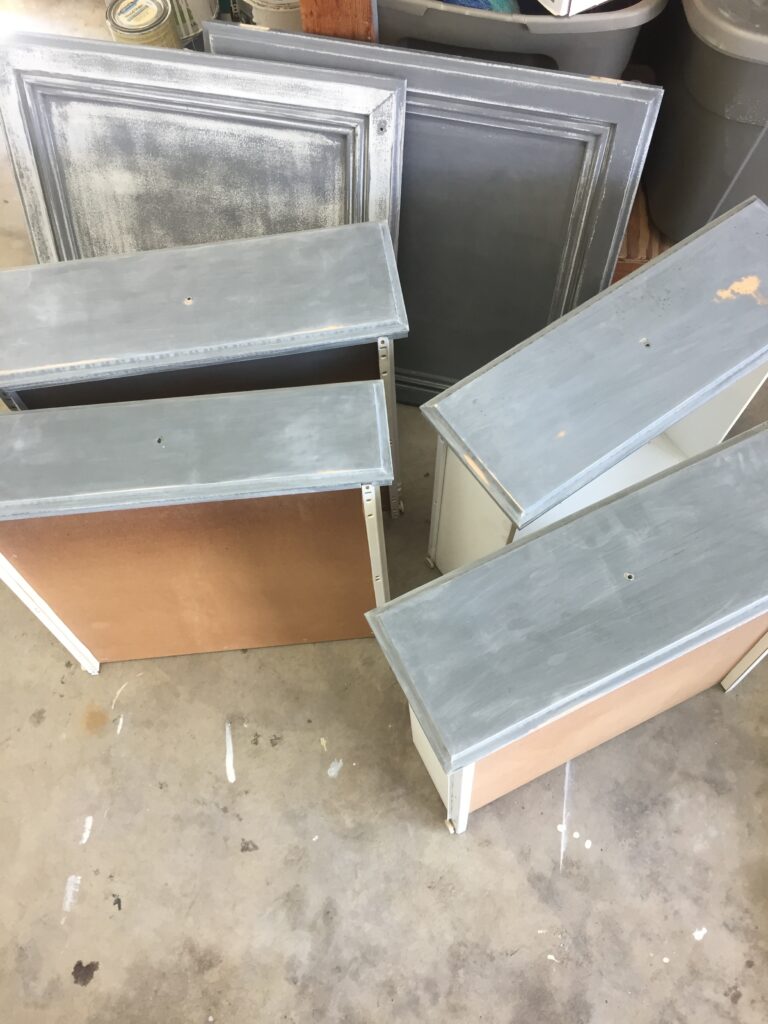
The deglosser should work just fine for you, I used this on my kitchen cabinets instead of sanding and it was ah-maz-ing. The only reason I chose to sand this cabinet, is because I wasn’t sure if the deglosser would work the same way on a spray painted surface. I just wanted to be safe in this case. But, I highly recommend the deglosser for all other surfaces!
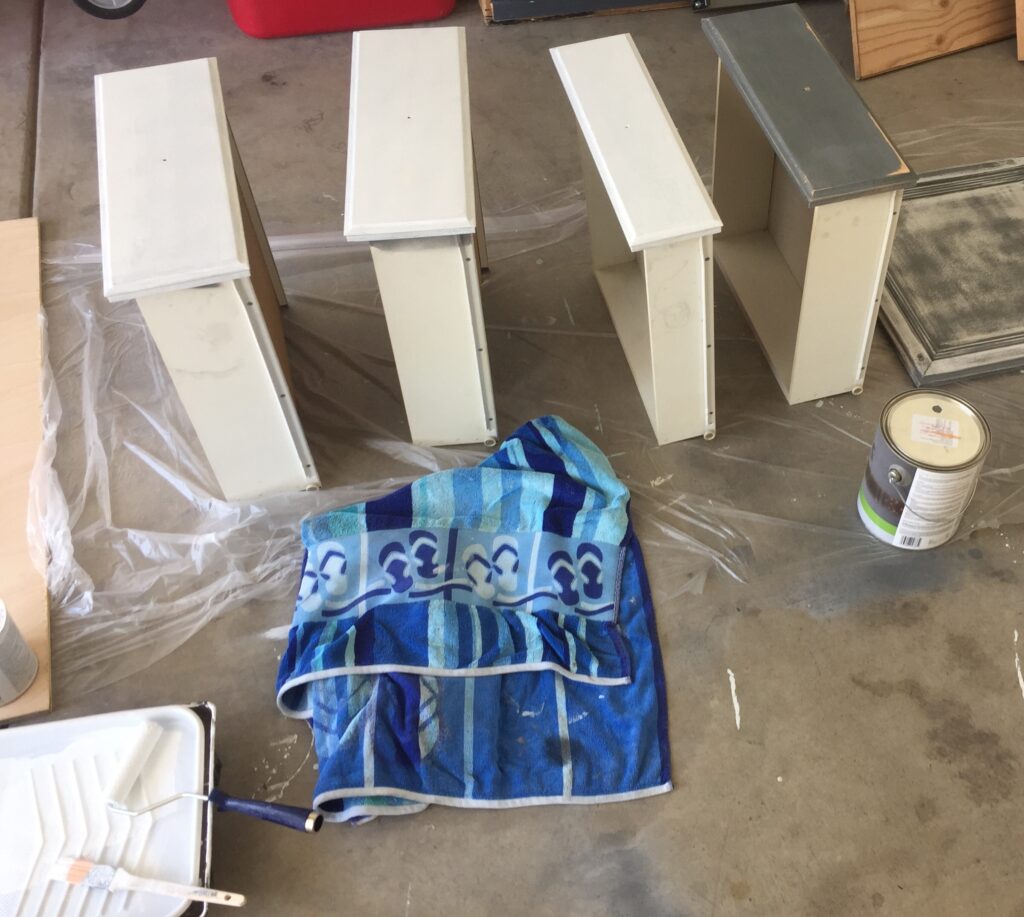
Wipe down to remove dust if you had sanded, or allow deglosser to dry. Apply one coat of your primer to all doors, you may need another coat just depending on the previous color of the cabinet. Take your time and apply this nice and even, using the angle brush first and then your nap roller.
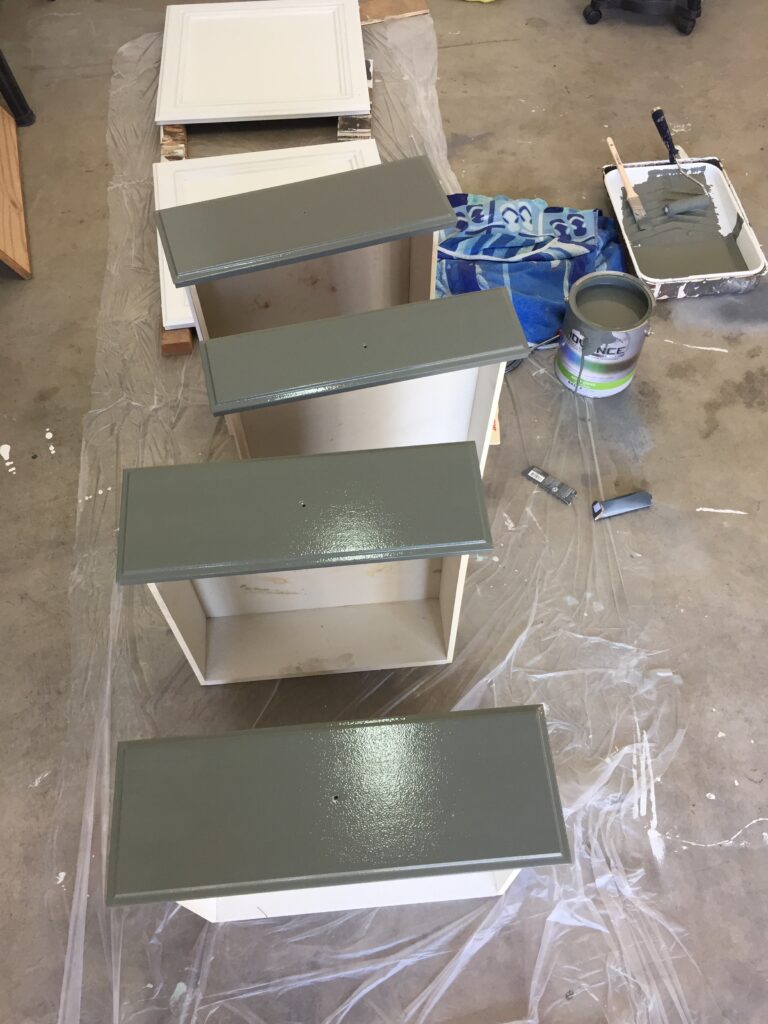
Once the primer has fully dried (at least 4 hours) Apply your Benjamin Moore Advance Line paint. Again, using your angled brush to first paint in any detailed trims or hard to paint areas. Then go over everything with your ¼” nap roller. This paint is soooo good. It’s self-leveling so even if you don’t catch a little mess-up, the paint smooths itself out so nicely. It’s also very thick paint, you may only need one coat and a little touching up. It will dry rock hard within a couple weeks, and will last for many, many years to come! Feel free to put the doors and drawers back in after a couple days, just be very gentle with that area while it fully hardens.
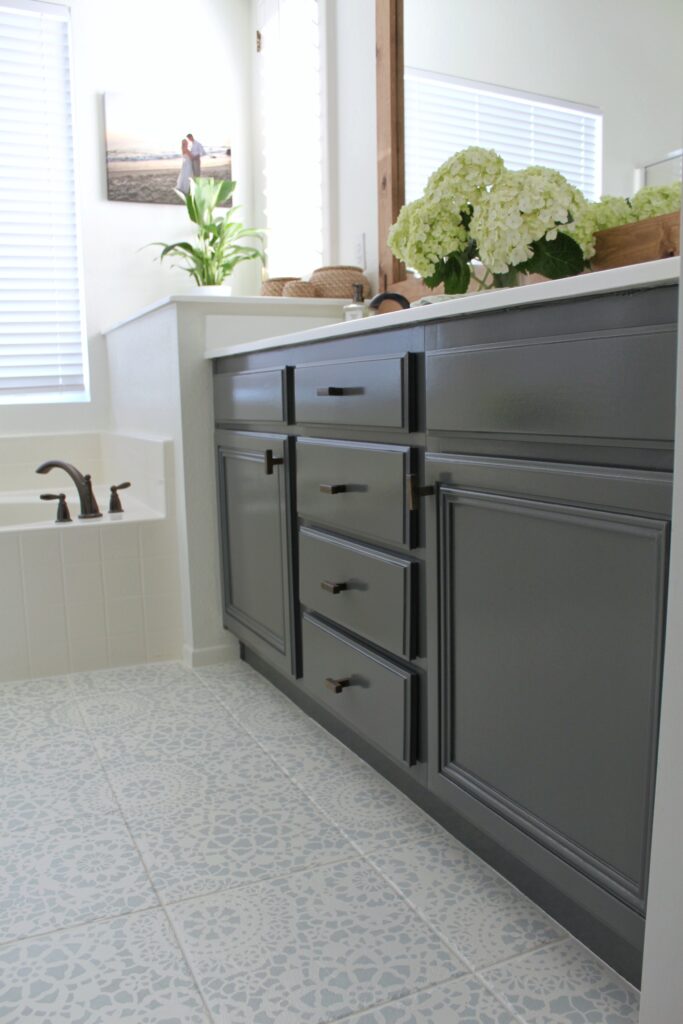
Find the bathtub faucet HERE
Find this gorgeous (and affordable) light HERE
Find the Sink Faucets HERE
Find the floor stencil HERE , and my tutorial to paint floor tiles here.
For those of you who previously completed my spray painted cabinet, I hope you love it! I am not saying that spray paint cannot be used, but as far as touching up any future mishaps, it is very difficult. I will always be very honest with my readers, sharing my experiences and giving the best advice I can give.
Love you all.
XOXO,

Thanks for the tips. The bathroom looks great and I LOVE the stenciled floor.
Thank you so much, you’re so sweet!
Loved the finish product! I work in the paint industry and touching up spray paint is piratically impossible. There’s way to do it on metal structures but you have to be a professional and have plenty of practice!
Where were you when I originally did this product??? ???? Thank you for your input! Spray paint is so tough to work with, mostly for a high traffic piece of furniture
Looks great! What color did you use this time on the cabinets?
Unfortunately, I can’t say what color the cabinet is now! I had it color matched to look the same as the spray paint. So it doesn’t have a name. Bummer, I know!
Can you show us a color of the mix they used? I’d love this color for my bathroom cabinets as well!
It looks SO great!!! So much better for sure!
Thank you, Tabitha ❤️
Wow! These cabinets look amazing. I absolutely love the gray color that you chose so clean and modern.
Thank you so much!
Ahh! I want to do this to our bathroom but I’m nervous I will ruin it! Haha! I will have to come back to this post. Amazing job!
You can do it! I promise it will be so great ❤️
Your bathroom looks amazing! I wouldn’t want to cancel on BHG either 😉
Exactly! Not a good idea! ????
That’s a really beautiful cabinet! And the glimpses of your bathroom look gorgeous too. I have read tons about spray paint so I would have believed it’s really easy but clearly there are issues. This is so good to know. I love your honesty about the process. Definitely will be coming back to you with any other DIY queries.
Hi Michal,
The initial project with spray paint was simple! The trouble came when I attempted to touch it up. You really can’t touch up spray painted furniture. So that was a bummer!
Umm can you come do mine? They looks awesome!
Sure! Sounds fun. Lol.
Thank you 🙂
Your bathroom looks amazing. Thanks for admitting there were bumps in the road. Sometimes hearing someone else’s story of perfection can set the bar at impossible. It’s good to hear that others do face struggles, but they find ways around them.
Thank you, Erica! I appreciate that. I always like to know the follow-up on other people’s projects. We can’t just assume they always worked out! 🙂
Absolutely beautiful transformation! Weldone!
Thank you so much!
These look amazing! Thank you for the ideas, I’ve been wanting to re-do my cabinets for a long time now.
You should! It really is an amazing transformation to see. And totally doable on your own.
Ah! You did an amazing job! They look so modern and new.
Thank you, Hannah!
This is GORGEOUS! Totally saving this for future reference! ????
Thank you, you should go for it!
It looks great! I love the floors
Thank you! I have a tutorial on the floors as well
I am in love with this remodel! That paint makes all the difference!
Thank you so much! It’s true, paint can change everything ❤️❤️
Where did you get the handles? Love those
Thank you! They are from Hobby Lobby!
Hi Kelly!
Your countertops looks so much brighter than the originals – did you have those replaced or is there some other magic you did? Thanks!
I refinished them! I have a tutorial on those as well- here is the link:
https://domesticblonde.com/2016/12/09/the25countertop/
❤️❤️
The bathroom looks gorgeous! The painted floor is what brought me here as I’m thinking about doing this, too. I’m so impressed that you were able to get right up to the edges – that’s what I’m most nervous about. Well, that and going around the toilet. Did you stencil around the toilet and how much fun was that?
Thank you! Going around the toilet isn’t something I would call ‘fun’. Lol. But, the stencil material makes it fairly easy to bend around areas like that. You can do the same with the edges around the wall. If you look at my bathroom floor tutorial, you’ll see a photo that shows how it bends at the edges. Good luck!!
Hi!! I love what you did?? What color did you use for the bathroom cabinets?
Thank you! The color doesn’t actually exist!! It was a color match to a spray paint I originally used. Such a bummer, I know!! If you go to a paint store, bring a photo of my cabinet and tell them it’s grey with a hint of blue. So sorry I can’t give you a color!
What paint finish did you use? It doesn’t look like semi-gloss.
It is a semi-gloss! ❤️
I appreciate you sharing these unique bathroom remodeling Ideas.Bathroom renovation is always needed in every home. You will need it if you want your bathroom to be more convenient for you and your family.I shared this on Facebook and my followers really enjoyed it.Keep up the amazing work! ??.
That is so nice of you! Thank you very much!!
XO,
Kelly ❤️
Hi this looks great! I want to make sure I understood correctly, are you saying the cabinet doors and drawers should dry for a couple weeks before putting back in? Thanks!
Hi! No, you can install once they are dry- maybe a few hours. I may have been referring the the curing time, to fully harden.
Love this! Looking to spruce up my bathroom soon! Did you paint the counters as well??
Where did you buy the cabinet hardware from ?
I found them at Hobby Lobby! They were on sale and super affordable- around $2 each.
Amazon! I linked the hardware in my post ❤️
Can you tell us what the RBG numbers were when they color matched it? Did they put them on the can?
Your bathroom is amazing! Is there a tutorial for what you did with your mirror?
Yes! Here you go! https://domesticblonde.com/2017/01/06/put-a-frame-on-it/
How durable is the finish? Is it still going strong?
Yes! I highly recommend the Benjamin Moore Advance line. So Good!
Can u give the name and color of the spray paint you matched the cabinet color to? Is it Greg or green or blue?
Hi! Sorry for the late response. It is a grey color with a hint of blue in it. The color of the spray paint was Slate by Krylon. If you bring a picture of my cabinet to your local paint store (a GOOD one, not home depot) they can color match it really well for you!!
What color is the Benjamin Moore paint?
This color was made to color match the spray paint I originally used- so it doesn’t have a name! It is a grey with a tiny bit of blue and black. You can take the photo of my cabinet to your local paint store and they can color match it for you very well! (if you go to a good place)
~AMAZING~
I am grabbing a teen or two of mine and having them help me with this. I am confused. I read the updated version of the cabinets and can’s figure it out. Did you spray paint them cabinets or use the nappy roller? Or a combination? TIA
I used a short nap roller! When I originally updated the cabinet I spray painted it, but realized this method was MUCH better!
I have a special paint gun – do you think I could still use this with paint rather than brushing? I mean, is it a difference in the composition of spray paint and paint in a can or is it the application?
That I am not sure about. The paint I used was definitely thicker than your traditional paint. I would contact the paint gun manufacturer. Good Luck!!
I’m so impressed! Your new cabinets look so good!
That’s so nice, thank you!
Did you paint the insides of the cabinets or the inside trim?
Hi! I only painted the trim around the opening of the door, as well as the inside of the door. I did not paint the inside of the cabinet.
How did you work with the cabinet bases? Mine are build in so I can’t move the vanity to the garage.
Hi Kelly, we are in the process of painting our bathroom vanity and would like to get a color similar to the one you have. Could you please tell me the name and brand of the spray paint used to color match. Thank you
Hi! I can’t remember off hand, but that info will be in the original post I did on spray painting my vanity. Good luck!
Love the color of the vanity cabinet. Do you still have the paint can for this? If so can you provide the color code? I read that I can just take a picture to a paint store but the color code would be way better! Thanks!
Following Rainey’s comment as I too would love the paint can color code information – the color is just what we’re looking for, but ‘color matching’ has historically never worked out for us…
Thanks!
I’m sorry I don’t have it! Take a photo to your paint store (not home depot) and have them try to match it!
I love the mirror! Did you do the frame or replace it completely?
I used the original mirror, and just added a frame over the top. The process is in my Frame blog post!
Do you do any tutorials because I have similar light fixtures in my bathrooms I want to replace and I don’t even know where to begin because I don’t even know what those type of light fixtures are called
I don’t! But I should absolutely do that!
The light fixture I used is linked in the blog post, and I would search YouTube for a quick tutorial on changing out a light. Good luck!
Did you use the deglosser on the cabinet face and base? I’m about to head into this project and doors/drawers you show above….thabks so much for giving us the know-how and confidence to DIY
Yes I did! On everything.
Love this project..would you recommend using polyurethane on this afterward..My bathroom vanity gets hair spray build up. Would the polyurethane make it easier to keep clean?
You absolutely could! It would make it stronger for sure. I don’t add a poly coat, and I haven’t had any issues with wiping it down.
Hello! I have two questions, are you happy with the sheen of your cabinet paint? Is a more matte paint more popular in 2021? Also my idea for the paint color is it sure would be nice if you could bring some paint chips home and try to color match one to your cabinet….we would all appreciate it! Thanks!
Any advice for redoing the inside of old cabinets with 1970s paper liner? I feel so lost!
I believe there are wallpaper stripping products. I’ve never used them before. Or prime and paint over the top? Depending on where the cabinet is being used
I am so glad I found your blog! This post is right on time. I just purchased a house and have honey oak cabinets in the kitchen with a blush tile countertop and backsplash followed up with an off white tile floor. Uuuugh. I wanted to paint the floor and the cabinets gray and now I’m ready to tackle it. Thank you so much.
Thank you!! I’m sure it turned out wonderful!