• Home
  • DIY Projects
    • Home Office
      • Home Office Desk for 2
    • bathroom projects
      • Kid’s Bathroom Makeover
      • Guest Bathroom Makeover
      • Update: How to Refinish Bathroom Vanity
      • Stencil Bathroom Floor
      • Refinish Bathroom Counterops
    • Living Spaces
      • Easy Window Trim
      • Board & Batten Wall Family Room
      • Board & Batten Wall Living Room
      • Sliding Barn Door
      • Hanging Succulent Wall Garden
      • Hairpin Tables
      • How to Shorten Bamboo Shades
    • Kid’s Bedrooms
      • Platform Twin Bed Frame
      • Kid’s Bed Headboard
    • playroom
      • Magnetic Chalkboard
      • Hanging Basket light With Macrame Cord
    • Kitchen Projects
      • Kitchen Island
      • Refinish Your Kitchen Cabinets
  • Home
    • Holiday Decor Centerpiece
    • Best Gray Paint Colors
    • Top 5 Stencils for your home
    • Playroom Makeover
    • 10 Neutral Floor Poufs
    • Family Room Decor
  • Contact Kelly

Domestic Blonde

DIY - LIFESTYLE

  • Home
  • DIY Projects
    • Home Office
      • Home Office Desk for 2
    • bathroom projects
      • Kid’s Bathroom Makeover
      • Guest Bathroom Makeover
      • Update: How to Refinish Bathroom Vanity
      • Stencil Bathroom Floor
      • Refinish Bathroom Counterops
    • Living Spaces
      • Easy Window Trim
      • Board & Batten Wall Family Room
      • Board & Batten Wall Living Room
      • Sliding Barn Door
      • Hanging Succulent Wall Garden
      • Hairpin Tables
      • How to Shorten Bamboo Shades
    • Kid’s Bedrooms
      • Platform Twin Bed Frame
      • Kid’s Bed Headboard
    • playroom
      • Magnetic Chalkboard
      • Hanging Basket light With Macrame Cord
    • Kitchen Projects
      • Kitchen Island
      • Refinish Your Kitchen Cabinets
  • Home
    • Holiday Decor Centerpiece
    • Best Gray Paint Colors
    • Top 5 Stencils for your home
    • Playroom Makeover
    • 10 Neutral Floor Poufs
    • Family Room Decor
  • Contact Kelly

DIY Mirror Frame: a Step by Step Tutorial

Mirror frame
This website may use affiliate links. When you purchase products from an affliliate link, I make a small commission.

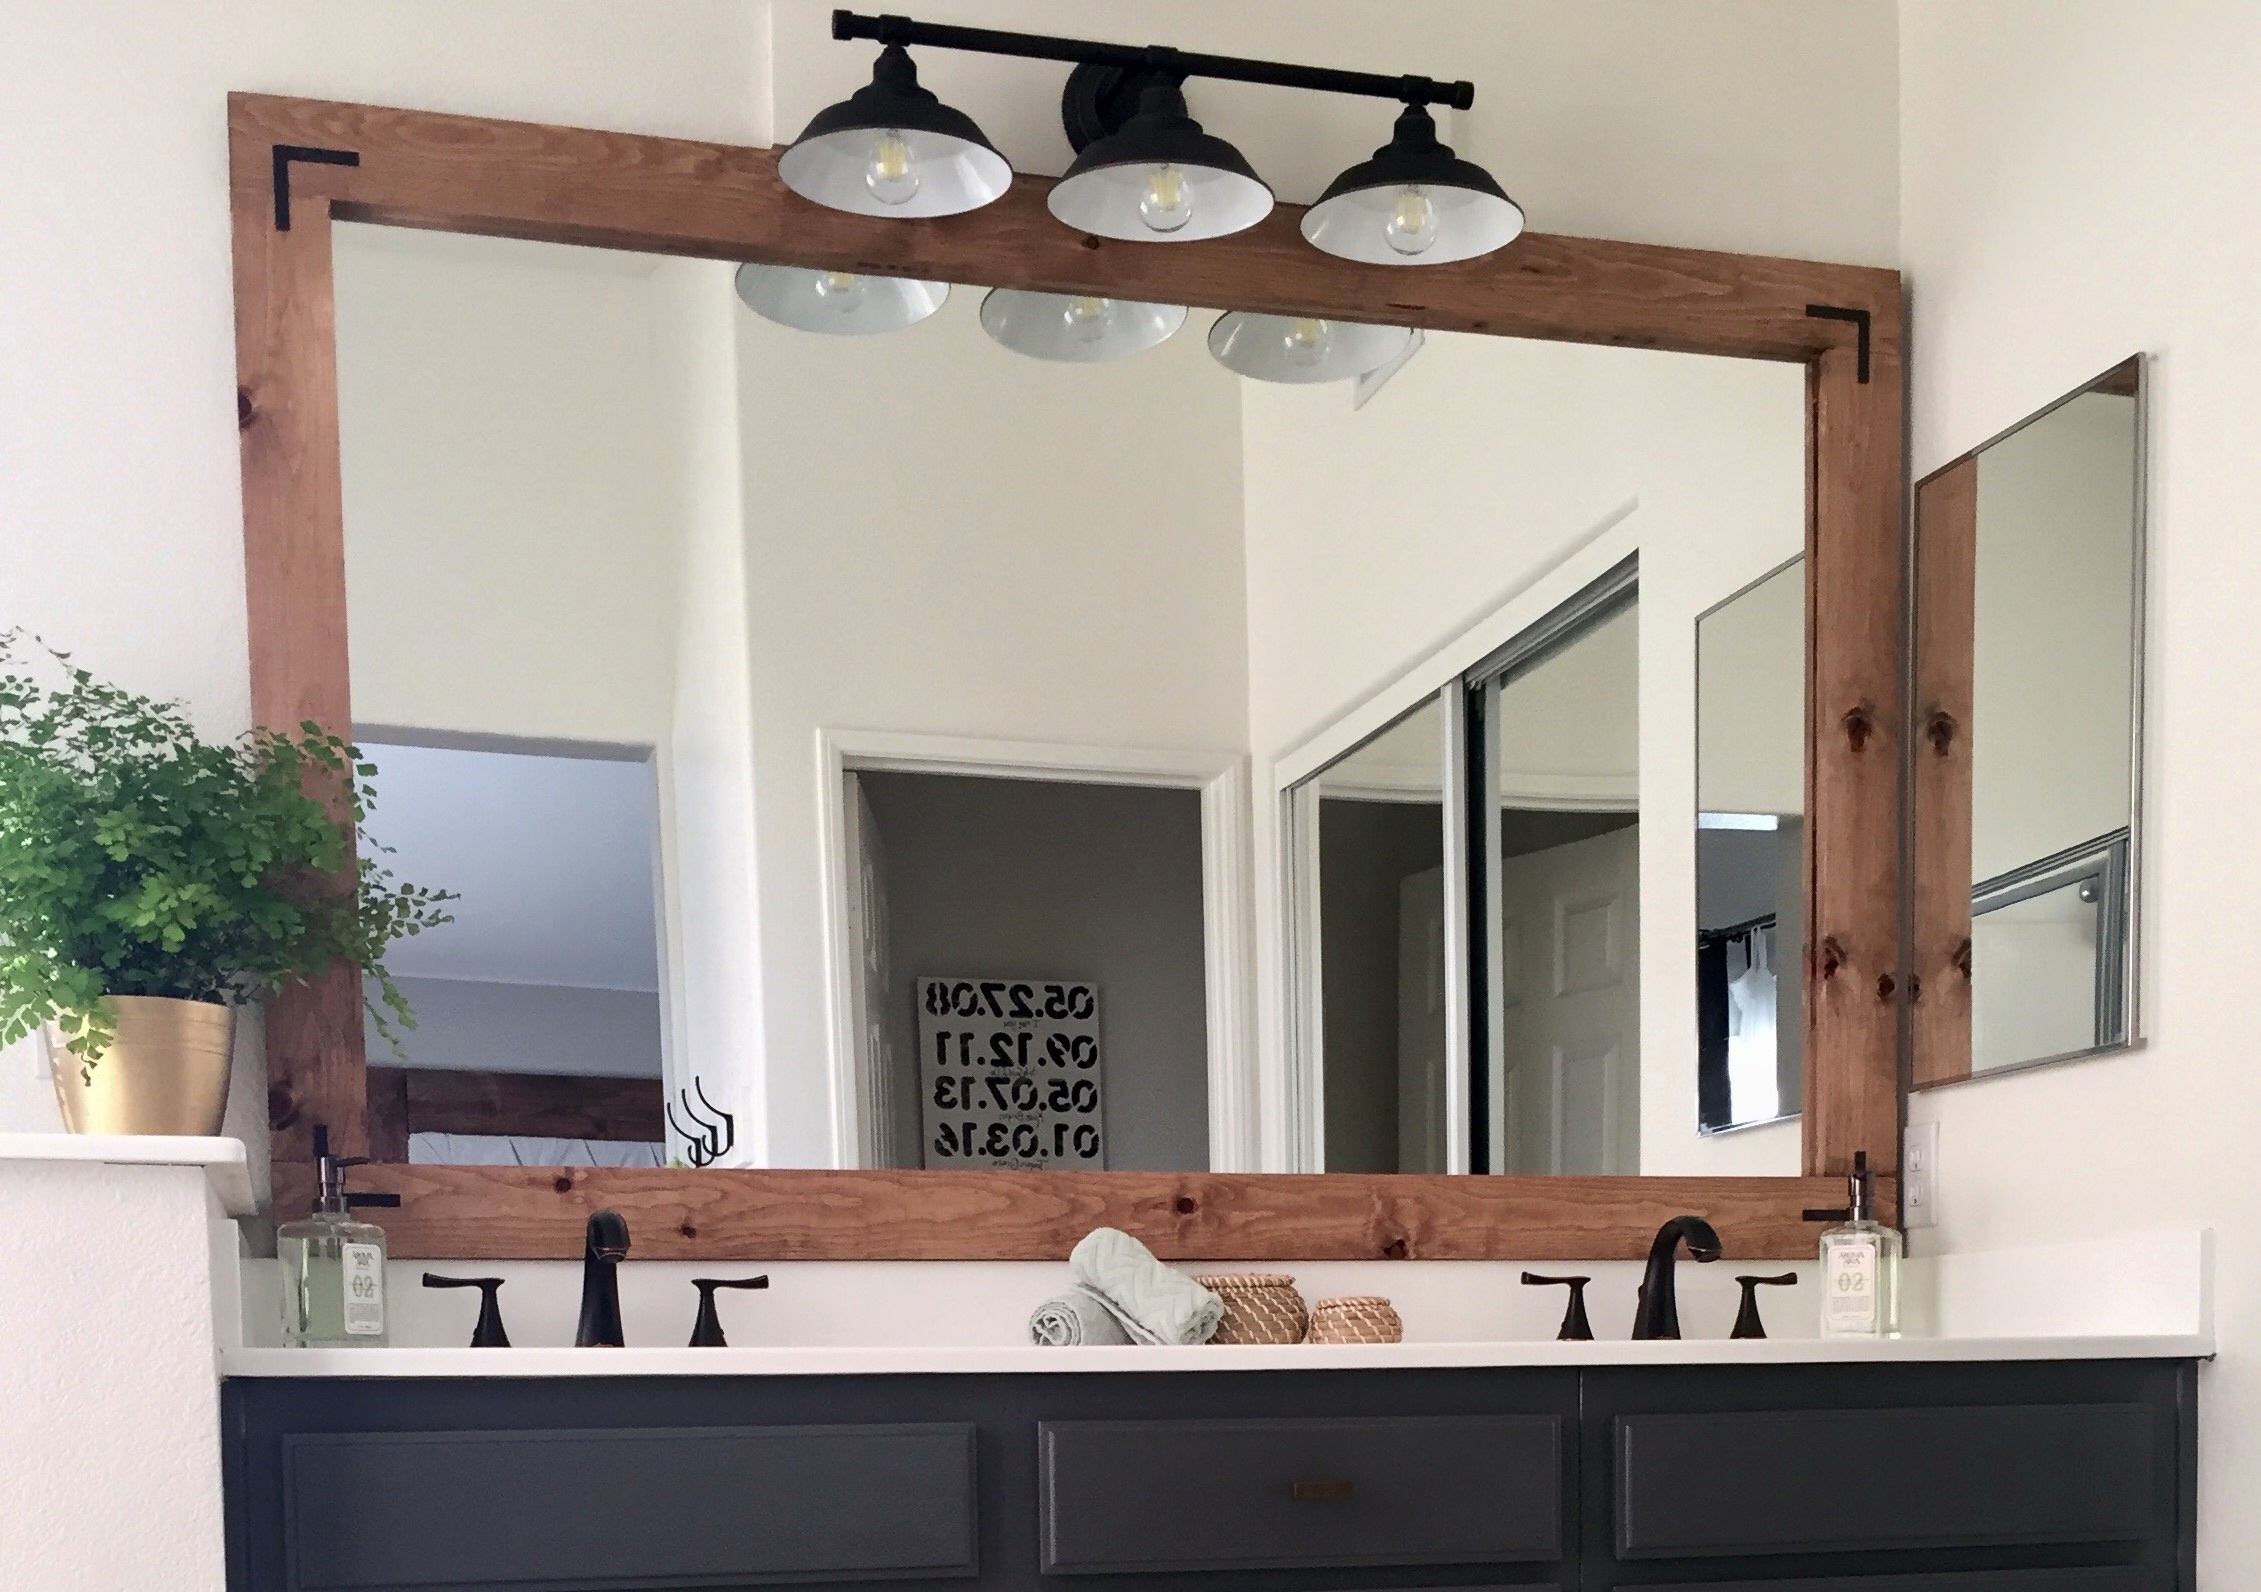
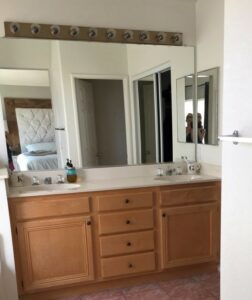
While updating my bathroom, I contemplated taking down our mirror and putting up two round ones in it’s place… I do love the look of a round mirror, but I really liked the large size of the one we already had. Plus, patching the wall after I ripped that bad boy down, sounded horrible. Creating a frame for it seemed like my best option to make it work. There was no way I was keeping it up the way it was. With the little hideous plastic holder-clips they put all around it. What’s that all about anyway?

There are lots of different directions you can go when making a DIY mirror frame. I chose to stain it with wood stain that I already had in the garage, but you can paint it a color to match your bathroom. Or choose a fun accent color to give a little pop to the room.  Also, adding little touches like the braces I used in the corners, make it feel a little more finished. Adding large nailhead trim, or…..decorative wood trim! That could be fun! Well now I need another mirror to update.

These are the items I used to make my DIY mirror frame:

          • DIY Mirror Frame: a Step by Step Tutorial4″ Flat Corner Brace 4 Pack
          • Rust Oleum Flat Black Spray PaintDIY Mirror Frame: a Step by Step Tutorial
          • Liquid Nail
          • Staple GunDIY Mirror Frame: a Step by Step TutorialDIY Mirror Frame: a Step by Step Tutorial
          • 4-  1 x 3 wood boards cut to size
          • Minwax Wood Conditioner
          • Minwax Wood Stain (I used Special Walnut)

This DIY mirror frame is one of those little projects that doesn’t take long, which = same-day instant gratification, baby! My favorite thing. Ha. Here are the steps for completing a wood frame like mine.

Measure length and width of your mirror and cut 4 pieces of 1 x3 boards to size. I’d recommend cutting slightly larger than mirror size, so you don’t see any of the mirror sticking out from the frame. That would not be pretty.

Butt your end pieces together and apply liquid nails to each corner. This stuff is suuuper strong and will hold that baby tight.

Use your staple gun (all you need is a little handheld one. It works like a charm! Here is the one I have and recommend for projects like this). Staple each corner together.

DIY Mirror Frame: a Step by Step Tutorial

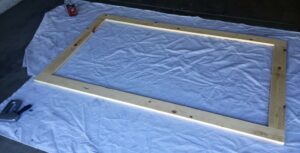
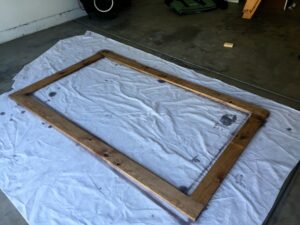
Now flip that lady over- Get out your conditioner and wood stain and get to work! Apply your wood conditioner first. This ensures that your stain will go on even and not blotchy. Let that dry for 10 minutes. Then apply your stain. I like to start off lighter than I think I want, because I can always add more stain. Once you go too dark… you’re dunzo. I went pretty darn light on the stain for this because I wanted to keep an airy feel in my bathroom. Nothing too heavy.

How to make your own DIY mirror frame, a tutorial featured by top US DIY blog Domestic Blonde DIY Mirror Frame: a Step by Step Tutorial

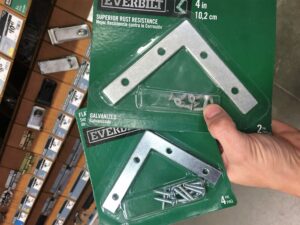
These are the corner braces I chose to use. I spray painted them flat black as well as the screw heads. I really loved this extra touch on the frame.

Going back to those little plastic clips that are around the mirror holding it on. I have no picture, but just go take a look, you’ll see what I mean. I unscrewed one at a time and replaced each one with a thin, flat head screw. To give the mirror support with no bulk. Ya hear?

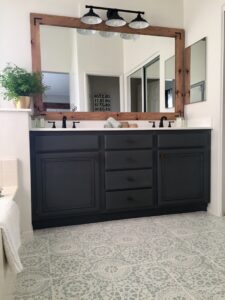
Once the stain and liquid nails was dry my hubby and I hauled it up to our bathroom, applied a good amount of the liquid nails all over the back side and stuck it right up against the mirror. Secure frame with tape until the glue dries so it will stay in place. And, done. What a glorious upgrade!    You can find this light fixture HEREDIY Mirror Frame: a Step by Step Tutorial

How to make your own DIY mirror frame, a tutorial featured by top US DIY blog Domestic Blonde: beforeDIY Mirror Frame: a Step by Step Tutorial

Short post. Fairly straight forward project. But we like things like that, right? Have fun creating your own DIY mirror frame. I’d love to see it!

PS: Loving this DIY mirror frame tutorial? Click here now to see how I created this stencil tile floor!

XOXO,

Kelly

You may also like

Comments

  1. Erica

    January 18, 2017 at 5:51 pm

    What color/paint did you use on your vanity?

    Reply
    • Kelly

      January 18, 2017 at 6:28 pm

      Hi Erica,
      I used Krylon chalky finish spray paint in Slate. Then put a polyurethane satin clear coat over the top. I actually need to write a post about this cabinet!

      Reply
  2. Ashley

    August 5, 2017 at 9:35 pm

    What did you do about that metal strip at the bottom of the mirror? I have your same mirror and want to frame it in but I don’t know how I will get the frame to lay flat with the metal strip along the bottom. And I definitely don’t want that showing. Thank you!

    Reply
    • Kelly

      August 6, 2017 at 3:11 pm

      Hi Ashley,

      I put the frame right on top of it. When you put a good amount of liquid nails on the back of the frame, it will adhere right on to the little metal strip that is on the edge of the mirror.

      Reply
      • Ashley

        August 6, 2017 at 4:54 pm

        Thanks for responding! And it affect the mirror laying flat?

        Reply
        • Kelly

          August 12, 2017 at 2:19 pm

          It is slightly raised on the bottom edge, but that isn’t noticeable at all. Only if you leaned over and looked down inside the frame. There may be a way to remove the metal, I’m just not sure how.

          Reply
  3. Heather

    October 26, 2017 at 7:41 pm

    Can you tell me about the type of wood you used for the frame?

    Reply
    • Kelly

      October 27, 2017 at 1:19 pm

      Hi!
      I just purchased 1 x 3” boards from Home Depot and cut them to the length I needed. They usually have an area in the store with different size boards, called common boards. I believe the one I got was pine ❤️

      Reply
  4. Megan

    August 29, 2018 at 9:16 am

    Hey there! What color are your walls?! There’s about 1 millions different whites and I’m loving The Whole look here.

    Reply
    • Kelly

      August 30, 2018 at 10:13 pm

      I used Benjamin Moore White Dove- it’s a warmer white and really pretty. If you want a real WHITE I love Benjamin Moore’s Oxford White. No undertones but also not stark white either. Good luck!

      Reply
  5. Flor

    December 2, 2018 at 10:05 pm

    Love your whole look here, my bathroom seems to be similar. I am gonna copy this mirror frame soon, does the 1×3 come out farther on the bottom than the counter’s little backsplash?
    I also had a question about the counters. Are yours cultured marble that you painted/finished for $25? Mine are and the side then connects to a tub with the same marble on the outside front of it, as well as the side splash around the tub and then the whole separate shower is the same marble -which is yellowish in my house. So it’s all touching/connected. Can that stuff you painted the counters with hold up in a shower? Did you do other areas in your bathroom with it or just your counters?

    Thanks!

    Reply
    • Kelly

      December 4, 2018 at 1:10 pm

      Thank you so much!
      I believe the frame is slightly thicker than the little backsplash. The material of my countertop was not marble. The product I used is made for tub and tile, so it is supposed to hold up in a shower. I can’t recommend that because I don’t have experience in the shower- I only painted my countertop. You could even consider my tutorial on my stenciled bathroom floor and do that for other areas in your bathroom. The paint I used on my floor was an outdoor porch and patio and has held up really well. It also doesn’t have a glossy finish, so you wouldn’t create a slippery shower floor like the countertop product would. Just a thought!!

      Reply
      • Flor

        December 9, 2018 at 9:53 pm

        Thanks for your reply! I appreciate the tip!

        Reply
  6. Anna

    December 30, 2018 at 12:24 pm

    Hello! Can you tell me what you used to spruce up your cabinet?

    Reply
    • Kelly

      January 1, 2019 at 7:33 pm

      Here is my link to update your cabinet!
      https://domesticblonde.com/2017/08/22/update-bathroom-cabinet-this-is-how-to-refinish-yours-for-professional-results/

      Reply
  7. Meredith

    February 11, 2019 at 10:03 am

    Can you share the wood stain (brand and color) you used on the frame after applying the wood conditioner?

    Reply
    • Meredith

      February 11, 2019 at 10:05 am

      Sorry, just saw it in the item list…Minwax Special Walnut. Thank you!

      Reply
      • Kelly

        February 12, 2019 at 3:17 pm

        Ok glad you found it!!

        Reply

Leave a Reply Cancel reply

Your email address will not be published. Required fields are marked *

Recipe Rating


Search The Blog

Hey, I’m Kelly!

Hey, I’m Kelly!

I love DIY Home Improvement, and I'm sharing all of my projects with you! Not only that, but my favorite products, family life, and more! xoxo

  • Email
  • Facebook
  • Instagram
  • Pinterest

Pinterest

Follow @domesticblonde

Maybe the update wasn’t necessary? You tell me. Maybe the update wasn’t necessary? You tell me. I do sort of miss the adorable little curtains that were above the mirror 😝
You can find these bathroom items in my LTK or Amazon store, linked in my bio ❤️

#interiordesign #inter #bathroomdesign #bathroomremodel #bathroomdecor #bathroomrenovation #wallpaper #bathroomwallpaper #homedecor #home #neutraldecor #homeinterior #founditonamazon #hometour #powderroom
I’ve gotten lots of questions about wallpaper an I’ve gotten lots of questions about wallpaper and what is safe while installing. I’d say all of these worries are myths, and just hang the wallpaper!
It’s going to turn out great 👏

#homedecor #wallpaperdesign #wallpaperinspo #wallpaper #moderntraditional #howwedwell #homedesign #homerenovation #bathroomdesign #bathroomdecor #interiordesign #decor #diyprojects
Life changer? Yup, I think so… the kids can inde Life changer? Yup, I think so… the kids can independently get things from kitchen without asking for help. 👏 Would this make your life easier too?

Find it linked in my LTK and Amazon Store.
https://liketk.it/41pKd

#interiordesign #interior #designinspo #designinspiration #organization #kitchendesign #kitchenorganization #homedecor #homedesign #kitchenremodel #kitchenrenovation #kitchen
Please tell me I’m not the only one who hates th Please tell me I’m not the only one who hates that glare from the glass on framed art? When it’s possible to use this hack, I do it. Maybe I’m OCD… but it makes me happy. 

#interior #home #interiordesign #diyhomedecor #homedecor #homedesign #walldecor #homeinspiration #kitchendecor #style #interiordecor #kitchen #wallart
When I see something that I want to change, I have When I see something that I want to change, I have to change it. Even if it’s something I haven’t tried before. Where there’s a will, there’s a way. And I always love a before and after 💫 

#homeimprovement #homedecor #homedesign #interior #demo #remodeling #remodel #kitchen #diyhomedecor #tools #diy #designinspiration #kitchendesign #interiordesign #homeupdates
This kitchen was one of the most challenging proje This kitchen was one of the most challenging projects I’ve taken on… it wore me down! Long days working on each of the different parts of it. From putting together all of the cabinets,
to designing and piecing together the island. Truly a labor of love (that I thought I may not survive for a while there) 😆 But worth it, now that my family can live here and enjoy it everyday. Will I ever build a million cabinets again, you ask? Not likely! 

https://liketk.it/3ZE9M

#design #kitchendesign #kitchenremodel #diykitchen #decor #kitchendecor #interior #interiordesign #homeprojects #apartmenttherapy #home #kitchenisland #kitchensofinstagram
Hanging photos the FAST way. I used to get frustra Hanging photos the FAST way. I used to get frustrated when there were multiple hooks behind my frame that I had to line up. This method makes it cake 👌🏼 

https://liketk.it/3ZAxH

#homehacks #homedecor #design #homerenovation #homestyling #apartmenttherapy #decor #decorcrushing #diyhomeprojects #diy #interiordecor #interiordesign #kitchenrenovation #walldecor #wallart #kitchendecor #homedesign #doityourself #home
Styling open shelves in the kitchen. I love open s Styling open shelves in the kitchen. I love open shelves ❤️ they add so much character and warmth in the room.
Find all of these items in my ltk, or comment and I can send you the links ❤️

https://ltk.app.link/Y4Ns7cssAwb

#decor #openshelving #openshelvingkitchen #interiordesign #kitchendecor #kitchendesign #homedecor #interior #homeinterior #design #home

Copyright © 2023 · Theme by Blog Pixie

We are using cookies to give you the best experience on our website.

You can find out more about which cookies we are using or switch them off in settings.

Domestic Blonde
Powered by  GDPR Cookie Compliance
Privacy Overview

This website uses cookies so that we can provide you with the best user experience possible. Cookie information is stored in your browser and performs functions such as recognising you when you return to our website and helping our team to understand which sections of the website you find most interesting and useful.

Strictly Necessary Cookies

Strictly Necessary Cookie should be enabled at all times so that we can save your preferences for cookie settings.

If you disable this cookie, we will not be able to save your preferences. This means that every time you visit this website you will need to enable or disable cookies again.