
Hiii! I have been in some serious Mom mode lately and slacking on my blog posts! That’s life I guess- Just flying by so fast! Like, oh dang, I completely forgot that I had other things in my life that I also love- besides my little offspring. It feels so good to be typing away on here again.
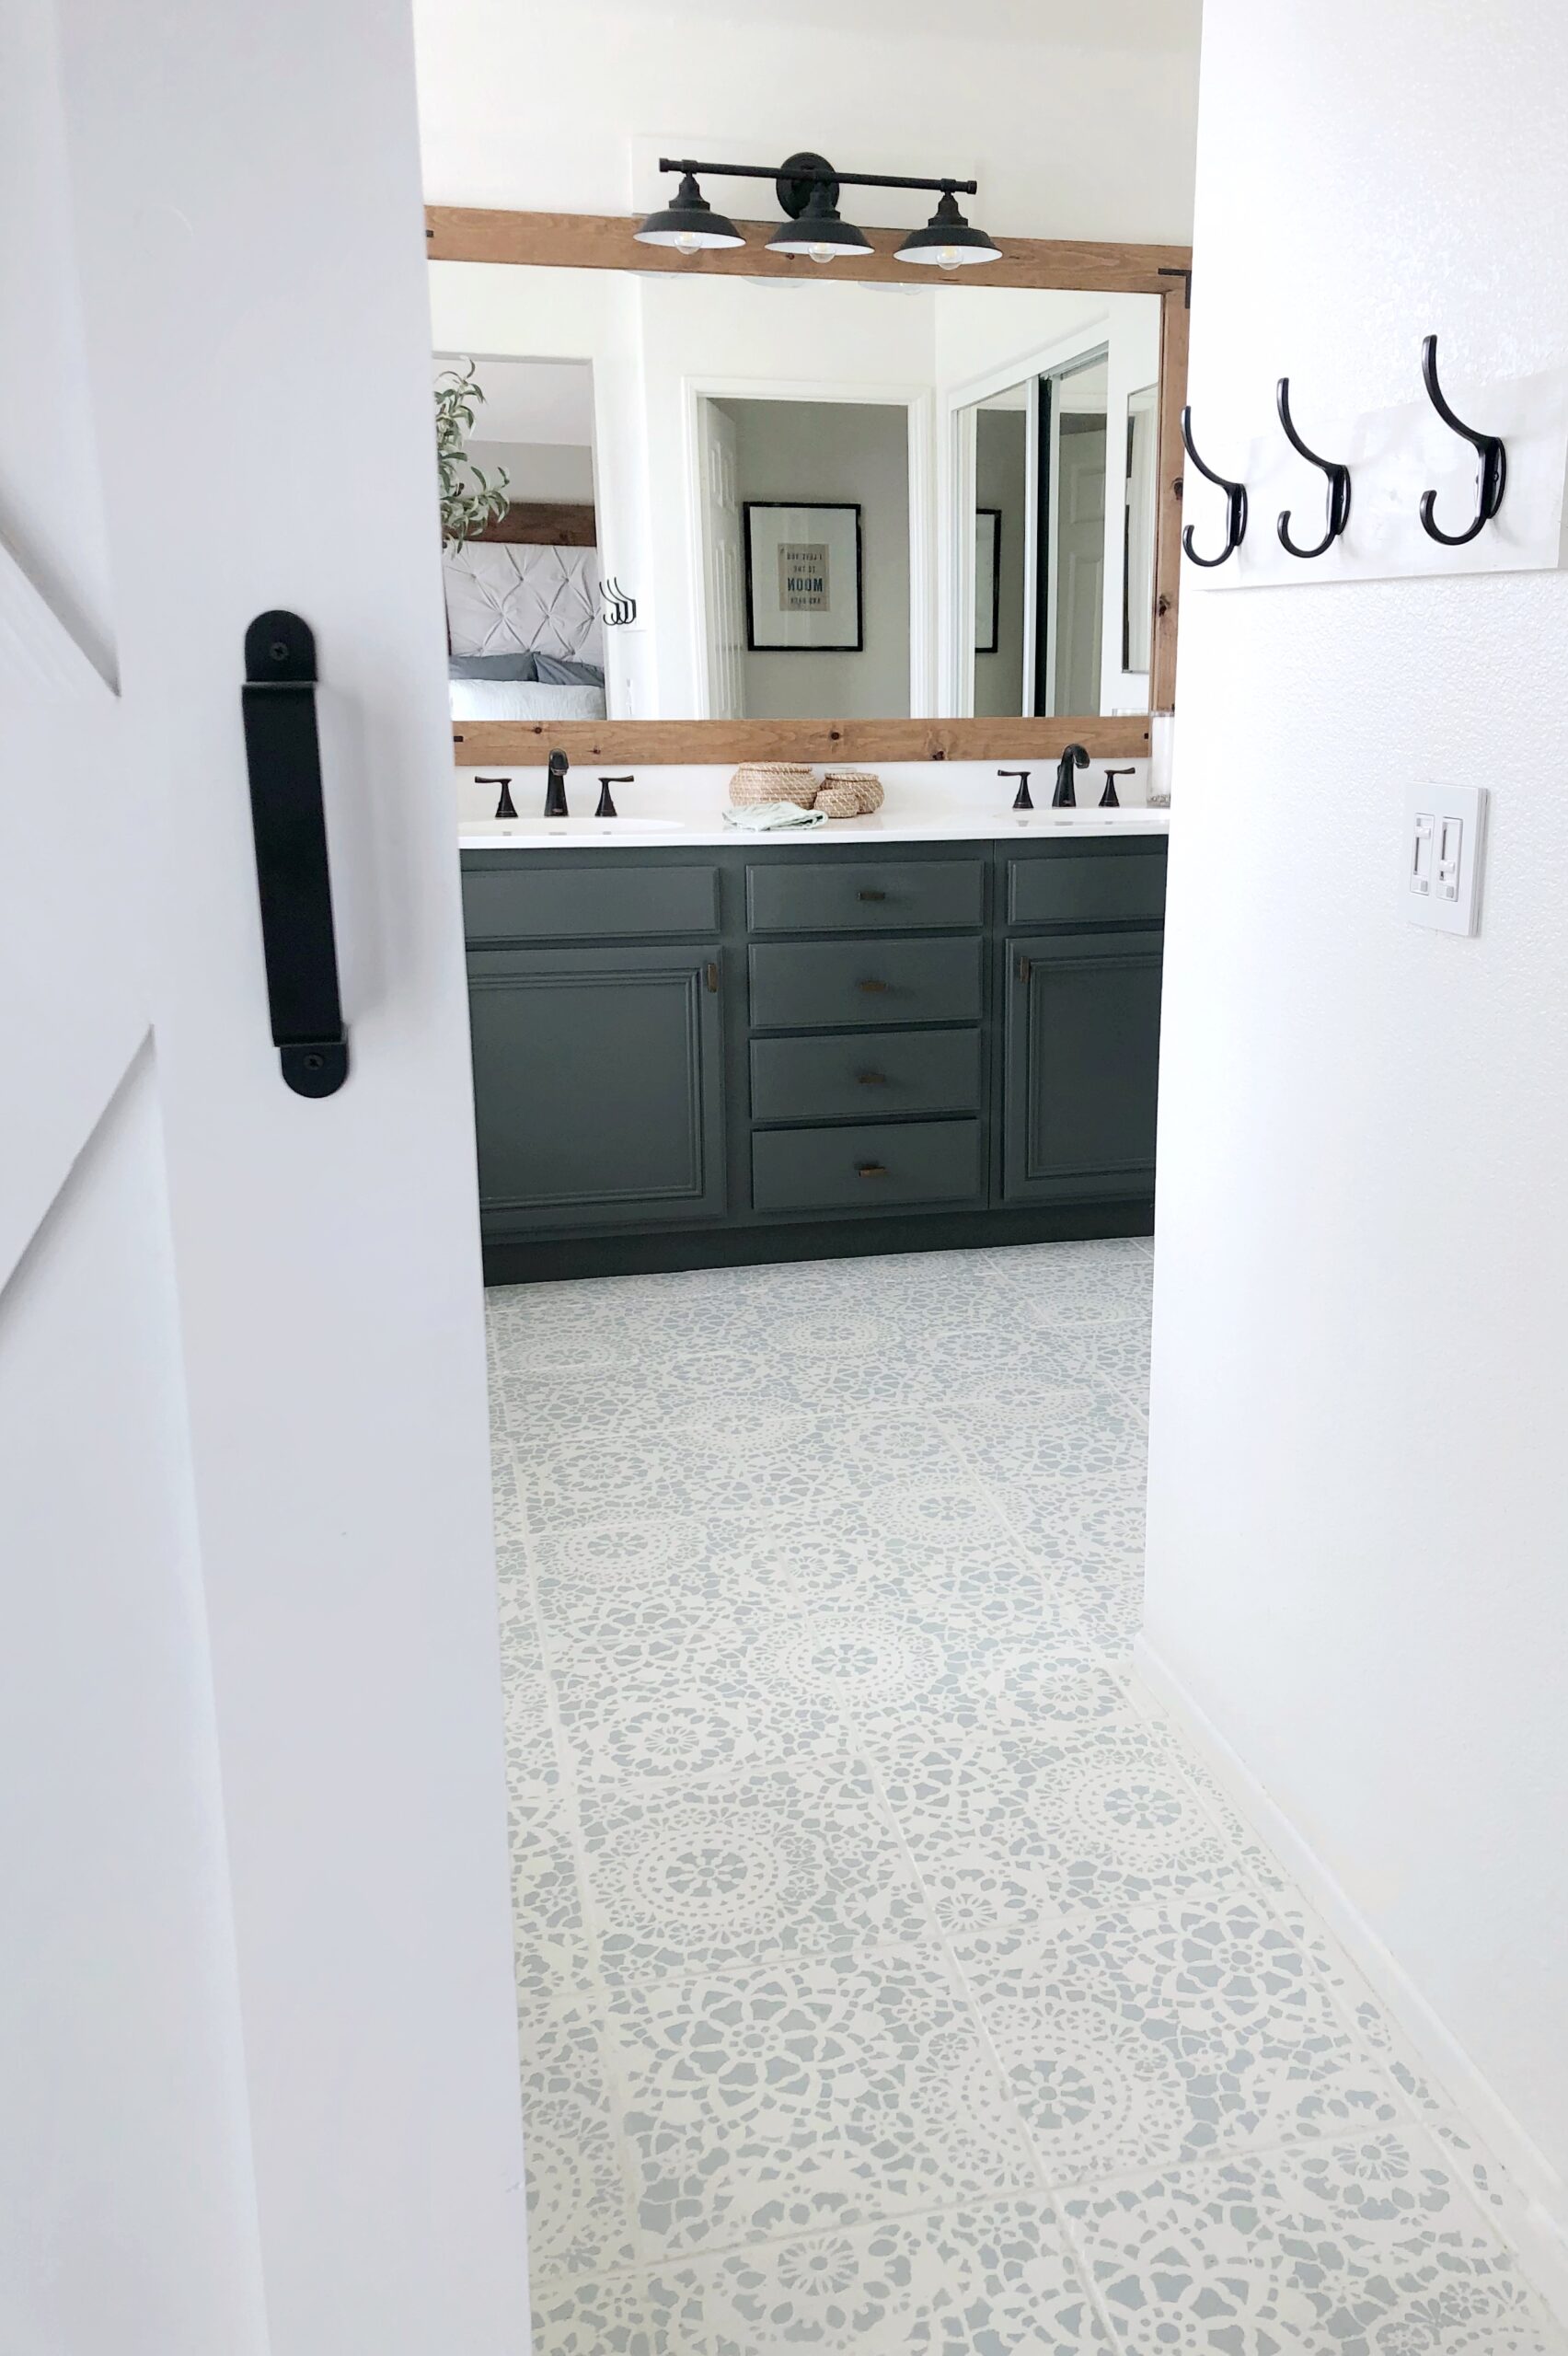
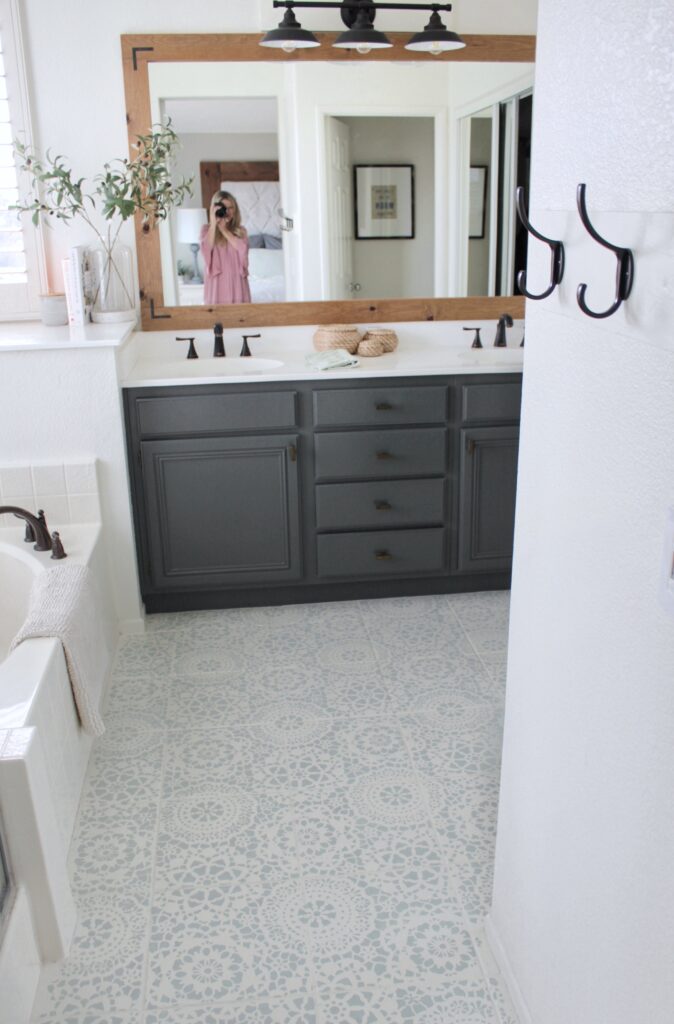
So often I get questions about my Master Bathroom and the tile floor that I stenciled. How is it holding up? Are you happy with your product choices? Paint colors, etc… I wanted to give you an update on my pretty, stencil tile floor! She’s doing awesome, she has a boyfriend now. JK. Honestly though, I still love our stencil tile floor and am super happy with my product choices. (Here is the tutorial, if you are looking for that specifically)
This post contains affiliate links
I love my Zinsser Primer. I use it for every project needing primer and it covers beautifully. This was the first coat I laid down on my floor- just one coat and that was sufficient for me. I had a reader at one point mention that they thought I should have sanded the floor before laying primer to ensure the primer stuck. I absolutely agree! I have only had two tiny little chips in the paint so far, and one was from a big metal pipe dropping down on it…but if you plan to do this in a higher traffic area- or you just want some extra insurance that this wont chip, then do it! I would use a very low grit sandpaper (maybe 80) to get it good and rough before painting on your primer. Why not?? I love to hear suggestions from people, we can all improve from that!
The paint I chose was Behr Porch and Patio Paint. Made for high traffic areas, and also areas with moisture. Perfect for a bathroom. I color matched the paint to Benjamin Moore’s -White Dove and also to Sherwin Williams’-Rainwashed. I thought this color would have more of a green look to it, but it is definitely a blue- so if you’re looking for green tones, choose something different. I also painted my entire bathroom in White Dove to ensure the white undertones matched. (I swear, white paint is the hardest color to choose. But that’s a whooooooole other blog post) White Dove is on the warmer side, so if you’d like something just all around WHITE, not warm or cool- I love Benjamin Moore’s Oxford White (I used this on my kitchen cabinets). You cannot go wrong with that color.
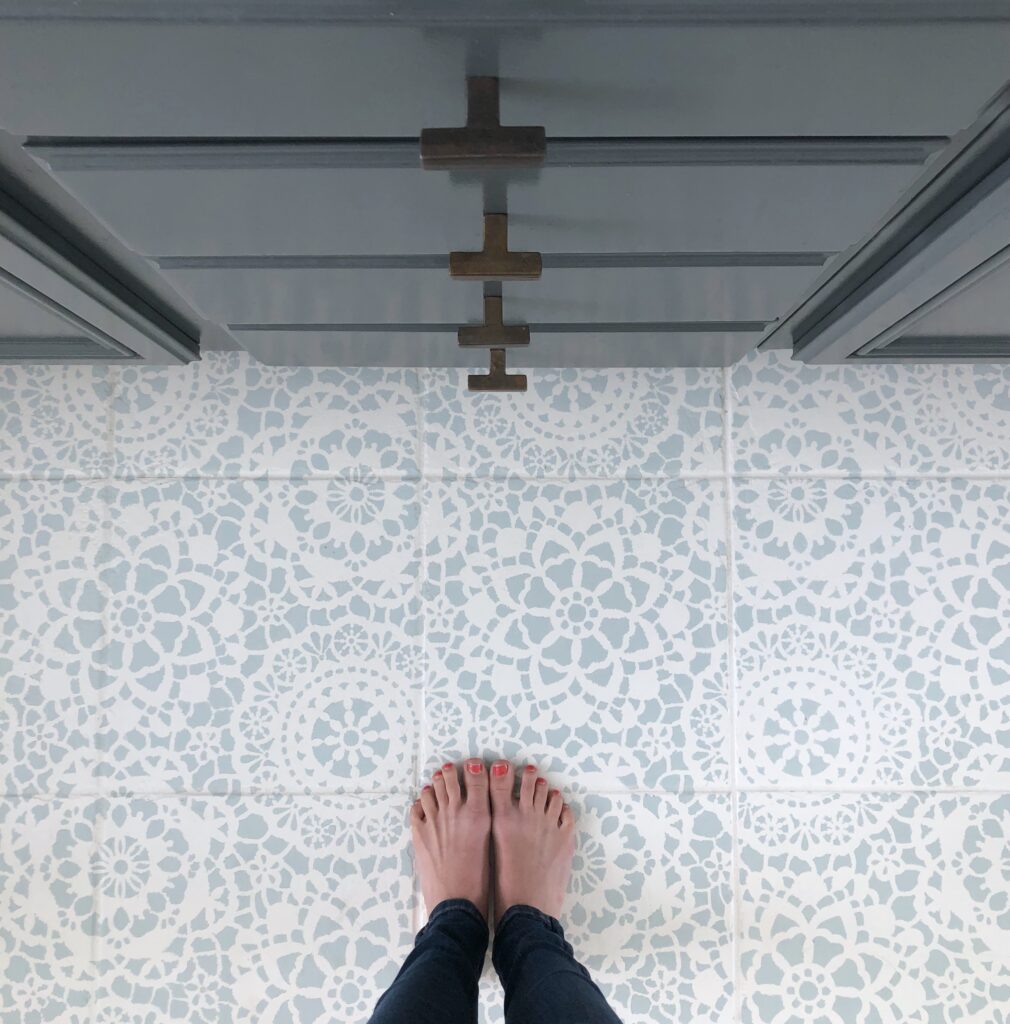
The stencil I chose is a gorgeous all-over pattern. LOVE LOVE! Do NOT try to save money on your stencil. You need a nice, thick stencil for a large project like this. If you purchase a cheap stencil, it will be thin and you’ll end up with a mess, trying to keep the paint where you want it to go. THIS is the stencil I used. Royal Design has great stencils and a ton of choices. I personally recommend using an all-over pattern like this. DO it! It’s super forgiving, covers over any size/shape of tile so well… Miss bossy pants over here. But, just do what I say OK. Just kidding.. but do it.

Now, there is ONE thing I wish I would have done differently….! I wish I would have used a stencil adhesive spray. Like I said, the all-over patterns are very forgiving so it’s hardly noticeable- but, I believe the paint job would have been a little cleaner and lines sharper if I had used one. HERE is a spray you could use- just a light spray on the back side before you place the stencil down each time.
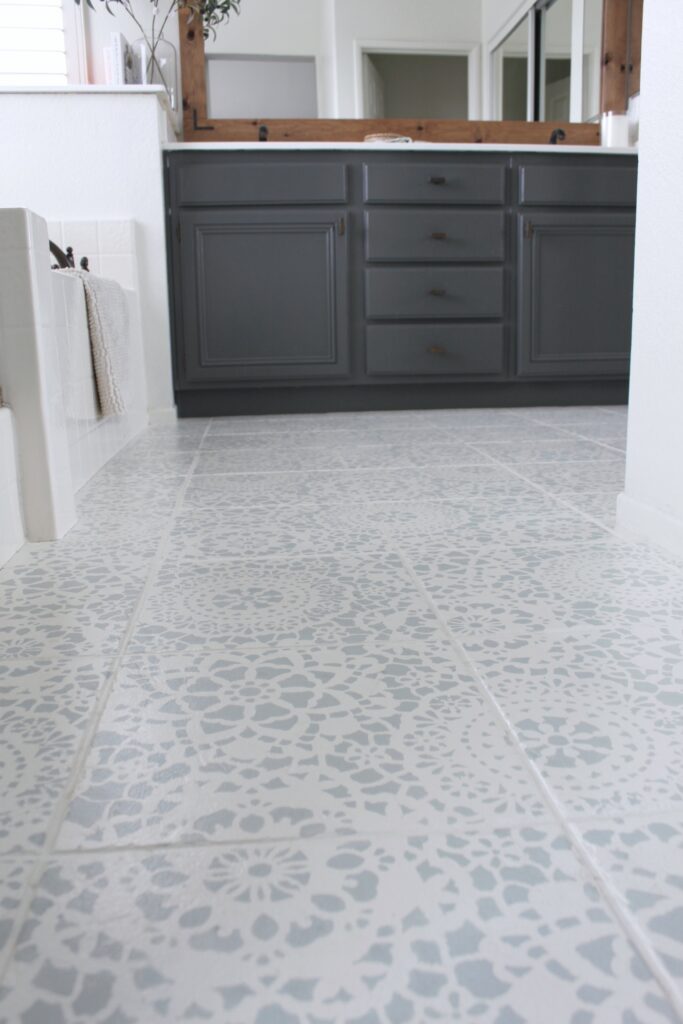
Overall, I am still loving my stencil tile floor and if you’re on the fence about trying it DO IT! It’s going to turn out amazing and you will impress alllll your friends.
Head over to my tutorial to paint floor tiles for all the specifics and the step-by-step, click here!
Shop all Products in my Bathroom below!

Happy (and confident) Stenciling!
XOXO,

Your flooring looks absolutely gorgeous! 🙂 I love the stenciling and colors especially. I’m glad that you are able to enjoy it now.
Thank you so much- I really appreciate it! XOXO
OMG! I love everything about your space. I just got some of those IKEA seagrass baskets too! Seriously looking forward to using those in my decor ????????✨
Thank you, Amanda! Yes, you have to love Ikea for easy decor items XOXO
I can’t believe you stenciled that! It looks not only beautiful, it is also absolutely immaculate! Fantastic work, you can really be proud of it!!
I love the entire space. The details of the flooring is a great contrast.
Hi!! So your whole bathroom has been the main inspiration for both my master and guest bathrooms! I used the same porch and patio paint and I LOVE IT- totally using on all the tiled floors in my house I hate at the moment 🙂 . I only have one question- did you use a semi-gloss polycrylic protectant onto of the low luster paint? Or did you leave it the matte finish? It’s hard to tell in photos.
-Charlotte
That’s so nice, thank you! I’m so happy you love your results! I did not use a top coat on my floor- I really liked the matte feel. If you want some more protection you could absolutely do that, especially for higher traffic areas ❤️❤️
Love everything about this! Do you have any color palette suggestions for a bathroom with no natural light?
The same for bathrooms with no natural light! Light and airy colors will help to make your room feel lighter too ❤️❤️ Whites and cooler colors
I love, Love, LOVE this bathroom! I am starting to remodel my master bath soon and this is my inspiration. Quick question, what color are the baseboards and trim?
Thank you so much! Your are too sweet! All the white in the room is White Dove by Benjamin Moore. Even the white paint on the floor. Good luck!
Did you use a topcoat?
I didn’t! I wanted a matte surface. I am sure there is a way to add one though- I am just not the person to ask since I have no recommendations. Good luck!!
No I didn’t ❤️
I love loved this when I saw it and decided to do it to my master bath diy!! I did a darker grey on top of white more more of a contrast and I am totally in love with my floors. I decided to stick with the matte finish just like you. I enjoy that look more! I am wondering if you have any suggestions for cleaning the floor? I would be so upset if I messed up and used too harsh of a cleaner!!
Hi Becca!
I am so happy that you love your flooring! Sounds so pretty with the darker gray! I normally just use a mild soap and hot water to clean my floors.
I love everything about this…do you think this would work well in high traffic area like kitchen/ half bath/ laundry room since mine is all connected? Also what do you use to clean the floor with?
I am not 100% sure how it would do in a high traffic area like that. Our master bath isn’t near as trampled on as our kitchen! If you want a more temporary fix, then this would be perfect! I am so happy with it in my bathroom, but I just can’t guarantee it in a kitchen
Hi! I love all your posts and this one is the inspiration behind my bathroom Reno. Question- Our trim and everything was painted before we moved in. If I am painting our bathroom floor white, should I get the Behr paint matched to what our trim is? That seems to make the most sense to me, but just thought I would get a second opinion, then do a grey on top for stencil? I loved hearing you didn’t paint a top coat! Thank you for all your detailed posts! It really helps someone like me who is fairly new to the DIY scene!
Hi there, thank you so much!
I would match the wall paint to the floor so the whites don’t clash with each other. If you don’t like the wall color, just paint the whole room first! That’s what I did- and then used the same white on the floor as well. Yes, then apply your stencil. Good luck!
Do you think this paint would work on a guest bathroom countertop as a temporary fix with a top coat on it?
This is what I did to my master bathroom countertop!https://domesticblonde.com/2016/12/09/the25countertop/ it’s a great fix!
What do you use to clean the floor?
Just mild soap and hot water!
Beautiful project. Do you remember the name of the stencil? When I click on the link you have, it goes into an error message. I really like the fact that it is not specific to a tile size but an all over design.
I really want to do this, however my tile is 18″x18″ I notice on the website they do not have the size I need. Is there away around it, I do have grout lines so I don’t want the design to be off. Is there another site that you know of that has the larger stencils?
My tiles didn’t match the size of the stencil either! That is what’s so nice about the continuous pattern, you won’t notice the grout lines- it should work with any size tile.
Did you paint your cabinets? If yes, the color is beautiful and exactly what I am looking for. Do you you mind sharing the color? Thank you.
Hi, I’d love to know the paint color for your cabinets. Would you mind sharing?
I love the style! It looks elegant