In my most recent blog post I showed you how to make my daughter’s pink DIY headboard, so I wanted to finish that off with the DIY twin platform bed frame I also made for her room. This project, just like the headboard is pretty straight forward, and you can easily make it in a weekend- Let’s do it!
DIY Platform Bed Frame Tutorial- Twin Size
Materials Needed for your DIY Twin Platform Bed Frame:
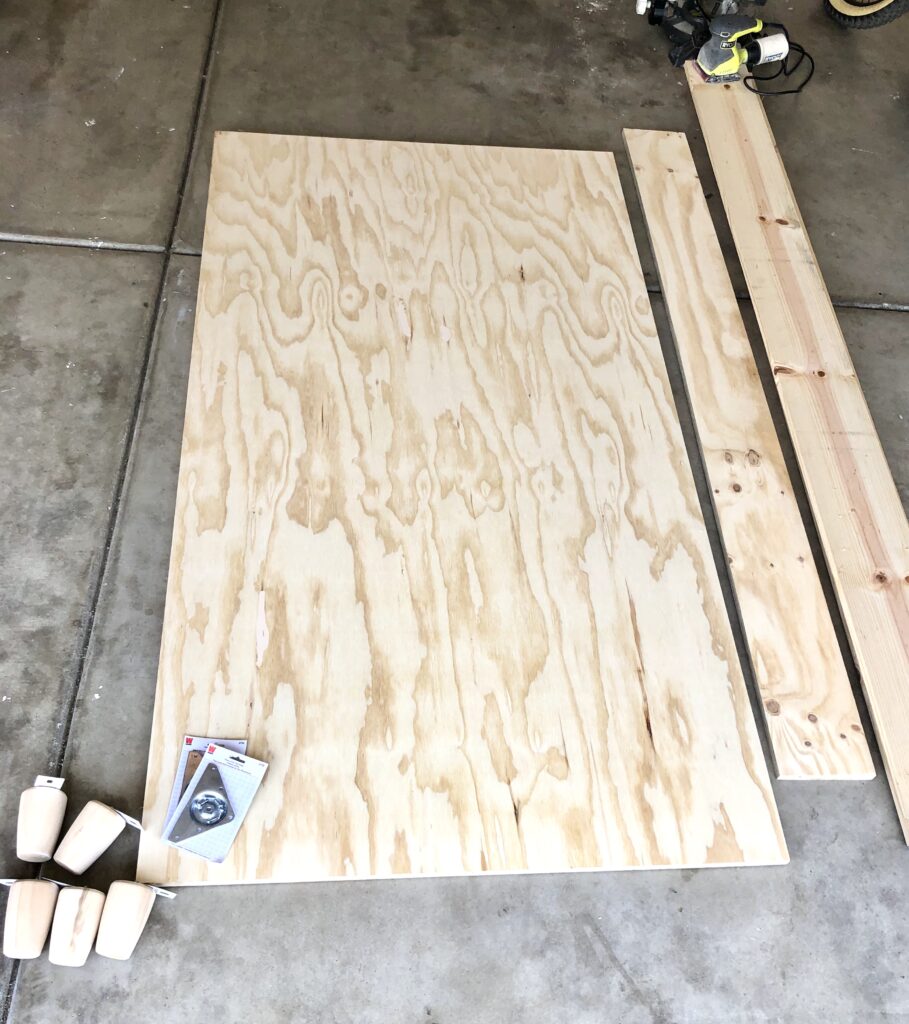
- 4′ x 8′ piece of plywood 3/4″ thick, cut to 41″ x 78″
- (3) 1″ x 8″x 8′ Pine boards
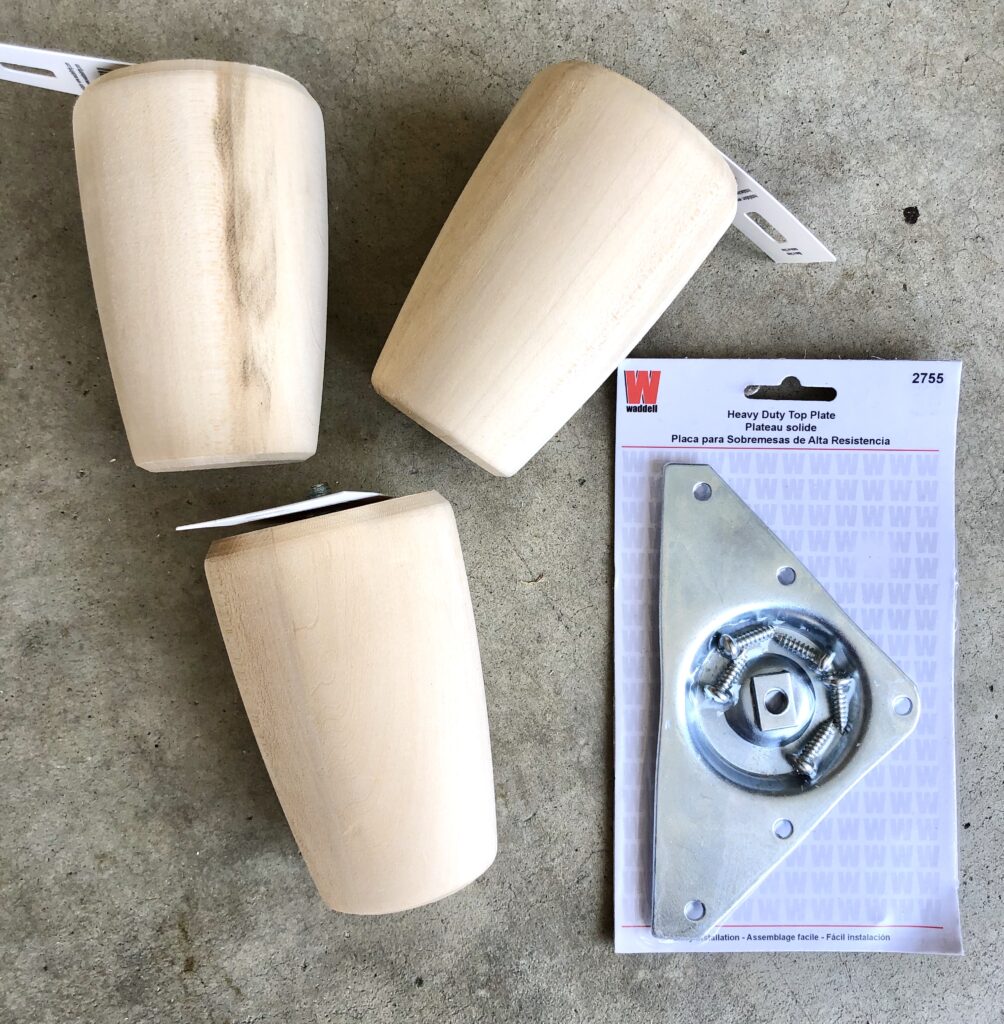
- (5) 4″ Pine Legs
- (5) Heavy Duty Top Plates
- Wood Screws
- Liquid Nails
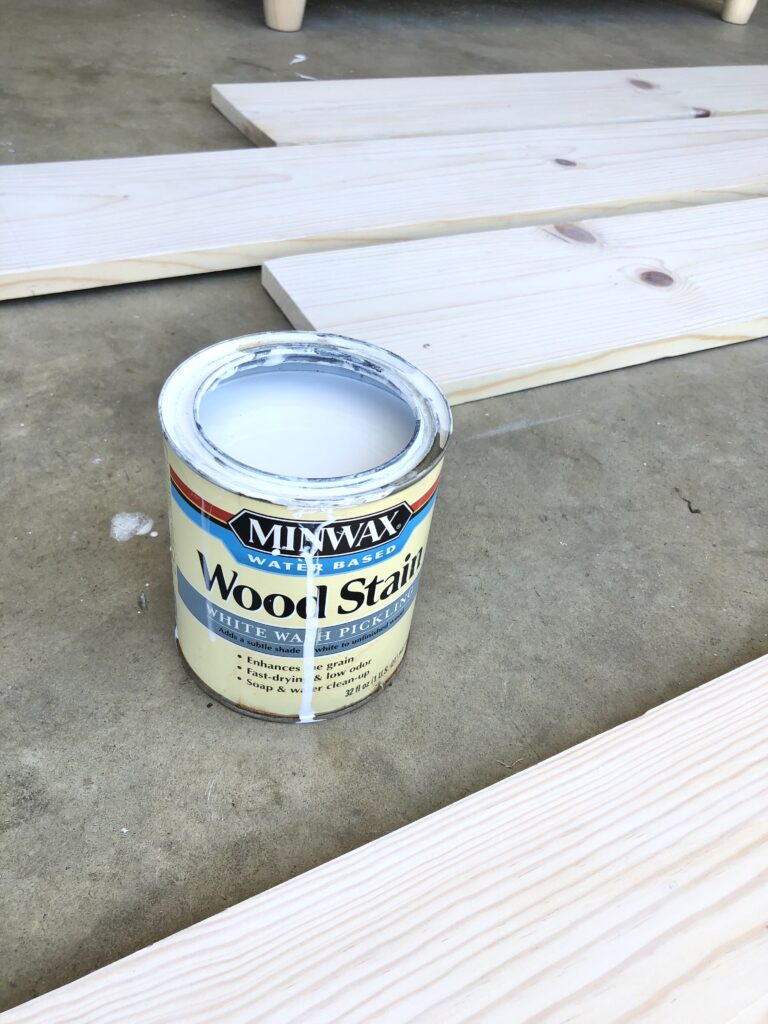
- Varathane Wood Stain- Sunbleached
- MinWax Wood Stain- Whitewash Pickling
This is the kind of project that makes me the most happy, because it’s quick and so satisfying when you’re done. I Searched high and low for a bed frame online for Tegan, and since I am (way) too picky about all things, I couldn’t find one that was just right. Either they were too high off the ground, looked cheap, cost too much, or reviews weren’t great. I just decided to make it myself and I’m so happy I did.
Grab a 4 x 8 piece of plywood
from the lumber section 3/4″ thick is what I chose, to be sure the sides of the frame would have enough to grip onto. Have the Home Depot guy cut it (or use your table saw) to 41″ x 78″. These dimensions give just a little room around the mattress to tuck your comforter in, if you ever wanted to, without it being too tight. (Always measure your mattress first to be sure this size works for you).
Pick up 3- 1×8″ pine boards, 8 ft long.
Cut to size. The two long sides should be about 79″ and the 2 end pieces 41″.
Lay plywood down and attach the legs of your bed frame.
Screw down the Heavy duty top plates in all four corners, and one in the center. Twist in the wood legs. I chose shorter legs because I like the look of the low-profile bed, and wanted something smaller for Tegan to get in and out of. Once you’re done, flip the bed over.
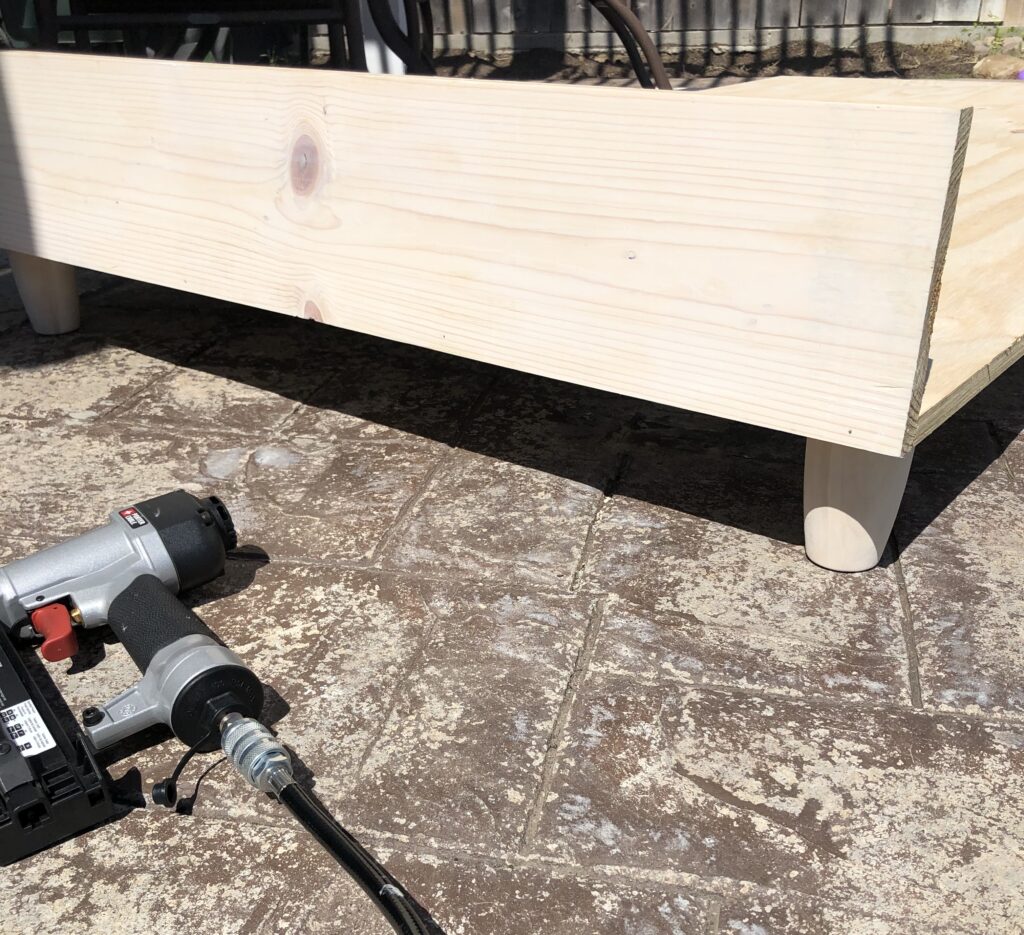
Attach all four sides
of the outer frame by first applying Liquid Nails (this stuff is so great, and strong!) Then, add a few finish nails to tack each board into place.
Add wood screws
to ends, and middle sections of the boards for support. Don’t skip this part. The nails wont give enough support on their own. You can also be much cooler than I am and use a tool called a Jig Pocket Hole drill, which screws in at an angel and virtually hides your screw! This is on my list of tools I want to go get!

Lightly sand the frame
and edges till nice and smooth, then stain with first the Sunbleached and follow with the Whitewash Pickling Stain.
You don’t have to use these random stain colors if you like something else! I wanted to keep a natural wood look to this frame. These two colors were just available in my garage and I tried them together and really liked it. It keeps the natural wood look, but somehow the combo of these two stains knocks out the yellow/gold that was showing in the pine. So… just stain your frame in something you love! Or leave it natural.
OMG you’re done with your DIY twin platform bed frame.
Wait what?? Wasn’t that simple? Such a quick project. When Tegan jumps on the bed (bad child) it is so solid and strong. I think this is a winning project for sure.
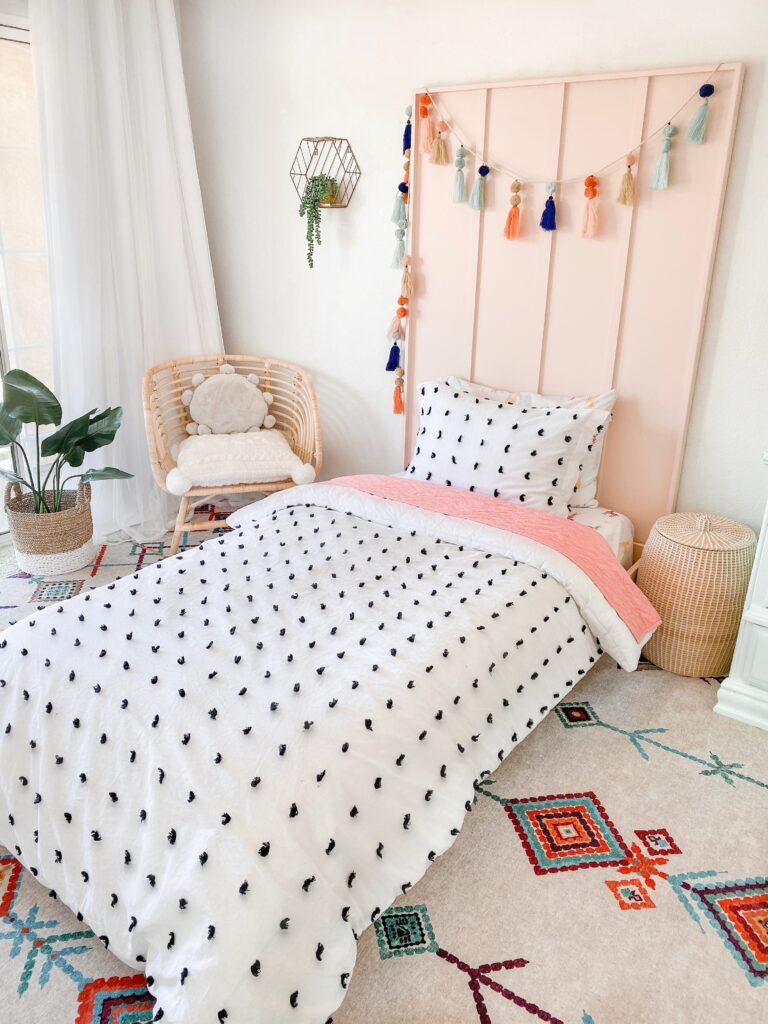
The bed frame fits snug right inside the headboard, and I like the mismatched look of the soft pink with the natural wood. Just so cute.

Have fun making this little DIY twin platform bed frame, don’t forget to send me the photos! I wanna see! You can also shop items in this room below–>>

XOXO,