
Have you ever found yourself searching the internet for a decor item and you just cannot find it? You have a certain look in mind and you know it’s got to be out there… but where?? I had this feeling when I was updating the kid’s playroom and wanted a basket style pendant light for the corner of the room. Everything I found was either not what I had in mind, or soooo expensive. I started thinking how insane it was that companies charge this much for basically a basket turned upside down. LIGHTBULB. I could easily make this myself- it would just be silly to pay for that. I began looking for an affordable basket instead… and remembered I had a basket from Target sitting in my closet for the last couple years and always wondered why I ever bought it. Lol. It was perfect, and somehow matched the other wood stain in the room- meant to be? Yep!
So I flipped that bad boy upside down and got to work. Really quick and easy to only do the basket and just add a light kit! If you wanted to add the macrame cord, it will give the light a special touch. I really love that part and feel it brought the entire look together. Let’s get started-
Items you’ll need for this Basket Light and Macrame Cord project:
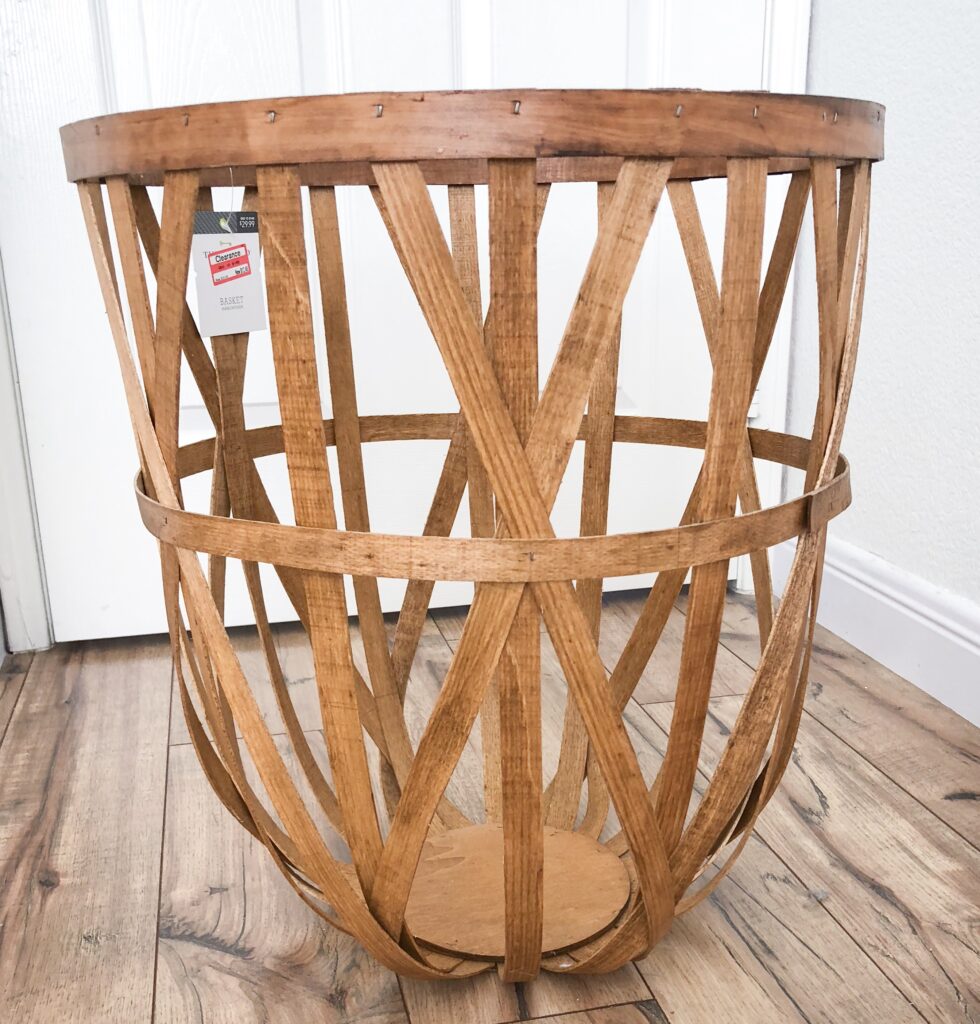
Basket of choice (the wider the weave, the more light will get through into the room)
Once you choose your basket, turn it upside down and drill a hole with your 1.5″ Spade drill bit in the center of the bottom panel. A solid base works best for creating a clean hole. My basket had a thin wooden base, so cutting a hole in the bottom was very simple. You can still do this with a woven bottom, but you may need to clean the opening with scissors to get all the frayed edges. No one will ever see that, so it’s ok!
When you were a kid, did you go to camp and make your bestie a friendship bracelet? This is the SAME exact thing! I was looking at macrame wrapped light cords and thought- I am way to lazy at this moment to figure out a detailed knotting technique, but I do know how to make a mean friendship bracelet. Lol. So I got myself some macrame rope, and got to work. This is so simple!
Now that your basket is already done (woo hoo), set it aside. Attach your light cord up on a wall so you can easily work with it. I just used a piece of duct tape and stuck it right to the wall. Tie a good knot at the very top of the cord, up against the base of the light. Then you will start your friendship bracelet style knotting. I’m sure this style must have some sort of real name, but that’s what I’m calling it. So, if you want to let me know the correct title- by all means, comment below!
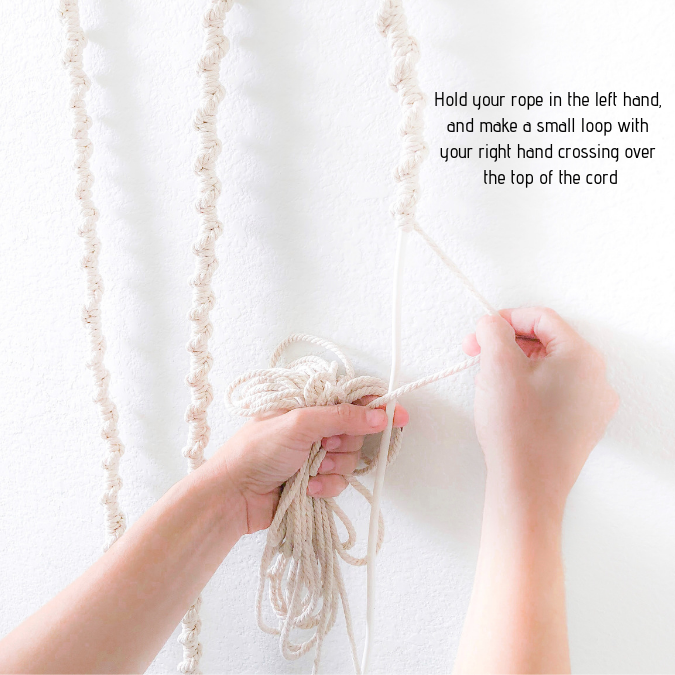
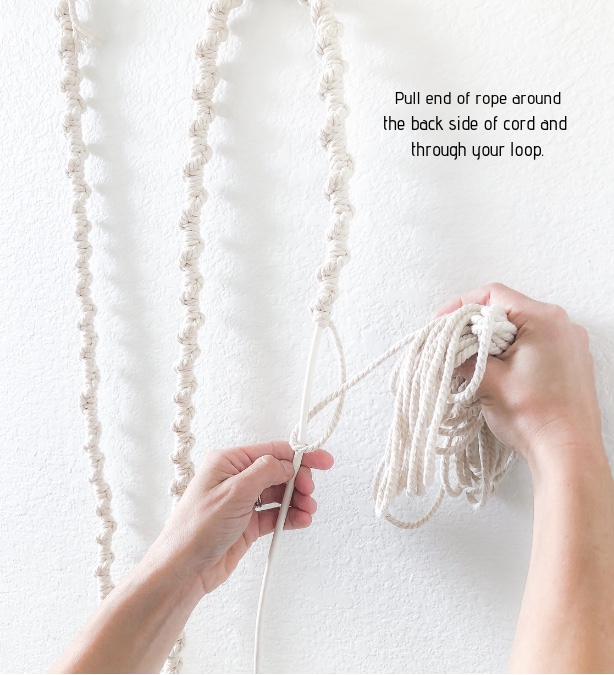
Follow these 3 steps over and over to fully cover your macrame cord.
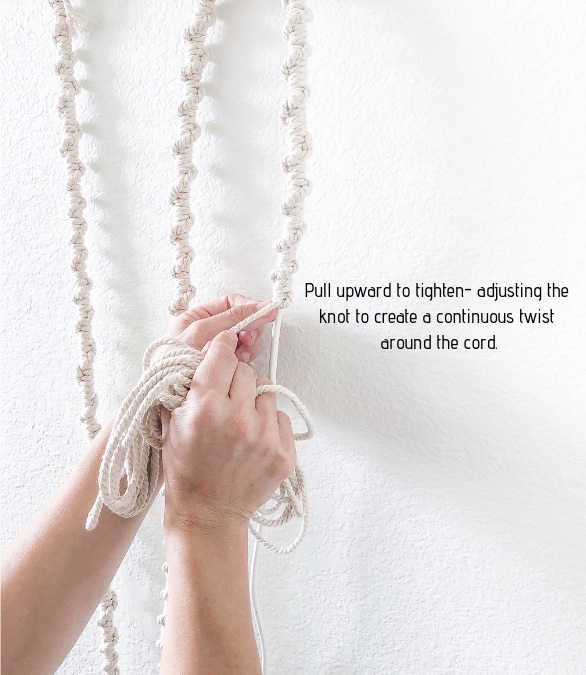
Once you reach the outlet, make another knot at the end. That’s it! You’re done! It does take a little time to complete the macrame cord, but for me it was very therapeutic. Do it while watching TV or watching the kids play.. or have your husband feed you grapes while you wrap your macrame cord. Whatever you like.
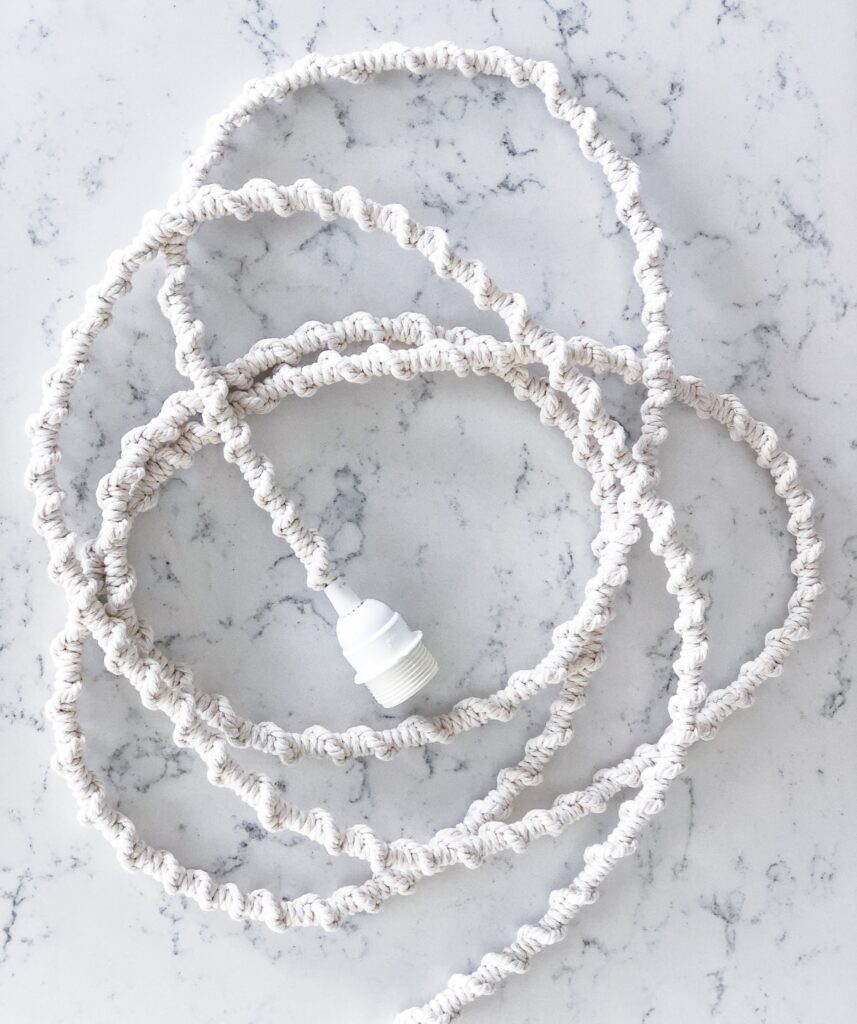
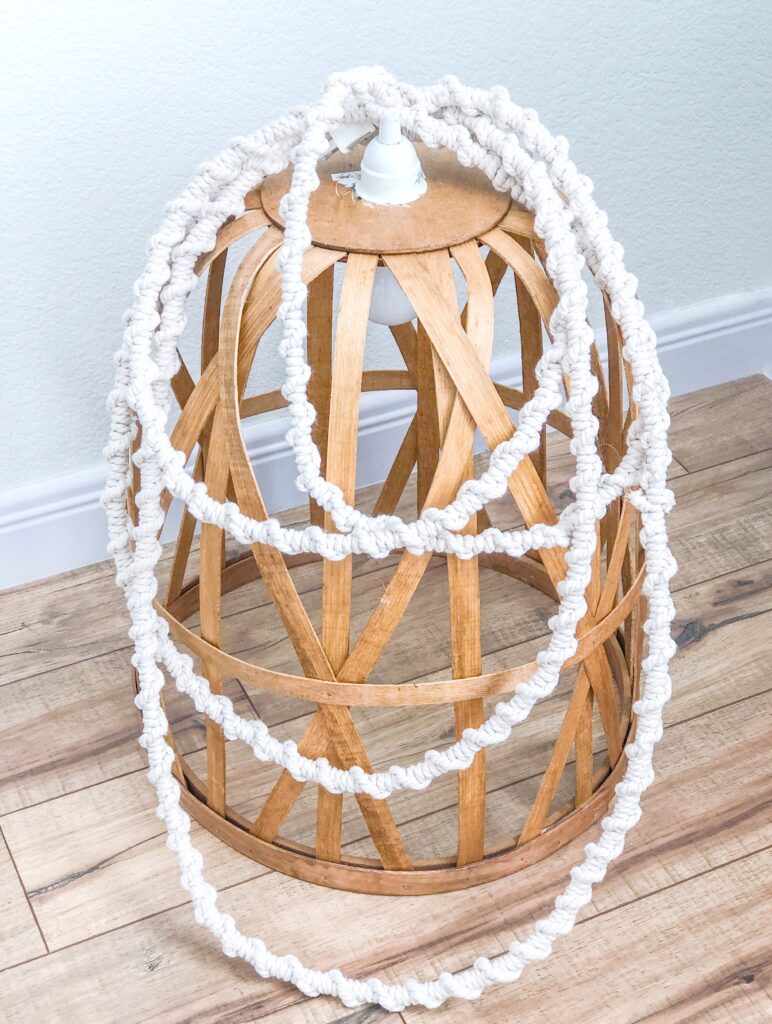
Unscrew the end piece to the light and insert the top into the hole you created in your basket. Screw in the other end and you are ready to hang. This project can be done in so many styles and ways. There are different color macrame ropes and a different basket style would result in a totally different look! I will have to do this again in another room, just to switch things up.

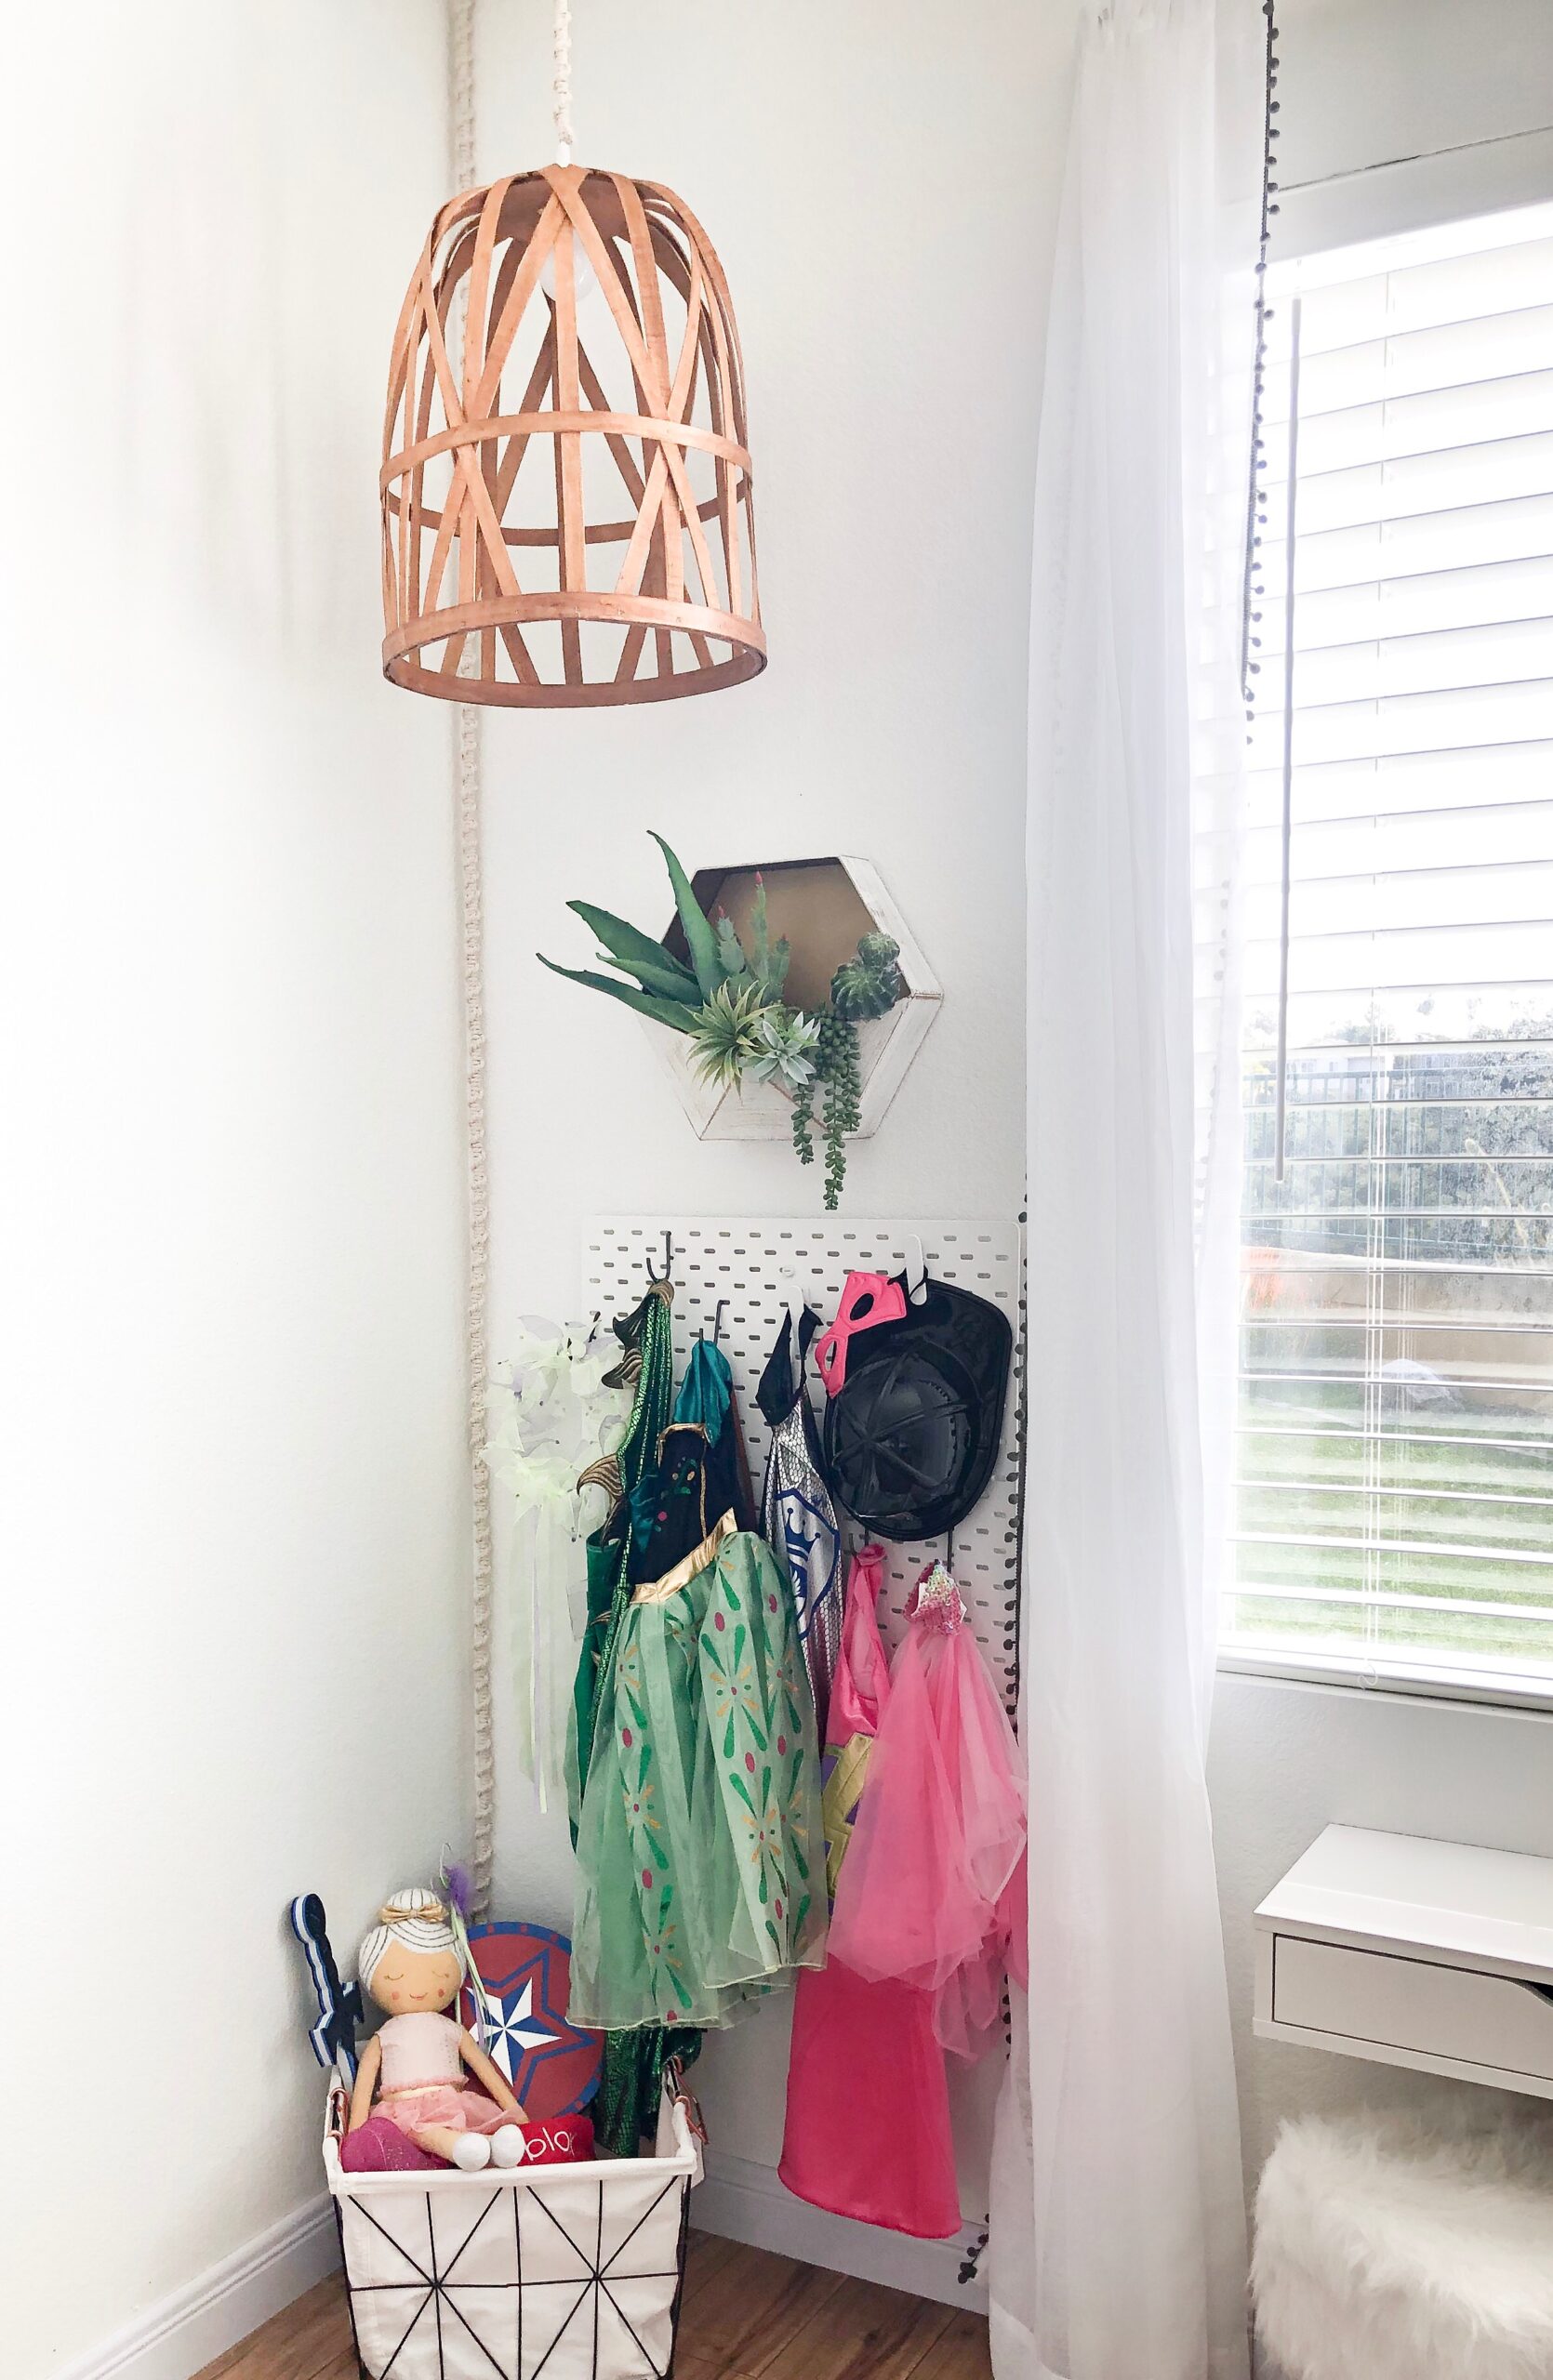
It’s the perfect little addition to this fun space for the kids. To see the entire playroom reveal click HERE. You can shop items from this post below!

XO,

Oh my, that cord just looks so beautiful! I never knew how to make that before, and I already have a lamp in mind that would use this look. It is sooo much better than having the bare cord. And such a great use of the basket, a happy idea!
That’s so nice, thank you!