
Our front room has always been a mismatch of different furniture. I never knew what I wanted to do with it, and to be honest I still don’t really know. The ceilings are around 20 feet high and it’s a little separated from the rest of the house, so it just feels like a daunting task at times to fill the space. We finally found the couch we love and have decided to make the room more livable for our family. So we won’t just avoid the room! Next step, was a coffee table.
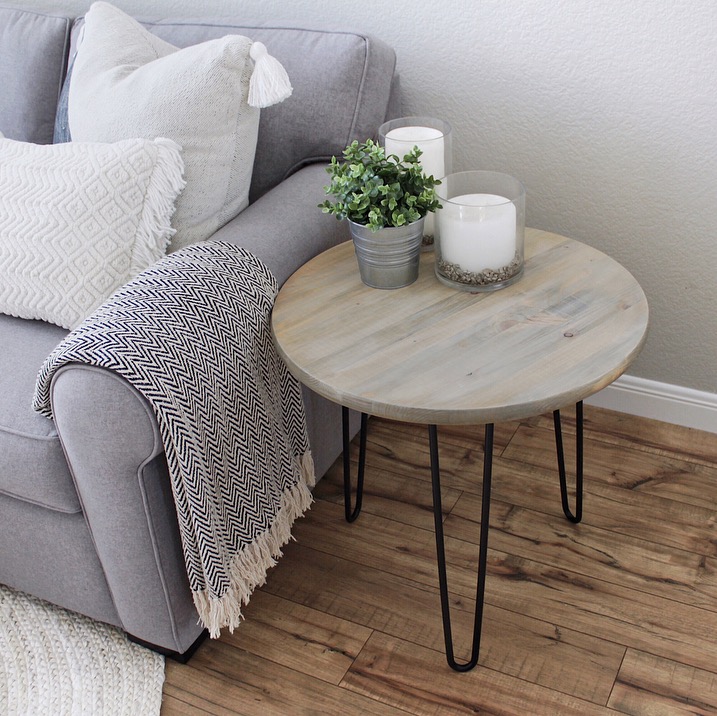
I looked all over for a table I thought would work, but I didn’t want anything too bulky, and I wanted it to blend well with the finish of the wood on our chandelier. There was really no way around this one. It had to be made. I remember one-day walking around Lowes (I hang out there a lot. And Home depot. Ha) I saw these round circular pieces of wood. They immediately made me think of a table top, but I had no use for it at the time. I thought this was perfect now, so I went back to check them out. I purchased the 24” round circle, and thought it would work. After making the entire table, I set it down in the living room and instantly said “Nope. Too small, going back to get a bigger one.” So I went and purchased a 36” size and made another table! I used the initial table for an end-table instead. LOL. I just may drive my husband completely crazy one day. But hey, they were both put to use, so it’s all good!
Hairpin Tables Tutorial:
This project is SO SIMPLE!! Here is what you will need to make your own hairpin tables:
(affiliate links are included)
-
- Round laminated pine board in 18”, 24”, or 36” (36” for a coffee table and 18 or 24” for end table)
- Hairpin Legs (Satin Black)
(16″ for coffee table, 20-22″ for end table)
- Power Drill
- Screws
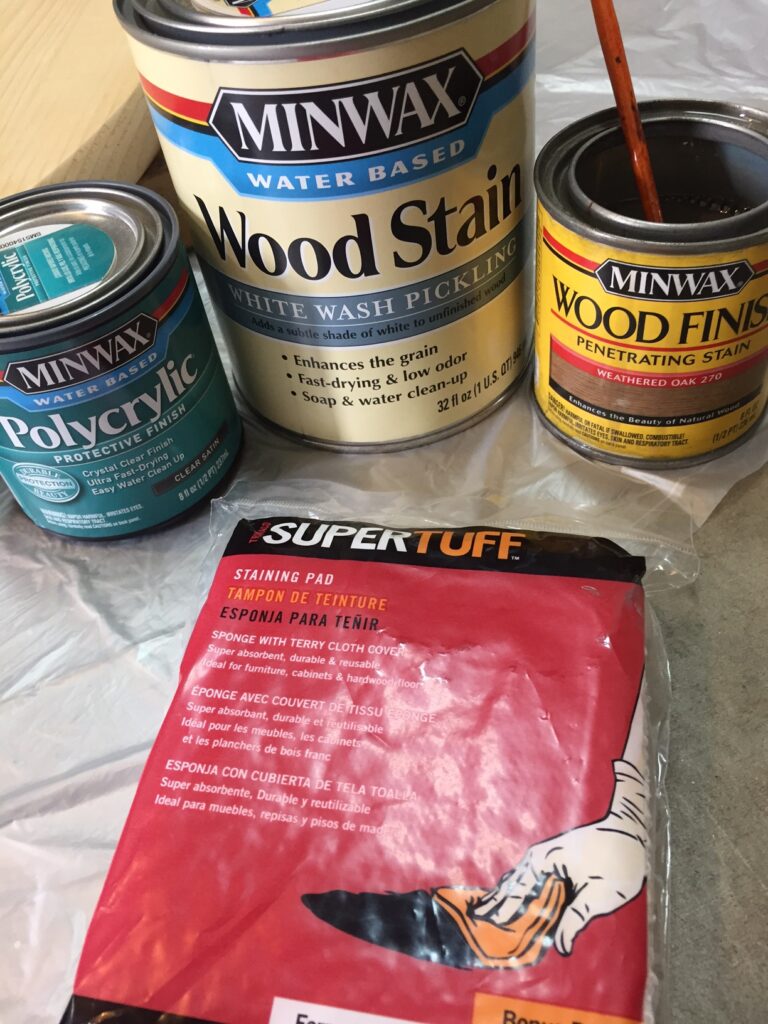
- Weathered Oak stain by Minwax
- White wash pickling stain by Minwax
- Water based, clear polyurethane top coat in satin or semi-gloss
- Sandpaper with 200 grit or higher
- Microfiber cloth or tack cloth for saw dust
- Lint-free cloth for staining
Ok, let’s get started.
I am super fancy, so I’m pretty sure you won’t be able to mimic my work-space or materials. HA!! I joke! I am SO not fancy, actually I am the opposite and my work area is always a mess. In my videos, you will notice the paint splattered garage floor…. I get busted a lot for my messes.
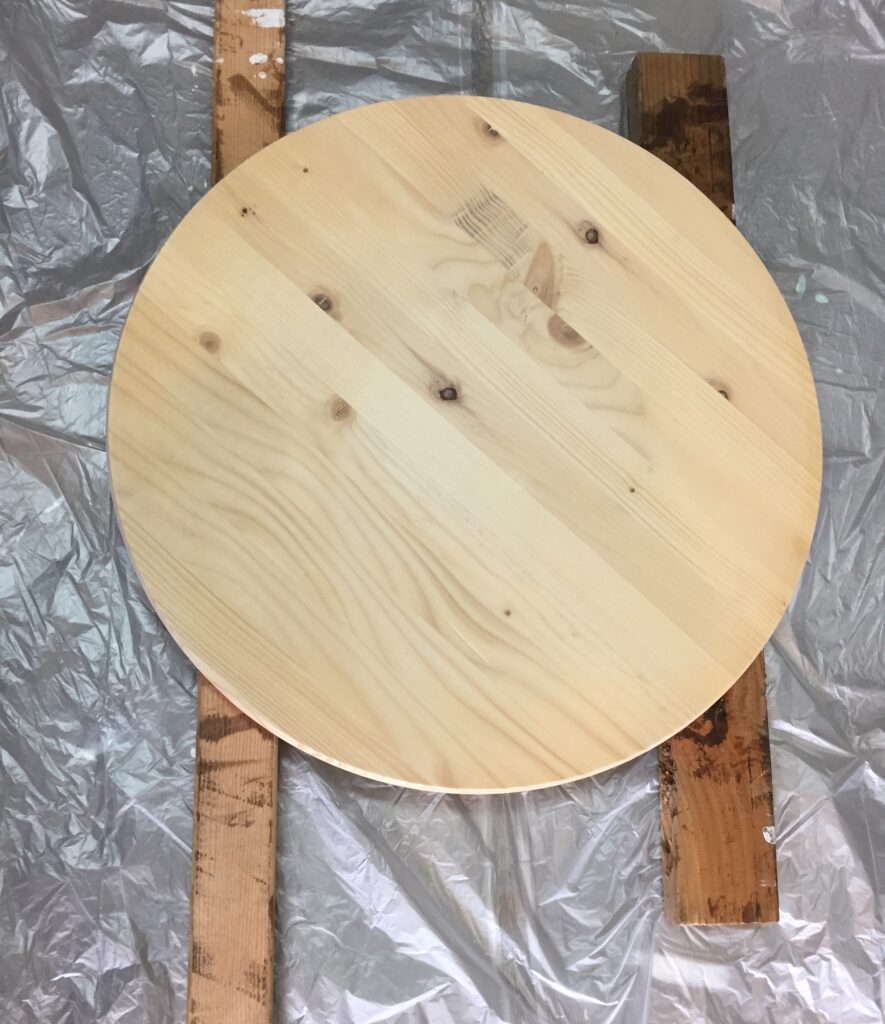
I use these two 2 x 4 pieces of wood to prop up everything! That’s why they are covered in all sorts of paints and stains. Lay your round board down on them and sand entire surface including the edges very well. The edges especially, be sure to get the rough spots nice and smooth so your stain will apply evenly.
Use a microfiber or tack cloth to remove all saw dust
I purchased the staining sponge shown above, for the first time for this project and I have to say I loved it. It is not necessary, but I felt as though it applied the stain really nicely. So, they are only a buck if you see one, try it out! Otherwise, just use a soft, lint-free cloth.
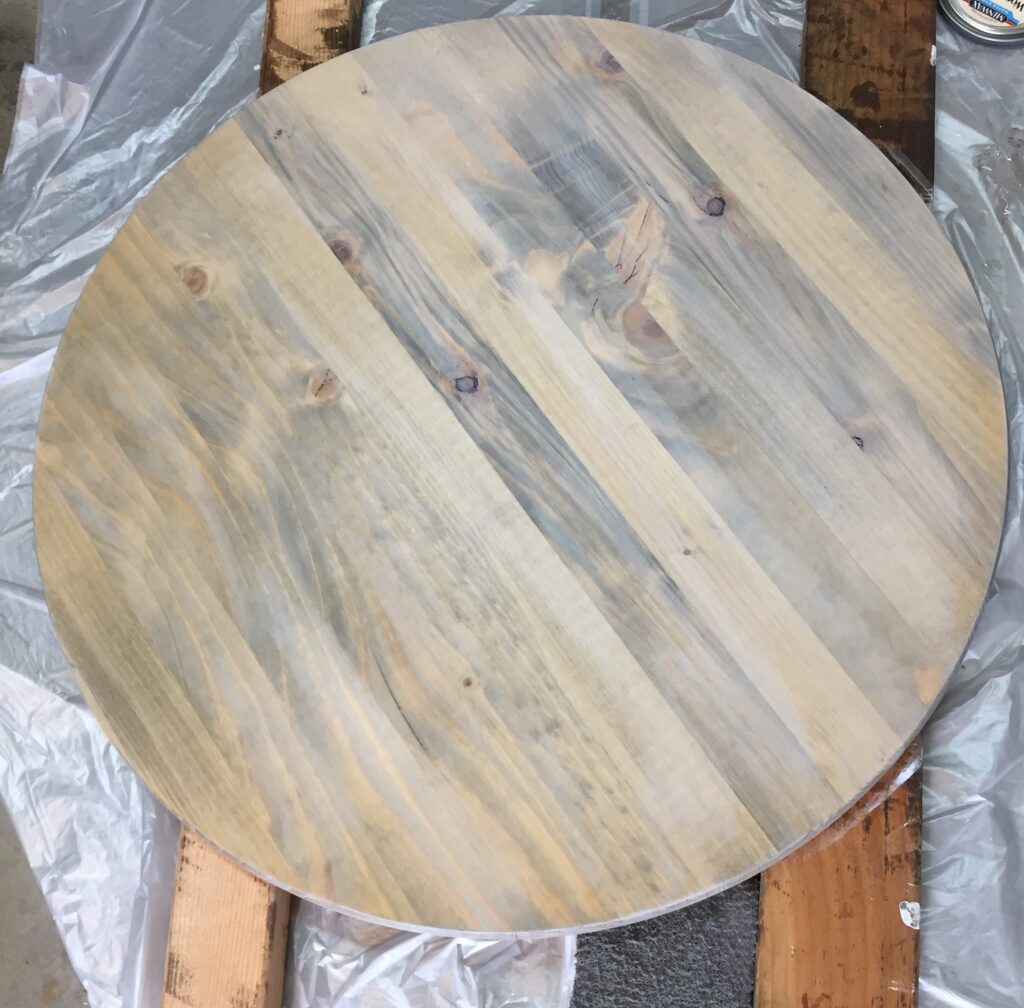
Apply stain around edges and all over table-top, going the direction of the grain. Now, immediately after applying stain, begin adding on the white wash. You want to apply this while the stain is still WET so the colors sort of blend together. So have everything mixed and ready to go. Apply white wash as seen in my super professional video below.
Oh my gosh, it looks so pretty. I just love this rustic, imperfect, cozy type of style. Not only because I love the look, but it’s the best for people with crazy kids. They can bang it all up and it only ends up looks better. It’s gets more “rustic” as time goes on! 😉
Allow stain to dry overnight and then apply a thin layer of your poly top coat. I always like to use a craft sponge brush for this step, because it doesn’t leave any paint brush marks like a bristle brush can do.
Let that coat dry and lightly sand with your high grit sand paper to smooth. Apply another coat. I did two coats, three would be better I’m sure. I have no patience for all that. Or garage space for leaving tables just laying around. So, two coats for me.
Flip over and attach your hairpin legs to the bottom. Three legs for a smaller end-table, or four legs for your coffee table.
I found these instructions on tablelegs.com and it was so great! I had no idea how to put legs on a round table correctly. So this little equation will help you get it perfect! Click on the link for the difference between 3 and 4 legs: Hairpin-Round-Template
With this pine wood, it is so easy to drill in your screws. NO pilot hole required! Just drill them right in. Be sure to use heavy duty screws for strength. (the hairpin legs don’t come with screws)
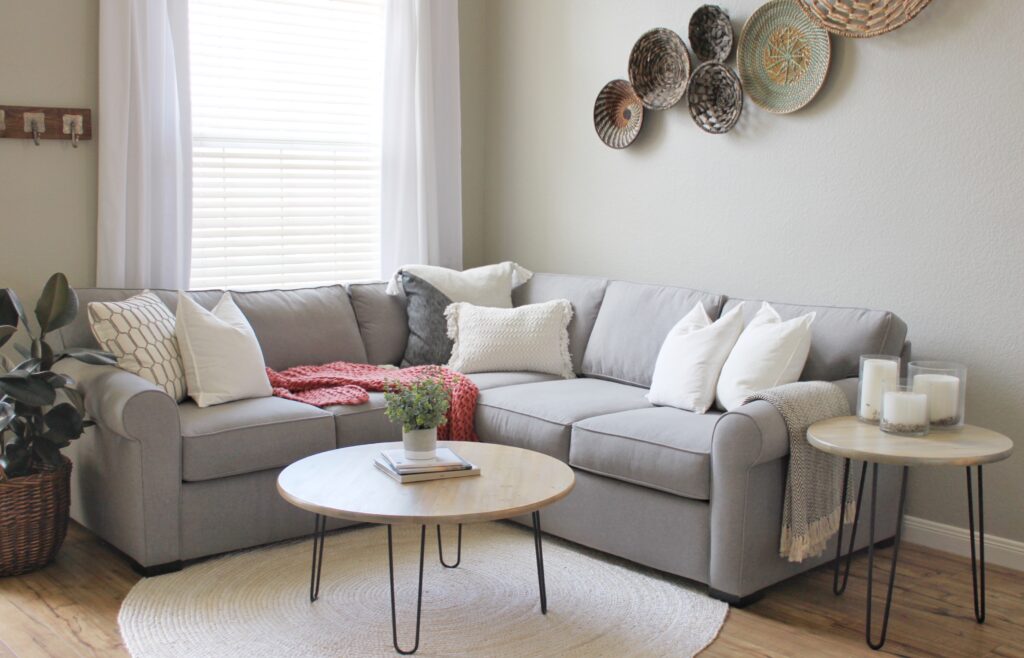
Enjoy your unique and super fabulous hairpin tables!! It’s a one-of-a-kind piece, and that is something to kick your feet up and cheers to.
XOXO,

Girl, both tables look AMAZING! I’m so impressed that you turned a circle of wood into THAT! Great project!
Thank you so much!
Oh my goodness, you are so freaking talented. Although this DIY seems super simple I would rather pay someone to do the work for me since I’m horrible at DIYs hahahah. I absolutely love how your space turned out too <3
Thank you, you’re so kind! I am POSITIVE you could do it. You may surprise yourself!
I LOVE these tables! Thank you so much for this DIY. I think I am going to make some for our bedroom. They look so good!
You should! I would love to see your result!
Oh my goodness! I’ve been hoping you would do this post! I’m obsessed with that table!
Thank you! I hope the tutorial helps and would love to see your table.
The tables are SO cute! Love how they turned out and girl…. #GRAYallday! Haha. Love the gray stain!
Yes, #grayallday! Cannot go wrong with gray EVER. Thank you!!
These turned out great ! I love your space ! Those pillows and the throw are super cute !
Thank you, Natalie!
These are fabulous! I figured you cut the wood into circles yourself and it was going to be super difficult to replicate! This is definitely a project I can handle.
No cutting any wood. Super simple, anyone can do this!
Those tables are so beautiful! I would have never guessed that they were a DIY. I need to try this!
Great job! Honestly, I NEVER would have guessed the table was DIY. Prior to reading your post and just looking at the picture, I thought your table was surely from West Elm.
I love this project!! I think I know what I want to make next!!
Great blog. What is the flooring you have? Looks awesome. Thanks
Thank you! Our floors are by Timberline, and the color is lumberjack hickory ❤️
I’m SOOO doing those tables when we move into our new house next month! Great project!! I was looking at a similar style couch – can you give me details on yours??
That’s great! I hope you love them ❤️ My sofa is from Living Spaces!
What size/type screw did you use on this table?
Hi! Honestly I just used some shorter wood screws that I had in the garage! Be sure to use a thick and strong screw to hold the weight.
I would love to get on your email list
You can subscribe on the side bar of my blog! XOXO